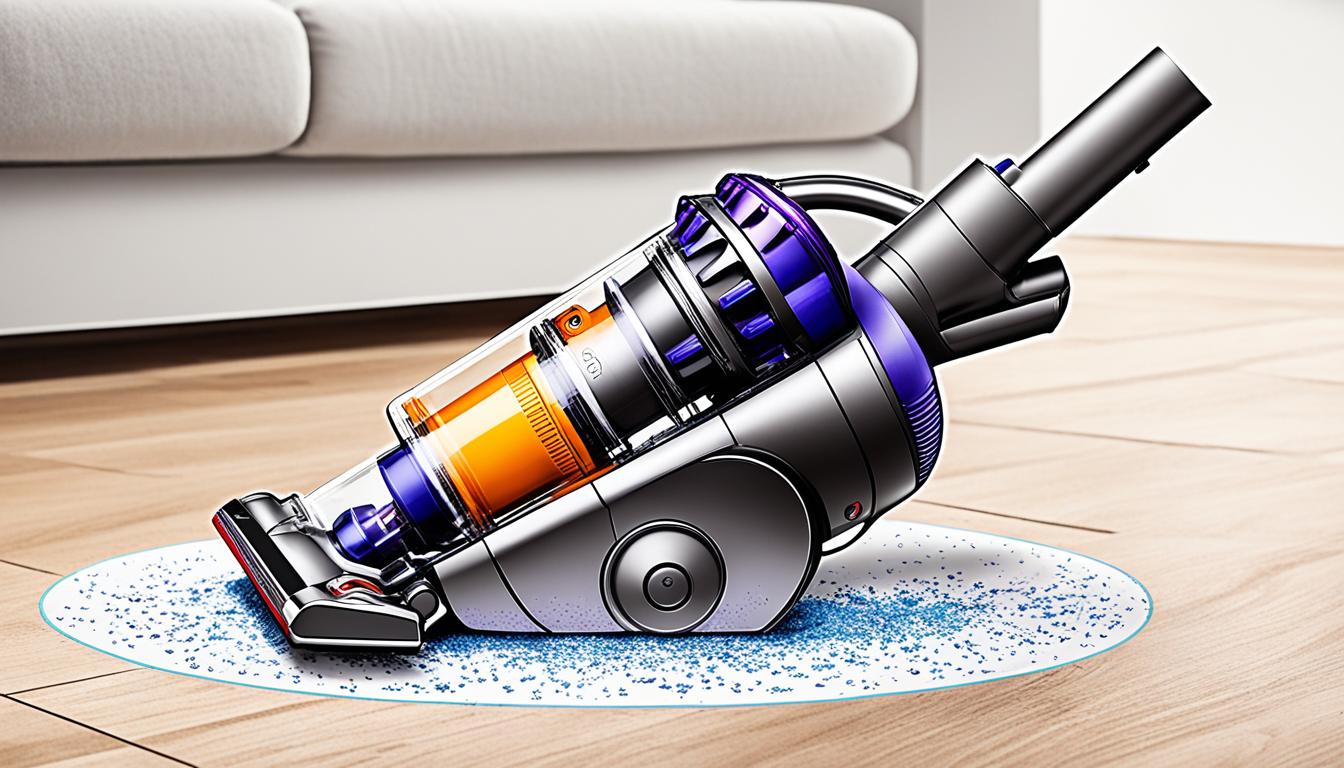

You can easily make a vacuum cleaner by first gathering essential materials like a powerful motor, HEPA filter, and durable housing. Start by securing the motor in the chassis and connecting the electrical wires. Next, install the filter to trap particles effectively. Then, connect the dust container and attach the hose ensuring a snug fit. Don't forget to test its functionality by checking suction power and airflow. Always prioritize safety by unplugging before maintenance and wearing protective gear. If you're curious about more intricate assembly techniques and troubleshooting tips, there's plenty of useful information ahead.
Key Takeaways
- Gather essential materials, including a motor, HEPA filter, housing, attachments, and electrical wiring for your vacuum cleaner.
- Assemble the motor securely, connect wires, and attach the fan for optimal suction efficiency.
- Install the HEPA filter properly, ensuring it captures 99.97% of particles and check for snug fit.
- Connect the dust container and hose securely, confirming no leaks and proper attachment for maximum functionality.
- Test the vacuum for suction power, brush roll operation, and check for clogs to ensure effective performance.
Required Materials
To build your own vacuum cleaner, you'll need several key materials. First, you should source a motor with adequate suction power, typically rated between 500 to 1200 watts. This motor is vital for effectively drawing in dirt and debris from various surfaces.
Next, a dust collection bag or container is essential. Consider using a HEPA filter, which captures 99.97% of particles as small as 0.3 microns, improving air quality considerably.
You'll also need a sturdy housing or casing to contain all the components and withstand operational wear and tear; durable plastic or metal works best for this purpose.
In addition, gather various attachments such as brushes, hoses, and nozzles. These tools enhance your vacuum's versatility for different surfaces and cleaning tasks, making it more effective overall.
Lastly, don't forget the electrical wiring and a power source. You'll typically use a cord or rechargeable battery to connect the motor, ensuring your vacuum cleaner operates effectively.
With these materials in hand, you'll be well on your way to creating a functional vacuum cleaner tailored to your needs.
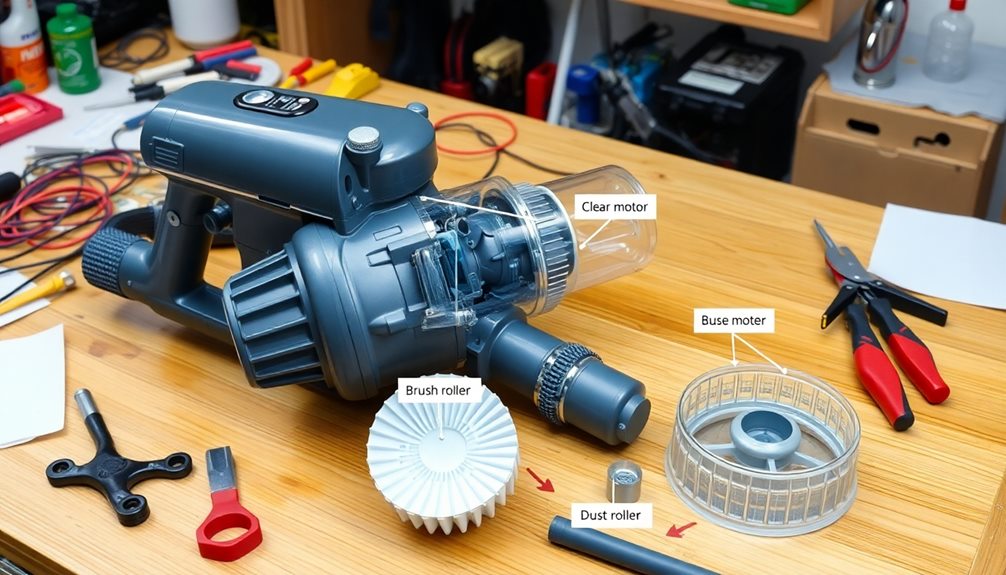
Assembling the Motor

As you immerse yourself in assembling the motor, securing it firmly to the vacuum cleaner's chassis is essential for maximum performance. Start by aligning all mounting brackets, which helps prevent vibrations during operation. Next, connect the power supply wires to the motor terminals, making sure you match the positive and negative connections to avoid electrical issues.
| Step | Action | Tips |
|---|---|---|
| 1. Secure the motor | Align and fasten to the chassis | Check for tightness |
| 2. Connect wires | Attach power supply wires to terminals | Double-check connections |
| 3. Install covers | Protect motor with covers or housings | Verify proper airflow |
| 4. Attach fan/impeller | Position it correctly for suction efficiency | Test alignment |
After that, install any necessary motor covers to shield it from dust and debris while allowing for ideal airflow. Carefully attach the motor fan or impeller, making sure it's positioned correctly. Finally, perform a test run to listen for any unusual noises or vibrations. This step verifies the motor is properly assembled and functioning as intended, setting the stage for successful vacuum operation.
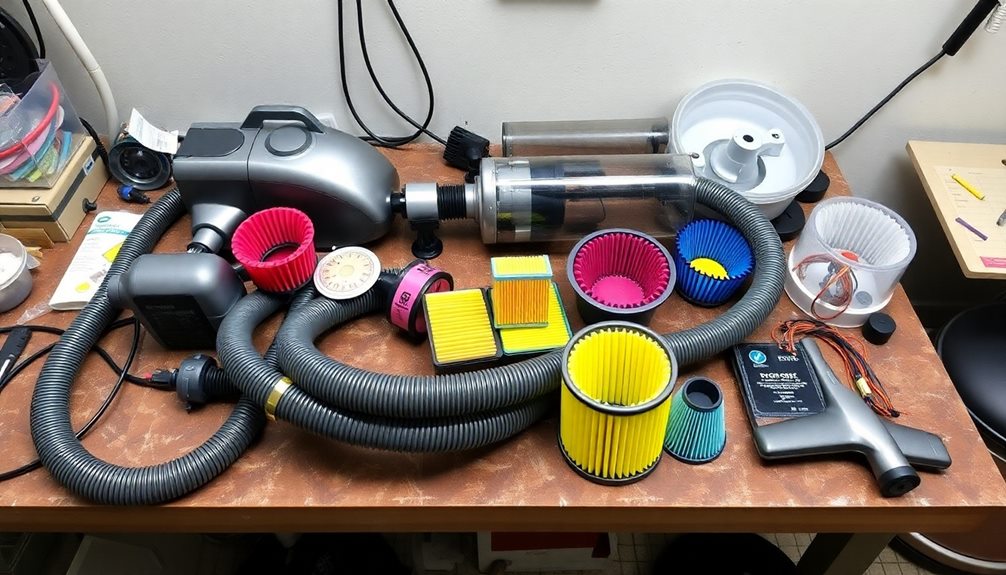
Installing the Filter
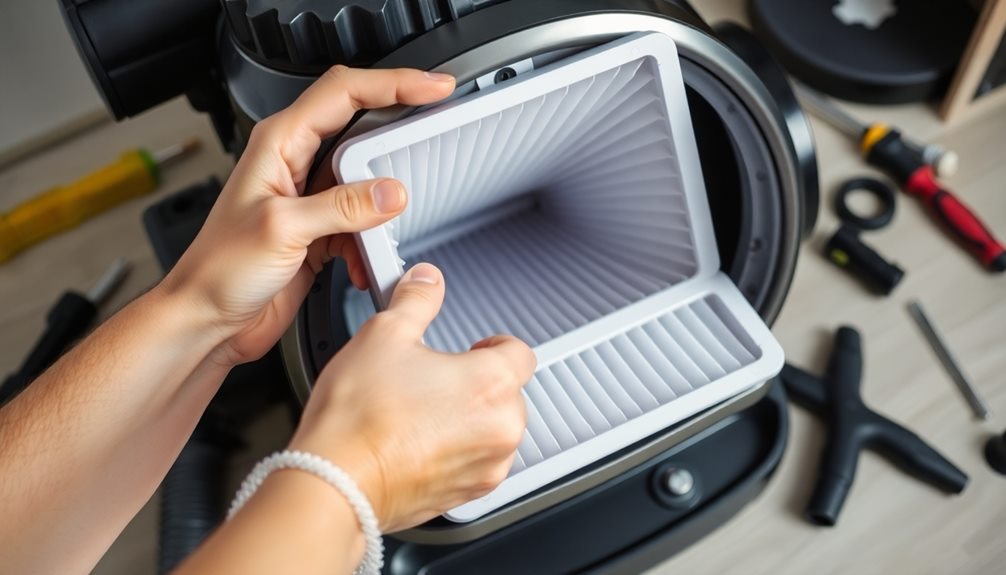
Now that you've assembled the motor, it's time to install the filter.
You'll want to understand the different filter types available and follow the installation steps carefully for a proper fit.
Keeping your filter well-maintained and replaced regularly is key to ensuring your vacuum runs smoothly.
Filter Types Overview
When selecting and installing a filter for your vacuum cleaner, it's important to understand the different types available, as each serves a specific purpose.
HEPA filters are a top choice, especially if you suffer from allergies. They trap 99.97% of particles as small as 0.3 microns, ensuring cleaner air in your home.
Foam filters are another option; they're washable and reusable, making them a cost-effective choice for capturing larger debris. These filters can last a long time with proper maintenance.
If odors are a concern, consider carbon filters. They work to reduce unpleasant smells and are often used alongside other filter types to boost air quality.
When you install any filter, make sure it fits securely in the designated compartment. A loose fit can allow dust and debris to escape, undermining your vacuum's effectiveness.
Regularly check your filters and replace them according to the manufacturer's guidelines. This practice is vital for maintaining peak suction and efficiency, ensuring your vacuum cleaner operates at its best.
Understanding these filter types will help you make an informed choice for cleaner, fresher air in your living space.
Installation Step-by-Step
Installing a filter in your vacuum cleaner is a straightforward process that guarantees peak performance and air quality.
First, make certain the vacuum cleaner is unplugged to prevent any electrical hazards during the installation. Next, carefully remove the existing filter from its compartment, taking note of its orientation for proper reinstallation.
Once the old filter is out, clean the filter compartment with a dry cloth to eliminate any dust or debris that may have accumulated. This will confirm that the new filter fits well and performs at its best.
Now, take your new filter and align it according to the manufacturer's instructions. It's essential to confirm that it fits snugly and securely in place to avoid any air leaks.
After you've installed the new filter, plug the vacuum cleaner back in and perform a quick check. Turn it on and listen for any unusual sounds or performance issues.
If everything seems normal, congratulations! You've successfully installed the filter, confirming your vacuum cleaner is ready to maintain a clean and healthy environment in your home.
Maintenance and Replacement
Regular maintenance of your vacuum cleaner, particularly the filter, is vital for guaranteeing its efficiency and longevity.
Before you start, make certain the vacuum cleaner is completely powered off and unplugged to prevent any electrical hazards.
To replace the old filter, follow the manufacturer's instructions, which usually involve unclipping or unscrewing it from its housing.
Once you've removed the old filter, take a moment to clean the filter area with a dry cloth. This step helps eliminate dust and debris that could hinder the performance of the new filter.
Now it's time to install the new filter. Align it correctly based on the design of your vacuum, confirming it fits snugly to prevent any air leaks.
A proper fit is essential for maintaining peak suction and air quality.
Remember to regularly check and replace the filter according to the manufacturer's recommendations, typically every 6 to 12 months.
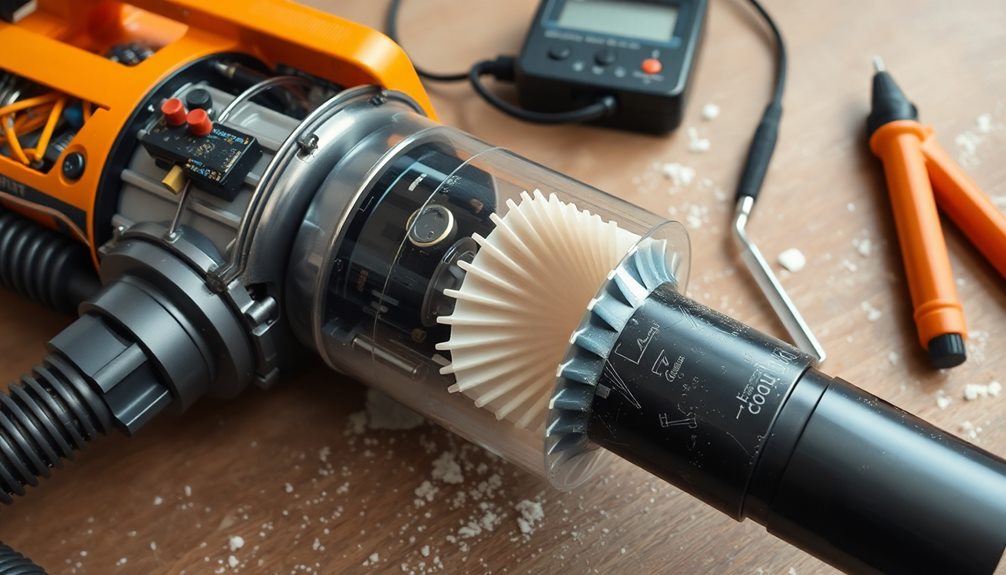
Connecting the Dust Container

Connecting your vacuum cleaner's dust container is an essential step in guaranteeing peak performance. Before you start, make certain the dust container is completely empty and clean. This prevents any blockages or contamination that could affect the vacuum's efficiency.
Next, align the dust container with the designated connection point on the vacuum cleaner. It should fit snugly to create an effective seal. As you push the container into place, listen for a click or feel a secure lock. This indicates that it's properly attached and ready for use.
Always check for any visible damage or wear on the dust container before connecting it. This precaution helps avoid potential leaks during operation, which could lead to messes or decreased performance.
Attaching the Hose

Now that you've connected the dust container, it's time to attach the hose.
Before proceeding, verify that the hose is compatible with your vacuum model, as different models may have varying attachment mechanisms.
Additionally, consider the smart features of your vacuum, as some may enhance ease of use during this setup.
Then, align the hose with the designated attachment point. Push it firmly until you hear a click, guaranteeing a secure connection for peak performance.
Hose Compatibility Check
Before you attach the hose, it's crucial to verify it matches the diameter and fitting type specified for your vacuum cleaner model. This guarantees compatibility and peak performance. Here's what you need to check:
- Diameter: Measure the diameter of the hose and the connector. They should match perfectly, or you could face suction issues.
- Fitting Type: Identify whether your vacuum requires a specific fitting type, like a friction fit or a locking mechanism. Using the wrong type can lead to a poor connection.
- Wear and Damage: Inspect both the hose and the attachment points for any signs of wear or damage. Any cracks or tears could cause air leaks, compromising suction power.
- Alignment: When you're ready to attach, align the hose with the connector on the vacuum. Confirm it's securely inserted; otherwise, it might detach during use.
If you feel resistance while attaching the hose, double-check the alignment and clear any debris around the connection point. Addressing these factors will help maintain effective operation of your vacuum cleaner.
Proper Attachment Technique
Attaching the hose to your vacuum cleaner is a straightforward process that guarantees peak performance during cleaning. First, make certain the vacuum cleaner's power is turned off to prevent any accidental activation. Next, align the hose connector with the designated port on the vacuum. Engage any locking mechanisms for a secure fit.
To guarantee a sturdy connection, apply slight pressure while twisting the hose clockwise. This locking action helps prevent the hose from becoming dislodged during use. After connecting, check for any visible gaps or misalignments between the hose and the vacuum body. A proper seal is essential for efficiency.
Finally, gently tug on the hose to confirm it's securely attached before you start cleaning. Here's a quick reference table to guide you through the process:
| Step | Action |
|---|---|
| 1. Power Off | Turn off the vacuum cleaner |
| 2. Align Connector | Position the hose connector with the port |
| 3. Lock Mechanism | Engage any locking mechanisms |
| 4. Twist Hose | Apply pressure and twist clockwise |
| 5. Check Connection | Look for gaps and tug to confirm attachment |
Securing Hose Connection
To secure the hose connection on your vacuum cleaner, start by ensuring both the vacuum body and hose ends are clean and free of debris. This step is vital for creating a proper seal when you connect the hose.
Once everything's clean, follow these steps to make a secure connection:
- Align the connector: Position the hose connector with the designated inlet on the vacuum cleaner, making sure any locking mechanisms are correctly oriented.
- Insert the hose: Firmly push the hose into the connection point until you hear or feel a click. This sound indicates that the hose is securely attached.
- Check for gaps: Inspect the connection for any visible gaps between the hose and the vacuum cleaner. An airtight connection is essential for maximum suction.
- Use locking mechanisms: If your vacuum has additional locking rings or clips, engage these to further secure the hose and prevent accidental disconnection during operation.
Testing Functionality
Once you've assembled your vacuum cleaner, it's vital to test its functionality to confirm everything's working properly. Start by plugging it in and powering it on. Listen for any unusual noises or smells, as these can indicate electrical issues.
Next, check the suction power. Place a small piece of paper or a lightweight object on the floor and turn on the vacuum. It should effectively suck up the item without any struggle.
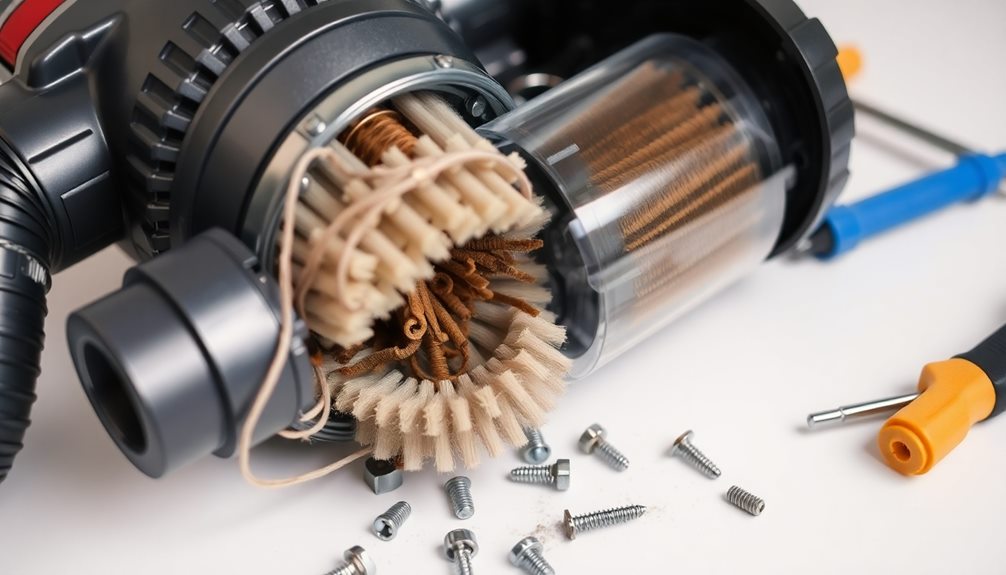
Then, inspect the brush roll. Run the vacuum over a carpeted area to verify the brush spins freely and captures debris without obstruction. If it doesn't, you may need to adjust or clean the brush.
After that, measure the airflow by placing your hand near the hose or nozzle. A strong airflow means the vacuum is functioning correctly and can effectively clean your space.
Lastly, check the filters for clogs or dirt buildup. Clean filters are vital for peak performance, so be sure to replace them regularly based on the manufacturer's recommendations.
Safety Considerations

When working with your vacuum cleaner, safety should always be a top priority. Taking precautionary measures can help prevent accidents and guarantee a smooth cleaning experience. Here are some key safety considerations to keep in mind:
- Unplug Before Maintenance: Always unplug the vacuum cleaner before performing any maintenance or cleaning. This simple step prevents accidental starts that could lead to injury.
- Use Personal Protective Equipment: When handling vacuum components, wear appropriate personal protective equipment like gloves and a dust mask. This helps you avoid contact with sharp edges and protects against dust allergens.
- Avoid Water and Wet Areas: Keep your vacuum cleaner away from water and wet areas. Water poses serious electrical hazards and can damage your machine.
- Inspect the Power Cord Regularly: Regularly check the vacuum cleaner's power cord for any fraying or damage. A compromised cord can lead to serious electrical shock risks.
Troubleshooting Tips
Even with proper safety measures in place, your vacuum cleaner may encounter issues that affect its performance. First, check for clogs in the hose and filters, as blockages can greatly reduce suction power. If you notice a decline in efficiency, inspect these areas closely.
Consider keeping a best vacuum for hardwood floors in mind to guarantee you have the right model for your cleaning needs. Next, verify the vacuum cleaner bag or dust container isn't full. An overfilled receptacle can hinder performance, so empty it regularly.
Don't forget to examine the brush roll for tangled hair or debris. If the brush roll can't spin freely, it won't clean effectively, and you risk damaging the motor.
Also, confirm all electrical connections and power sources are secure. Loose cords or switches can lead to power issues, so make certain everything's properly connected.
Frequently Asked Questions
How Can I Make a Vacuum at Home?
To make a vacuum at home, grab a plastic bottle, cut off the bottom, and attach a filter. Connect a tube and a small motor or hairdryer to create suction. Secure everything tightly to enhance performance.
How to Make a Vacuum Cleaner With Motor?
You think a motor just sits there? Nope! It powers a fan, creating suction. Choose a strong one, attach it to a sturdy container, and watch as dirt disappears into your clever creation. Simple, right?
How Does Homemade Vacuum Cleaner Work?
A homemade vacuum cleaner works by using a motorized fan to create suction. This pulls air and debris into a container, while filters trap dust, ensuring clean air is released back into the environment.
What Materials Are Used to Make a Vacuum Cleaner?
Building a vacuum cleaner's like crafting a sturdy ship. You'll need durable high-density plastic for the casing, a powerful copper motor, flexible rubber hoses, and effective HEPA filters to guarantee it traps dust and allergens efficiently.
Conclusion
Now that you've pieced together your homemade vacuum cleaner, it's time to release its power like a lion on the hunt! With every sweep, you'll conquer dust bunnies and dirt, turning chaos into order. Remember, safety's your trusty sidekick, so keep those tips in mind. If you hit a snag, don't fret; troubleshooting's just another puzzle waiting to be solved. Embrace your creation and watch as it breathes new life into your space! Happy cleaning!