You can easily make a homemade vacuum cleaner using a few simple materials. Start with a sturdy container, like a 2-liter soda bottle. Secure a small electric motor or a high-powered computer fan inside, ensuring it blows air out to create suction. Connect a flexible hose to the container and fan, sealing all gaps with duct tape or silicone for efficiency. Don't forget to add a filter to trap dust. Once assembled, test it out and troubleshoot any issues like clogs or leaks. With these steps, you can create a functional vacuum that meets your needs. Keep going to discover tips for enhancing performance!
Key Takeaways
- Select a sturdy container, like a 2-liter soda bottle or plastic bucket, ensuring it is clean and free of leaks.
- Use a high-powered fan or electric motor (1000-1200 RPM) to create suction, positioned to blow air out.
- Connect flexible tubing securely to both the fan and the collection container to maintain airtight connections and prevent leaks.
- Seal all gaps with duct tape or silicone sealant to enhance suction and prevent air loss during operation.
- Regularly check and maintain the filter and connections to ensure optimal performance and prevent clogs.
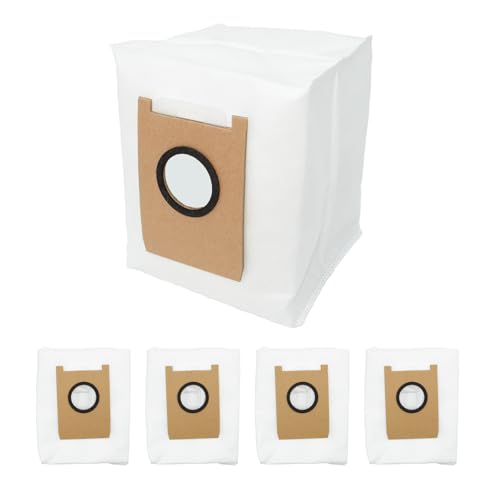
GZKEFEIS 5-Pack Dust Bags Compatible with eufy 3-in-1 E20 Robot Vacuum – 3L Large Capacity Replacement Parts, Durable Dust Filter for Long-Lasting Home Cleaning
1. 【Effortless Dust Control】Sealed for No Mess Sealed design locks in dirt and odors with durable materials -…
As an affiliate, we earn on qualifying purchases.
As an affiliate, we earn on qualifying purchases.
Materials Needed

To build your own homemade vacuum cleaner, you'll need a few key materials. Start with a sturdy plastic bottle, preferably a 2-liter soda bottle, as this will serve as the main body of your vacuum.
Next, you'll need a small electric motor or a computer fan; make sure it's suitable for continuous operation to create the suction you need.
You'll also require filter material, such as a piece of cloth or a coffee filter, to trap dust and debris while allowing air to flow through. This is vital for maintaining efficiency and ensuring your vacuum cleaner works effectively.
Additionally, a flexible hose is essential for connecting the suction source to the nozzle. You can source this hose from an old vacuum or buy one at a hardware store.
Finally, don't forget duct tape or strong adhesive; these will help you secure all components together and prevent any air leaks within the vacuum cleaner system.
Having these materials on hand will set you up for a successful DIY project, allowing you to create a functional vacuum cleaner tailored to your needs.

Gazaar Handheld Siphon Coffee Maker, Syphon Tabletop Glass Siphon Pot Glass Technica Vacuum Coffee Maker Filter Kit Homemade Cafe Machine (Black)
Effective filtering: The filter can effectively block the powder in coffee and provide you with more delicate and…
As an affiliate, we earn on qualifying purchases.
As an affiliate, we earn on qualifying purchases.
Preparing the Container

Once you've gathered your materials, preparing the container is the next step in building your homemade vacuum cleaner. First, choose a sturdy container like a plastic bucket or a large empty bottle. Make sure it's completely empty and clean to avoid any contamination in your vacuum system.
Inspect the container for any cracks or leaks, as these can reduce the vacuum's effectiveness and create safety issues during use. If you're using a bottle, check that the neck is wide enough to fit the hose attachment securely, leaving no gaps. It's vital for maintaining effective suction.
Next, organize your workspace by clearing away debris and gathering your necessary tools, like a drill, hose, and sealing materials. This will make the preparation process smoother and more efficient.
When you're ready to attach fittings or seals, follow guidelines closely to guarantee airtight conditions within your vacuum system. Proper sealing is essential for peak performance, so take your time to make sure everything fits snugly.
With the container prepared, you're one step closer to creating your homemade vacuum cleaner!

Ametek 120V Vacuum Motor, 2 Stage, 5.7" Dia 116336-01
8.0 amps, 120 Volts
As an affiliate, we earn on qualifying purchases.
As an affiliate, we earn on qualifying purchases.
Setting Up the Fan

Typically, you'll want to select a high-powered fan with at least 1000-1200 RPM for your homemade vacuum cleaner to guarantee it generates sufficient suction.
Start by securing the fan in a sturdy, enclosed container to prevent any movement or vibration during operation. This stability is vital for peak performance.
Next, create a tight seal around the fan's edges using foam or rubber gaskets. This step minimizes air leaks, making certain your vacuum operates efficiently.
Position the fan so that it blows air out of the container. This configuration allows for a vacuum effect, drawing debris in through an inlet.
It's also important to verify that the fan's power source is easily accessible. You don't want to struggle when plugging it in or turning it off.
Double-check all electrical connections, making sure they're secure and insulated to prevent any hazards during use. This precaution keeps you safe while maximizing the efficiency of your vacuum cleaner.

Multipurpose Vacuum Line Kit,6PCS 5Ft Vacuum Hose Automotive+64PCS Vacuum Line Connectors,Max 130PSI Silicone Hose for Variety Car Piping System Automotive Replacement Vacuum Hoses (70PCS)
[Complete Package]: This set includes 6 vacuum hose automotive, each with a length of 5 feet and inner…
As an affiliate, we earn on qualifying purchases.
As an affiliate, we earn on qualifying purchases.
Connecting the Tubing

Connecting the tubing is essential for guaranteeing your homemade vacuum cleaner operates efficiently. You'll want to pay close attention to a few key aspects to make certain your connections are solid and effective.
- Diameter Matters: Guarantee the tubing's diameter fits snugly onto both the vacuum motor and the collection container. A proper fit prevents air leaks, which can hinder suction power.
- Secure Attachments: Use a strong adhesive or clamps to attach the tubing securely. This guarantees a tight seal that can withstand the suction pressure without coming loose during operation.
- Measure Correctly: Measure the length of tubing needed to reach from the vacuum motor to the collection container. Avoid excessive bends or kinks, as these can impede airflow and reduce your vacuum's efficiency.
If you're using flexible tubing, choose a material that can handle the vacuum pressure without collapsing.
After everything's connected, run the vacuum briefly to test for any leaks or weak spots. Make any necessary adjustments to reinforce those connections. This step is vital for achieving the best performance from your homemade vacuum cleaner.
Sealing Gaps for Suction

To guarantee your homemade vacuum cleaner works effectively, sealing any gaps is essential for maintaining strong suction.
You'll want to choose the right materials, like high-quality duct tape or silicone sealant, to create airtight connections.
Let's explore some techniques for closing those gaps and boosting your vacuum's performance.
Importance of Proper Sealing
When building your homemade vacuum cleaner, ensuring proper sealing of gaps is essential for maintaining peak suction power.
Even small leaks can drastically reduce efficiency, so it's imperative to pay attention to every joint and connection.
Proper sealing can increase your vacuum's suction by up to 30%, making it much more effective at picking up dirt and debris.
Here are three key reasons why sealing is critical:
- Efficiency: A well-sealed vacuum system prevents air from escaping, allowing for stronger airflow and enhanced suction.
- Performance: Regularly inspecting and maintaining seals helps you avoid wear and tear, which can lead to decreased performance over time.
- Longevity: By addressing gaps, you'll not only improve suction but also extend the lifespan of your vacuum cleaner.
Materials for Effective Sealing
Choosing the right materials for sealing gaps is vital for maximizing your homemade vacuum cleaner's suction power. Start with weather stripping or foam tape to seal gaps around your vacuum's attachments and hose connections. This guarantees that air doesn't escape, keeping suction efficiency high.
For any cracks or holes in the vacuum housing, silicone sealant works wonders. It creates a strong barrier against air leaks that can diminish suction. Additionally, rubber gaskets should be used between the dust container and the vacuum body. This tight fit effectively contains debris and maintains strong suction.
Don't overlook the importance of securing all joints and connections. Make sure they're fastened tightly and free from dirt or debris that could compromise the sealing.
Regular inspections are essential, too. Check your sealing materials periodically and replace any worn-out parts. This proactive approach will help you maintain peak performance and prevent loss of suction over time.
Techniques for Gap Closure
Sealing gaps in your homemade vacuum cleaner effectively boosts suction power and enhances overall performance. To achieve this, you'll need to focus on the right materials and techniques.
- Weatherstripping and Foam Tape: Apply these to seal gaps between the vacuum body and its attachments. They're easy to use and provide a decent seal for smaller openings.
- Silicone Sealant: For larger or irregular gaps, silicone sealant is your best bet. It offers a flexible and durable seal that helps maintain suction efficiency over time.
- Hose Clamps: Secure connections between hoses and the vacuum body with hose clamps or adjustable clamps. This prevents air leaks that can diminish suction power.
Don't forget to regularly inspect your seals for wear or damage. Even small gaps can greatly reduce suction efficiency.
After sealing, test your vacuum's suction power. If it's still weak, re-evaluate your seals and address any areas you might've missed.
Testing Your Vacuum

Testing your homemade vacuum is essential to confirm it's ready for regular use. Start by verifying all components are securely assembled and the power source is functional. Loose parts can greatly impact performance, so double-check everything.
Next, gather a variety of materials like dirt, hair, and small debris to test the suction power. This will help you evaluate how efficient your vacuum is at picking up different types of messes.
While running the vacuum, keep an eye out for any air leaks; these can indicate poor sealing or assembly issues. Check for leaks by observing areas where air might escape.
To measure suction strength, place a small piece of paper or a lightweight object in front of the vacuum. See how effectively it draws the item in—this gives you a clear indication of suction capability.
After conducting these tests, assess the ease of maneuverability. A vacuum should be easy to handle, especially in tight spaces.
Using Your Homemade Vacuum

Once you've confirmed your homemade vacuum is working effectively, it's time to put it to use. Before you start, make certain everything is properly assembled and all connections are secure. This will maximize your vacuum's suction efficiency.
Here are some tips to get the most out of your homemade vacuum:
- Use a Clean Dust Container: Always start with a clean dust container or bag. This prevents clogging and keeps your vacuum performing at its best throughout the task.
- Check Your Environment: Vacuum in a well-ventilated area, especially if you're dealing with dust or debris. This guarantees you stay comfortable while you work.
- Follow a Systematic Cleaning Pattern: To guarantee thorough coverage, work methodically from one corner of the room to another. This approach makes it easier to see what you've cleaned and what still needs attention.
Lastly, don't forget to regularly check and clean the filter or any intake components. This helps maintain suction power and prolongs the life of your homemade vacuum.
Happy cleaning!
Troubleshooting Common Issues

Identifying issues with your homemade vacuum can be frustrating, but troubleshooting is often straightforward. If your vacuum isn't picking up debris, the first step is to check for clogs in the hose or filter. Any blockage can obstruct airflow and greatly reduce suction power.
Next, confirm that all connections between the vacuum parts are secure; loose fittings can lead to decreased efficiency.
If the motor runs but the vacuum doesn't pick up, verify that the power source is functioning correctly. Check the motor's connection to make sure it's properly attached. Additionally, inspect the container or bag for overfilling, as this can also restrict airflow and impact performance.
Lastly, don't forget about regular maintenance. Clean and maintain your filters and other components to prevent buildup that could lead to further issues.
Tips for Better Performance

To get the most out of your homemade vacuum cleaner, it's vital to focus on a few key performance-enhancing tips.
First, make certain you've got a powerful motor. Aim for one that operates at least at 1,000 watts to guarantee effective suction power.
Next, consider your filtration system. Using a HEPA filter can trap fine dust and allergens, making your vacuum cleaner more effective, especially if you or someone in your home suffers from allergies.
Lastly, pay attention to your vacuum's design. Here are three essential tips:
- Minimize airflow resistance: Use a wider hose to enhance suction while maintaining flexibility for easy maneuverability.
- Test various nozzle designs: Different surfaces require different attachments, so try brush rolls for carpets and specialized heads for hard floors.
- Maintain your vacuum: Regularly clean or replace filters and bags to avoid clogging, which can notably reduce your vacuum's performance.
Cleaning and Maintenance

Maintaining your homemade vacuum cleaner is key to guaranteeing it performs at its best. Start by regularly emptying the dust container or bag. This keeps suction power strong and prevents blockages from building up.
Additionally, making sure that your vacuum cleaner is free from dust and allergens can contribute to better indoor air quality, similar to how air purifiers reduce allergens.
Next, check the filters, and clean or replace them every 3 to 6 months as recommended. This guarantees efficient airflow and filtration, which is essential for peak performance.
Don't forget to inspect the brush roll and attachments. Hair and debris can accumulate, so clean them at least once a month to avoid hindering your vacuum's effectiveness.
It's also important to check the hoses weekly for cracks or blockages. Remove any obstructions you find to maintain proper airflow.
Frequently Asked Questions
How to Make a Simple Homemade Vacuum Cleaner?
To make a simple homemade vacuum cleaner, gather materials like a plastic bottle, fan, and filter. Cut the bottle for airflow, secure the components, and test it for suction. Adjust placement to enhance efficiency.
Can You Create a Vacuum at Home?
Yes, you can create a vacuum at home. Use a sealed container and a suction device, ensuring everything's tightly sealed. Just remember, the container needs to be strong enough to handle the pressure difference.
What Materials Are Used to Make a Vacuum Cleaner?
To make a vacuum cleaner, you'll need a motor for suction, a sturdy container for housing, a filter to trap dust, hoses for directing airflow, and electrical components for safe operation. Gather these materials wisely.
How Does Homemade Vacuum Cleaner Work?
A homemade vacuum cleaner works by using a motorized fan to create suction. This suction draws air and debris into a collection chamber, while filters trap dust, enhancing efficiency and maintaining a cleaner environment.
Conclusion
You've just crafted a vacuum cleaner that could rival the best on the market. With your homemade creation, tackling dirt and debris will feel as effortless as breathing. Just remember to maintain it regularly for peak performance. If you run into any hiccups, don't hesitate to troubleshoot—your vacuum's power is only matched by your ingenuity. Now, go ahead and enjoy the clean, fresh space you've created with your innovative spirit and a little elbow grease!