You can easily make a vacuum cleaner using simple materials like an electric motor, a 5-gallon bucket, and a HEPA filter. Start by securing the motor inside the bucket to create suction. Attach a flexible hose for maneuverability, ensuring all components are aligned tight to prevent air leaks. Install the filter to capture dust and allergens effectively. After assembling, check for strong suction and inspect filters and hoses for blockages. Remember, maintaining your vacuum is essential for peak performance. For more tips on enhancing and troubleshooting your homemade vacuum, keep going!
Key Takeaways
- Gather necessary materials like an electric motor, 5-gallon bucket, HEPA filter, flexible hose, and wiring for assembly.
- Securely mount the electric motor in the bucket to create a stable suction mechanism.
- Install the fan blade correctly to enhance airflow and maximize suction efficiency.
- Attach the HEPA filter and ensure it's aligned properly to prevent air leaks during operation.
- Regularly check and maintain components to ensure optimal performance and prevent overheating.

116336-00, 116336-01 Vacuum Motor 120V 2-Stage High Efficiency Low Noise Replacement for 56207802, 44903A, 380001, 14800,CAV26,296439 with Motor Gasket 566 (5.7 Inch, Peripheral Bypass Design)
Direct Replacement for Multiple Models:Compatible with popular vacuum models including 56207802, 62515-00-2,44903A, 380001, 14800, 1902,330,CAV26,cetral vac CV40-D, 296439…
As an affiliate, we earn on qualifying purchases.
As an affiliate, we earn on qualifying purchases.
Necessary Materials

To build an easy vacuum cleaner, you'll need a few essential materials. Start with a powerful electric motor, rated between 500 to 1200 watts. This motor is vital for generating the suction you'll need to pick up dirt and debris effectively.
Next, grab a sturdy container; a 5-gallon bucket works great, providing both strength and capacity for your vacuum's body.
For effective filtration, you'll want a HEPA filter. This filter captures fine dust particles and allergens, ensuring that the air expelled is clean and safe to breathe.
Don't forget a flexible hose, ideally between 4 to 8 feet long. This length offers maneuverability, allowing you to reach those tight spaces that need cleaning.
Additionally, gather a power switch and electrical wiring to control your vacuum's operation.
Finally, a nozzle attachment is helpful for various cleaning tasks, giving you the flexibility to tackle different surfaces and areas efficiently.
With these materials, you're well on your way to creating a simple yet effective vacuum cleaner that meets your cleaning needs.

CHEBIO A16 Cordless Vacuum Cleaner HEPA Filters, 2 PCS
CHEBIO A16 HEPA Filters
As an affiliate, we earn on qualifying purchases.
As an affiliate, we earn on qualifying purchases.
Building the Suction Mechanism
To build an effective suction mechanism, you'll need to gather key components like a powerful motor and a fan or impeller.
Once you've got your parts, the assembly process is straightforward, allowing you to create a system that maximizes airflow and suction.
Let's explore how to put everything together for peak performance.
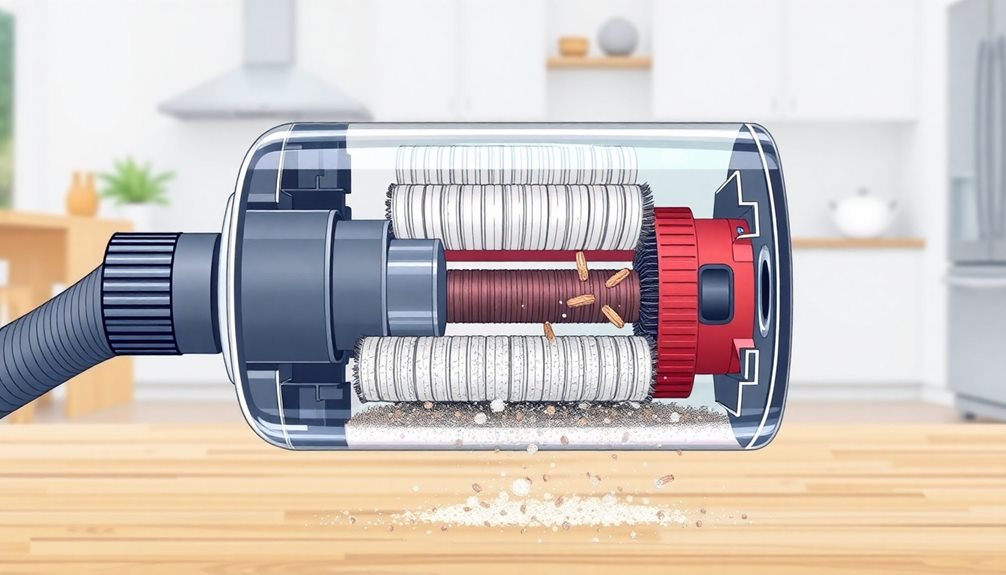
Components of Suction Mechanism
When you're building the suction mechanism of a vacuum cleaner, understanding its key components is vital for achieving effective performance. The main elements include the motor, filter, nozzle, and dustbin or bag. Each of these parts plays a significant role in guaranteeing that your vacuum can effectively pick up dirt and debris.
Here's a quick overview of these components:
| Component | Function | Importance |
|---|---|---|
| Motor | Creates airflow by spinning a fan | Generates the suction power required |
| Filter | Traps dust particles to prevent air pollution | Guarantees clean air is released |
| Nozzle/Hose | Directs airflow and optimizes suction | Affects overall performance |
| Dustbin/Bag | Collects debris and separates dirt from air | Essential for maintaining cleanliness |
Assembly Process Overview
As you commence on the assembly process of the suction mechanism, each step plays an important role in guaranteeing your vacuum cleaner operates efficiently.
Start by carefully assembling the motor housing, making sure the motor is securely mounted to prevent vibrations during operation. This foundation is vital for peak performance.
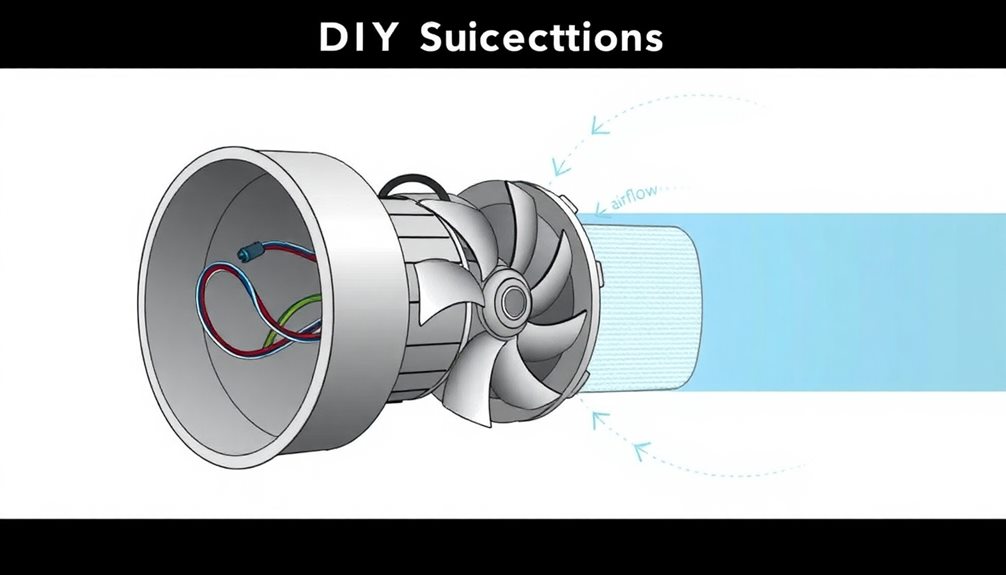
Next, attach the fan blade to the motor shaft. Align it correctly to maximize airflow and suction efficiency. A well-placed fan blade will enhance your vacuum's ability to pick up debris.
Then, install the suction inlet. Confirm it creates a tight seal to prevent any air leaks that could weaken your suction power.
Once that's done, connect the dust container or bag to the suction mechanism. Position it effectively to capture debris without obstructing airflow, as this will keep your vacuum functioning smoothly.

Holikme 2 Pieces Dryer Vent Cleaner Kit, Dryer Lint Vacuum Attachment and Flexible Dryer Lint Brush, Dryer Vent Vacuum Hose Attachment,Blue
Home Essentials: Holikme dryer vent cleaner kit can easily help you to remove years of built up lint…
As an affiliate, we earn on qualifying purchases.
As an affiliate, we earn on qualifying purchases.
Attaching the Filter

Attaching the filter is an essential step in guaranteeing your vacuum cleaner operates effectively. First, make certain the filter you've chosen is compatible with your vacuum model. Using the wrong filter can greatly affect performance and filtration efficiency.
Before you attach it, check the filter housing for any debris or dust. Cleaning this area guarantees a secure fit and ideal sealing.
Next, align the filter correctly with the housing. Pay attention to any grooves or tabs that need to match up; this alignment prevents air leaks during operation.
Once everything is lined up, gently press or twist the filter into place, following the manufacturer's instructions. It should fit snugly but avoid forcing it, as this might damage the components.
After you've attached the filter, take a moment to perform a quick check. Confirm that it's seated properly and that there are no gaps or misalignments.
This step is essential for maintaining the efficiency of your vacuum cleaner. With the filter securely attached, you're one step closer to enjoying a clean home with your newly assembled vacuum cleaner!

EZ SPARES Vacuum Crevice Attachment Kit,Micro Cleaning Tools for Keyboard,Crevice,Car,Vents & Tight Spaces,Compatible with Most Universal 1-1/4 Inch Hose Vacuums,Computer Cleaning Kit,All in Kit
【Universal Compatibility, Instant Upgrade】Engineered to fit virtually all standard vacuum cleaners with a 1-1/4-inch (32mm) inner diameter hose…
As an affiliate, we earn on qualifying purchases.
As an affiliate, we earn on qualifying purchases.
Securing Components Together

To guarantee your vacuum cleaner functions smoothly, you should frequently check that all components—like the motor, hose, and dust container—are properly aligned before securing them. Misalignment can lead to operational issues, so take the time to verify everything fits well.
Selecting a vacuum with superior dust removal capabilities can also enhance your cleaning efficiency.
Next, use screws or clips specifically designed for the materials of your vacuum cleaner. This guarantees a secure fastening without damaging any components. For joints where necessary, apply a small amount of adhesive or sealant to create an airtight seal, which will enhance suction efficiency.
When tightening connections, do so evenly to maintain stability and prevent vibrations. Loose parts can lead to performance deterioration, so make sure everything's snug.
Regularly checking and retightening these components is essential for peak performance and to avoid wear over time.
Testing Your Vacuum Cleaner

Testing your vacuum cleaner is essential to guarantee it operates efficiently and effectively. Start by checking the suction power; strong suction indicates effective performance while weak suction could mean blockages or a full bag/filter. Next, inspect the brushes and belts for wear or damage, as these components directly affect cleaning efficiency.
You should also test the vacuum on different surfaces, like carpets and hard floors, to evaluate its versatility. Listen for unusual noises during operation; these can signal mechanical issues or blockages that need attention. Finally, measure the vacuum's ability to pick up debris by conducting a simple test with small particles.
Here's a quick checklist to guide your testing process:
| Test Aspect | What to Check | Expected Result |
|---|---|---|
| Suction Power | Strong vs. weak | Strong suction |
| Brushes and Belts | Wear or damage | No visible damage |
| Surface Versatility | Effectiveness on different surfaces | Effective on all surfaces |
| Unusual Noises | Listen during operation | No strange sounds |
| Debris Pickup | Test with small particles | Picks up all particles |
Troubleshooting Common Issues

If your vacuum cleaner's losing suction, overheating, or making strange noises, it's time to troubleshoot.
Start by checking for blockages, ensuring the bag isn't full, and inspecting the brush roll for debris.
Addressing these common issues can help restore your vacuum's performance and longevity.
Loss of Suction
Sometimes, a vacuum cleaner's suction just isn't what it used to be, and that can be frustrating. To tackle this issue, start by checking the vacuum filter. A clogged or dirty filter greatly reduces suction power, so clean or replace it as needed.
Additionally, consider that top-rated vacuums often feature high suction power which can help maintain their effectiveness over time. Next, inspect the vacuum hose for any blockages or kinks. Obstructions can impede airflow, leading to a noticeable drop in suction.
Don't forget to check the vacuum bag or dust container. If it's full, it can restrict airflow, making your vacuum less effective. Empty or replace it to restore suction.
Also, examine the brush roll for any tangles or debris. A jammed brush roll can hinder your vacuum's ability to pick up dirt and debris, so clear it out if necessary.
Lastly, verify that all seals and connections are intact. Leaks in the vacuum system can cause a drop in suction power, so a quick check can help maintain ideal performance.
Overheating Issues
Overheating is another common issue that can arise with vacuum cleaners, often linked to problems like clogged filters or full dust bins. When airflow gets restricted, the motor has to work harder, leading to overheating.
To prevent this, make certain you regularly clean or replace the vacuum's filter according to the manufacturer's recommendations.
Also, check the brush roll—hair and debris buildup can impede its movement and cause the vacuum to overheat. If you're using the vacuum for extended periods, it's wise to take breaks every 30 minutes to let the machine cool down. This simple practice can greatly reduce overheating risks.
If your vacuum continues to overheat despite your best maintenance efforts, it might be time to look for electrical issues or damaged components. These problems can require professional repair, so don't hesitate to seek help if needed.
Noisy Operation
Noisy operation in vacuum cleaners can be frustrating, but understanding its common causes can help you troubleshoot effectively. Start by checking the filter and dust bin; if they're clogged, clean them out. A clean vacuum runs smoother and quieter. Next, inspect the hose and brush roll for obstructions. Any blockages can force the motor to work harder, resulting in excess noise.
Another culprit could be worn-out or damaged belts. If you notice fraying or signs of wear, replace them to cut down on noise. Also, remember to check for loose screws or components. Rattling sounds often come from parts that need tightening.
Finally, if your vacuum has a bag, make sure it's not overfilled. An overstuffed bag restricts airflow, causing the machine to make more noise than usual.
Here's a quick reference table for you:
| Cause | Solution | Effect |
|---|---|---|
| Clogged filter/dust bin | Clean or empty | Reduced noise |
| Hose or brush roll block | Remove obstruction | Smoother operation |
| Worn belts | Replace belts | Quieter vacuum |
| Loose parts | Tighten screws | Minimized rattling noise |
| Overfilled bag | Empty bag | Improved airflow |
Frequently Asked Questions
How to Make a Simple Vacuum Cleaner at Home?
To make a simple vacuum cleaner at home, you'll need a powerful motor, fan blade, airtight container, filter, and flexible hose. Connect everything securely, ensuring safety, and you'll create an effective cleaning tool.
What Is the Easiest Way to Create a Vacuum?
Did you know that a vacuum can reduce pressure by 14.7 psi? To create a vacuum easily, you can use a sealed container and a vacuum pump, removing air to achieve that low pressure.
What Materials Are Used to Make a Vacuum Cleaner?
To make a vacuum cleaner, you'll need materials like copper and aluminum for the motor, durable plastics for the body, HEPA filters for filtration, and rubber or flexible plastic for hoses and attachments.
How to Make a Vacuum Cleaner With a Motor and Battery?
To make a vacuum cleaner with a motor and battery, you'll need to select a suitable motor, connect it to a compatible battery, and assemble lightweight housing with a fan, filter, and dust container.
Conclusion
You've just crafted your very own vacuum cleaner, proving that even the simplest tasks can turn into an engineering marvel. Who knew a few materials and some elbow grease could transform you into a DIY genius? Now, instead of just cleaning your floors, you're cleaning up in the innovation department! Just remember, if it sounds like a jet engine when you turn it on, you might want to revisit that instruction manual—or embrace the chaos!