
To fix your vacuum cleaner, start by checking for common issues like loss of suction. Clear clogged filters, hoses, and empty the dustbin. Inspect the brush roll for tangles and make certain the belt's in good shape. If it's noisy, the belt might need replacing. Check the power cord for damage and verify the vacuum's plugged into a working outlet. For overheating, look for blockages in airflow paths. Addressing these simple fixes can greatly enhance performance. Curious about more in-depth repair techniques and maintenance tips? There's plenty more to explore on keeping your vacuum in top shape!
Key Takeaways
- Check and clean vacuum filters regularly to improve suction and maintain performance.
- Inspect the vacuum hose for blockages and ensure it is securely connected at both ends.
- Examine the brush roll and drive belt for debris and wear; replace if necessary.
- Always empty the dustbin or replace the bag when full to prevent clogs and overheating.
- Test electrical connections and inspect the power cord for damage to avoid operational issues.
Top picks for "vacuum cleaner"
Open Amazon search results for this keyword.
As an affiliate, we earn on qualifying purchases.
Common Vacuum Issues
Vacuum cleaners can encounter a variety of common issues that affect their performance. One major problem you might face is a loss of suction. This often happens due to clogged filters, hoses, or bags, so it's crucial to check these components regularly. If you notice your vacuum isn't picking up dirt like it used to, start by inspecting and clearing any obstructions.
Another issue to look out for is a noisy operation or a brush roll that isn't spinning. These symptoms usually indicate a problem with the vacuum belt. Make certain to check the belt for any cracks or breaks, and replace it if necessary.
Overheating can also be a concern, often caused by blockages in the airflow path. Inspect your filters, hoses, and dustbin to verify everything is clear, allowing for proper airflow.
Lastly, electrical issues, like a damaged power cord or faulty outlet, can prevent your vacuum from starting. Always check the cord for frays and make certain it's plugged into a working outlet.
Troubleshooting Loss of Suction
Experiencing a loss of suction can be frustrating, but troubleshooting it's often straightforward. Start by checking the vacuum filters. If they're clogged, clean or replace them, as this can considerably affect airflow and suction power.
Next, inspect the vacuum hose and attachments for any blockages or debris. Even small clogs can drastically reduce suction efficiency, so make sure everything is clear.
Don't forget to check the dustbin or vacuum bag—if it's full, empty or replace it. Overfilled containers restrict airflow and decrease performance.
Additionally, verify that the brush roll is free from tangles and debris. A clogged brush can impede cleaning effectiveness and reduce suction.
Lastly, adjust the vacuum's height settings based on the type of flooring you're cleaning. Improper height adjustments can lead to ineffective suction on different surfaces, making it harder to pick up dirt and debris.
Roller and Belt Maintenance

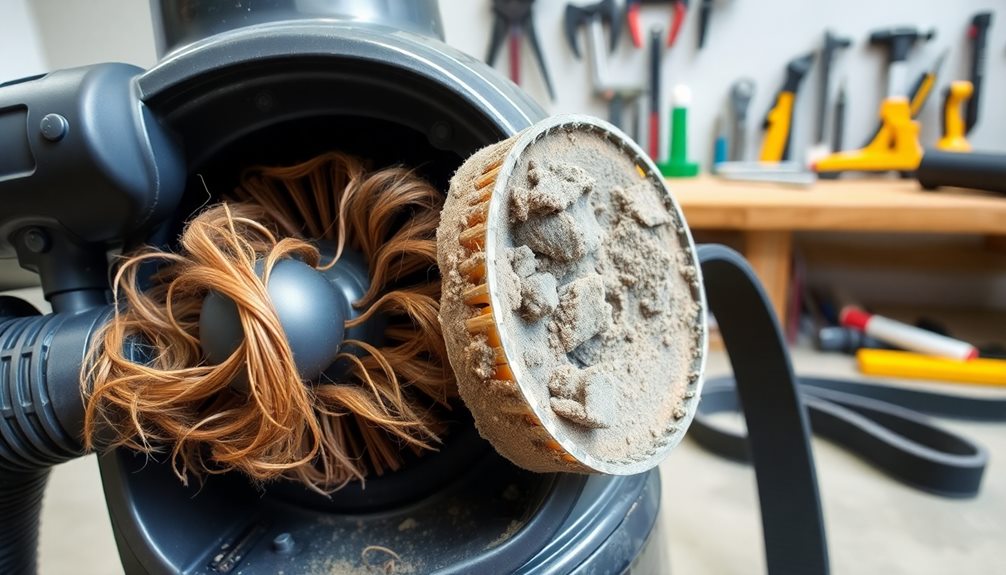
To keep your vacuum running smoothly, you need to regularly inspect the roller for any hair or debris that could hinder its movement.
Regular maintenance is essential, especially for models designed for superior dust removal that require peak performance to be effective.
Don't forget to check the condition of the belt, as worn components can lead to poor performance.
If you notice any cracks or breaks, it's time to replace the belt and make sure everything is working properly.
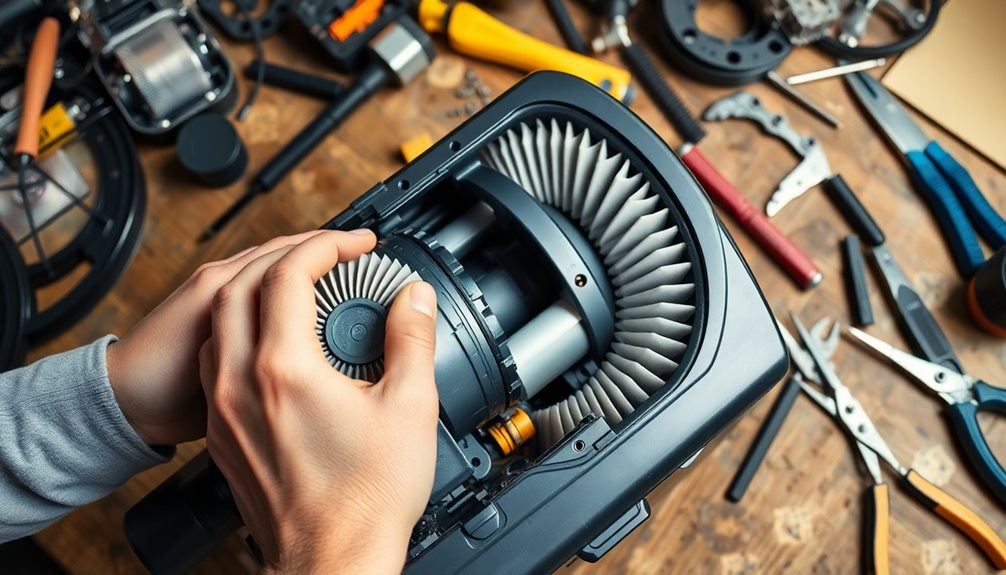
Inspect Roller for Debris
A clean roller brush is essential for ideal vacuum performance, so regularly inspecting it for hair, dust, and debris is important.
Start by removing the roller from your vacuum according to the manufacturer's instructions. Once it's out, take a close look at the brush for any accumulation of debris. Hair and fibers can easily get tangled, so use scissors to carefully cut away any knots. Just be cautious not to damage the bristles in the process.
Next, manually rotate the roller to guarantee it spins freely. If it feels stiff or doesn't move at all, there may be a blockage or other issue needing your attention. Use a paintbrush to clean the underside of the vacuum and the roller itself, removing any dirt or debris that might affect performance.
Regular maintenance of the roller will help your vacuum run smoothly and efficiently. If you notice that the roller isn't spinning properly, check the drive belt for signs of wear or damage, as this could hinder the roller's function.
Keeping your roller clean and free of debris is a straightforward but essential step in maintaining your vacuum cleaner.
Check Belt Condition
While maintaining your vacuum cleaner, checking the condition of the belt is vital for guaranteeing the roller operates effectively. A damaged drive belt can prevent the brush roll from spinning, ultimately reducing your vacuum's performance.
To check the belt condition, unplug the vacuum and remove the roller cover. Spin the roller manually; if it's tight or doesn't spin, you might need to replace the belt. Regular inspections are important, as it's recommended to replace the belt every 6 to 12 months.
Here's a quick reference table to help you:
| Belt Condition | Action Needed |
|---|---|
| Cracks | Replace the belt |
| Fraying | Replace the belt |
| No visible damage | Check the brush roll |
When you replace the belt, make sure to clean the connection points with a brush to guarantee the new belt lasts longer. After you install the new belt, test the roller by spinning it by hand to confirm everything's working properly before reassembling. Keeping an eye on your vacuum's belt will keep your vacuum running smoothly.
Replace Worn Components
After confirming the belt is in good condition, it's important to focus on replacing any worn components, particularly the roller.
Over time, the roller can experience significant wear and tear, which affects your vacuum's overall performance. If the roller isn't spinning, check the drive belt for cracks or breaks; a damaged belt should be replaced to restore functionality.
Regular grooming of your pets can also help reduce the amount of hair that ends up on your floors, making your vacuuming tasks easier and more effective, especially during peak shedding seasons when control pet hair like a pro is vital.
To maintain your vacuum, consider these essential steps:
- Inspect the Roller: Regularly check for hair and debris accumulation. A clogged roller can impede performance and reduce suction efficiency.
- Clean the Brush: Periodically clean the roller brushes to enhance cleaning performance. Remove any tangles or debris that may affect movement.
- Replace the Brush: If the brushes are worn down, replace the brush entirely to guarantee maximum contact with the floor and improve suction.
Electrical and Motor Checks
When troubleshooting your vacuum cleaner, start by inspecting the power cord for any frays or splits, as these can cause electrical issues.
Next, test the motor's functionality to guarantee everything is running smoothly.
If you find any problems, addressing them quickly can save you time and hassle down the road.
Inspect Power Cord
Inspecting the power cord is vital for guaranteeing your vacuum cleaner operates safely and effectively. A compromised power cord can lead to electrical failures or hazards, so it's important to check the power cord before use.
Here's how you can do that:
- Visual Inspection: Look for visible frays, splits, or any signs that the power cord is damaged. Any damage can create serious safety risks.
- Secure Connection: Confirm the power cord is securely plugged into a functioning outlet. Loose connections can cause the vacuum to shut off or fail to start.
- Outlet Testing: If your vacuum doesn't start, try plugging it into a different outlet. This helps rule out issues with the electrical supply or outlet functionality.
If you discover that the power cord is damaged or if the vacuum still doesn't work after these checks, you might consider seeking professional vacuum repair for internal electrical problems.
Remember, not all issues are DIY-friendly, and specialized tools and expertise may be required to address more complex problems.
Keep your vacuum in top shape by regularly inspecting the power cord and addressing any issues promptly.
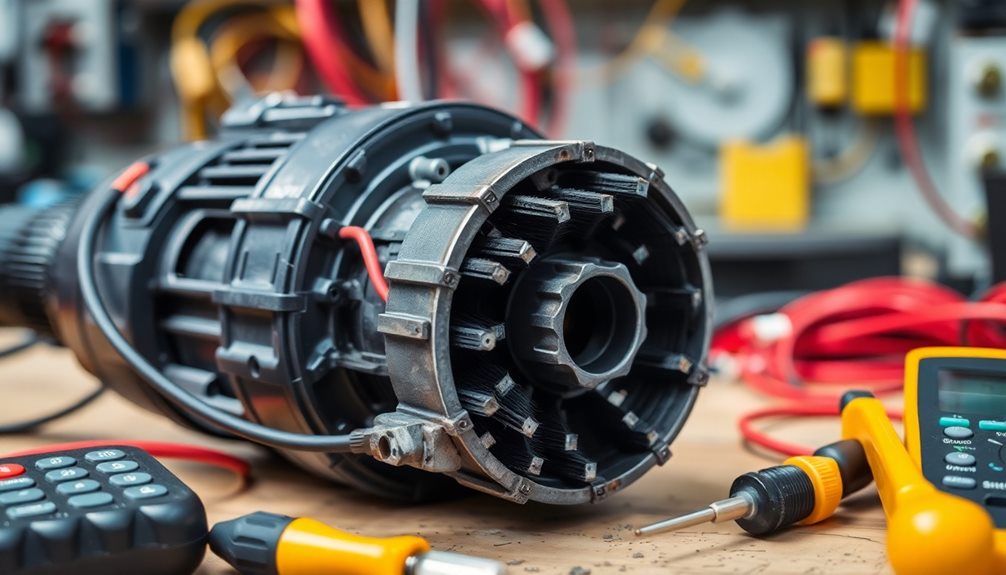
Test Motor Functionality
Testing your vacuum cleaner's motor functionality is crucial for diagnosing performance issues. Start by unplugging the vacuum and using a multimeter to check for continuity in the motor wires. This step guarantees the electrical circuit is intact.
If the motor fails to start, inspect the power cord for visible damage or fraying; a compromised cord can block electrical flow to the motor.
When you turn on the vacuum, listen for unusual sounds. Grinding or high-pitched noises may mean worn bearings or other internal components that need further inspection.
For models with brushes, check the motor brushes for wear. If they're less than 1/4 inch, it's time to replace the motor brushes to restore proper functionality.
If the motor runs but lacks suction, it could indicate internal obstructions or worn components. In this case, you'll need to clean and inspect the motor housing and attached parts thoroughly.
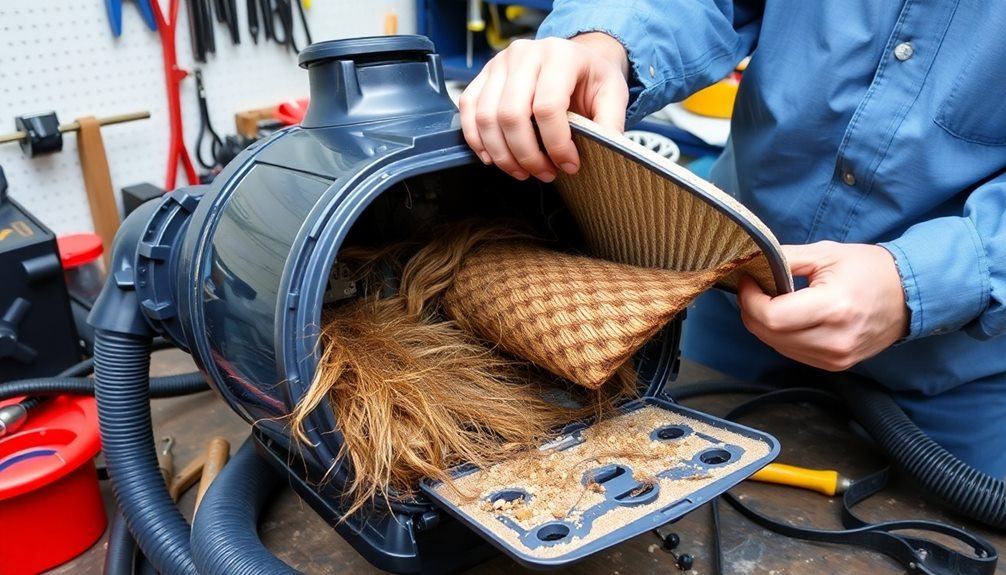
Filter Cleaning and Replacement

Keeping your vacuum cleaner's filters clean is crucial for maintaining its performance and longevity. Regular filter maintenance guarantees peak suction, as dirty filters can greatly hinder airflow, making your vacuum less effective.
In addition, using a vacuum with a HEPA filter can enhance indoor air quality, especially for allergy sufferers, as these filters capture 99.97% of particles sized 0.3 microns or larger, providing an added layer of protection against allergens and pollutants in your home.
Here's how to handle your filters:
- Locate the Filters: Depending on your vacuum model, you can find the filters in the dust bin, near the motor, or in a specific filter compartment.
- Clean or Replace: For washable filters, rinse them under cold water and let them air-dry completely before reinserting. If you have disposable filters, replace them when they look dirty or clogged.
- HEPA Filters: If your vacuum has a HEPA filter, consider using it. These filters capture 99.97% of particles sized 0.3 microns or larger, improving indoor air quality, especially for allergy sufferers air purifiers effectiveness.
Always refer to the manufacturer's instructions for specific cleaning and replacement guidelines. Proper maintenance not only keeps your vacuum running efficiently but also helps avoid voiding warranties.
Dustbin and Bag Management

To keep your vacuum running efficiently, you should regularly empty the dustbin or monitor the bag's fullness before each use.
An overfilled dustbin or bag can lead to clogs and reduced suction power.
Empty Dustbin Regularly
A clean vacuum starts with regular dustbin and bag management. To keep your vacuum running efficiently, it's essential to empty the dustbin or replace the bag when it's around 2/3 full. A full dustbin or bag can greatly reduce suction, leading to poor cleaning performance.
Here are three key steps to guarantee ideal vacuum operation:
- Check Before Each Use: Always inspect the dustbin or bag before starting. If it's full, empty the dustbin outside to minimize mess and allergens in your home.
- Clean Periodically: After emptying, clean the dustbin with warm, soapy water regularly. This helps eliminate odors and prevent bacteria buildup, making your vacuum hygienic.
- Replace as Needed: For bagged vacuums, promptly replace the bag when it's full. A full bag can decrease suction by up to 50%, straining your vacuum's motor and potentially leading to overheating or permanent damage.
Monitor Bag Fullness
Monitoring bag fullness is crucial for maintaining your vacuum's performance. An overfilled dustbin or bag can considerably restrict airflow, leading to reduced vacuum suction and efficiency. To keep your vacuum running smoothly, regularly check the dustbin or bag before each use. If you have a bagged vacuum, replace the bag when it's about two-thirds full to guarantee ideal airflow and prevent motor strain.
Here's a quick reference guide for managing your vacuum's dustbin or bag:
| Condition | Action to Take | Frequency |
|---|---|---|
| Dustbin full | Empty immediately | After each use |
| Bag two-thirds full | Replace the vacuum bag | Every few uses |
| Suction decreases | Check bag or dustbin level | During cleaning |
| Indicator shows full | Empty or replace | As needed, regularly |
Utilizing transparent dustbins or bags with visible fill indicators can help you easily monitor bag fullness. By keeping an eye on the dustbin or bag level, you can catch issues early, guaranteeing your vacuum always performs at its best.
Prevent Clogs Effectively
While keeping an eye on your vacuum's dustbin or bag is essential, preventing clogs goes beyond just monitoring fullness.
You need to take proactive steps to guarantee peak performance and maintain strong suction power. Here are three effective strategies to prevent clogs:
- Regular Maintenance: Empty the dustbin or replace the vacuum bag when it's about two-thirds full. This practice helps maintain airflow and prevents blockages that can hinder your vacuum's efficiency.
- Pre-Use Inspection: Before each cleaning session, inspect the dustbin or bag for any debris or blockages. A quick check can save you from unexpected issues and guarantee your vacuum operates smoothly.
- Monthly Checks: Schedule a monthly inspection of the dustbin or bag area. This routine will help you catch any potential clogs early, allowing for effective cleaning performance and extending the life of your vacuum.
Inspecting Hose Connections
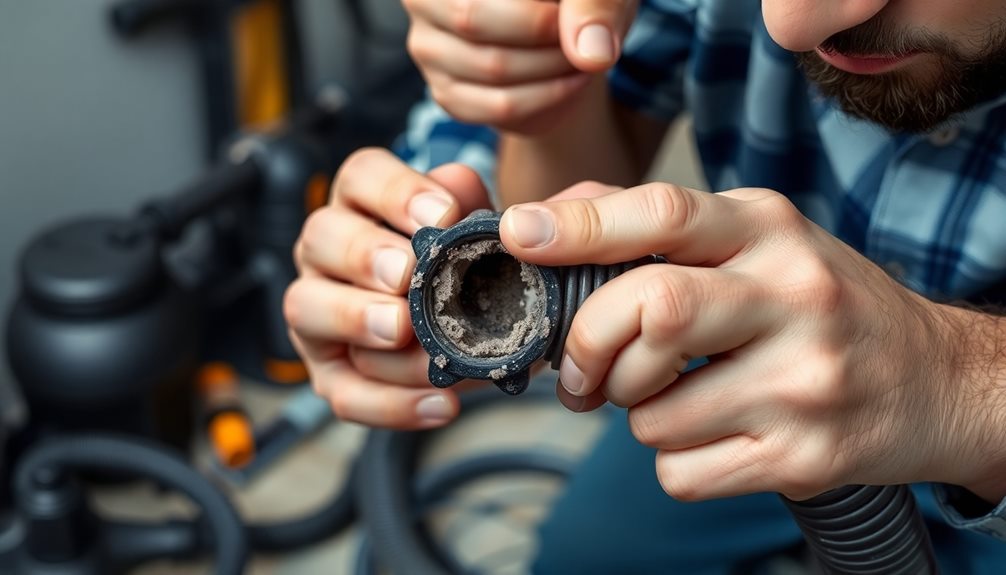
Inspecting hose connections is essential for maintaining your vacuum cleaner's performance. Start by examining the hose for any visible damage, like cracks or frays, as these can lead to suction loss and decreased efficiency. Make certain the hose is securely attached at both ends; loose connections can create air leaks that compromise your vacuum's ability to pick up dirt and debris.
Next, check for clogs by detaching the hose and using a flashlight to look for blockages obstructing airflow. If you spot any debris, carefully remove it to restore proper function.
To keep your hose clean, use a long, flexible brush or even a straightened coat hanger to eliminate built-up dirt or hair inside the hose.
Regularly inspecting hose connections not only helps maintain peak performance but can also prevent costly repairs down the line. If you find that the hose is severely clogged or damaged beyond repair, consider replacing it with a compatible model to guarantee your vacuum continues to operate effectively.
Taking these simple steps will help keep your vacuum cleaner running smoothly.
Repairing Broken Components
After ensuring your hose connections are secure and free of clogs, it's time to address any broken components that might be affecting your vacuum's performance.
Here are some common reasons for issues and how to fix them:
1. Brush Roll: If the brush roll spins sluggishly or not at all, remove the bottom cover and clear any debris.
Replace the brush if the bristles are worn or damaged to restore effective cleaning performance.
2. Drive Belt: Inspect the drive belt for any cracks or breaks.
If you find damage, replace it by removing screws or clips, sliding off the old belt, and ensuring proper tension on the new belt during reinstallation.
3. Power Cord and Motor: Check the power cord for frays or splits.
Replace any damaged sections to prevent electrical hazards. For motor issues, use a continuity tester to check the wires; replace worn brushes or seek professional help if extensive problems are detected.
Cost-Effectiveness of Repairs
When considering whether to repair your vacuum cleaner, it's crucial to weigh the costs against the machine's age and condition. If your vacuum is over eight years old, repairs may become less cost-effective, especially when the cost of a new model is just a few dollars more than fixing various problems.
Here's a quick comparison to help you decide:
| Vacuum Age | Common Repair Cost | Cost of a New Vacuum |
|---|---|---|
| Less than 3 years | $50-$75 | $150-$300 |
| 3-5 years | $75-$100 | $150-$300 |
| 5-8 years | $100-$150 | $150-$300 |
| Over 8 years | $150+ | $150-$300 |
DIY repairs can save you money, as many issues can be resolved with minimal tools. However, for complex problems, professional repairs might be necessary. Evaluating warranty coverage can also help reduce repair costs considerably. Ultimately, knowing when to repair or replace can keep your vacuum running efficiently without breaking the bank.
Maintenance for Longevity
Maintaining your vacuum cleaner is essential for guaranteeing its longevity and peak performance. By following a few simple maintenance steps, you can keep your vacuum running efficiently and avoid costly repairs.
- Clean or Replace Filters: Check and clean or replace your vacuum filters every 3-6 months. This keeps airflow ideal and maintains suction efficiency.
- Inspect Hoses and Brush Roll: Monthly, inspect your hoses for blockages and check the brush roll for hair and debris. A clean brush roll guarantees effective cleaning and reduces strain on the motor.
- Empty Dustbin or Replace Bag: Make it a habit to empty the dustbin or replace the vacuum bag when it's full. This prevents clogs and guarantees strong suction.
Additionally, store your vacuum in a dry, ventilated area to avoid moisture damage.
Regular maintenance not only extends the life of your vacuum but also enhances its performance, guaranteeing you get the most out of your investment.
Frequently Asked Questions
What Is the Common Problem of a Vacuum Cleaner?
Common problems with vacuum cleaners include loss of suction from clogged filters or full bins, unusual noises indicating motor issues, overheating from blockages, and electrical problems like damaged cords. Regular maintenance helps prevent these issues.
How to Fix a Vacuum That's Not Picking Up?
When your vacuum's not picking up, it feels like a lifeless chore. You'll want to check for clogs, clean filters, and guarantee the brush roll's free. Don't forget to empty the dustbin for better suction!
Why Did My Vacuum Suddenly Stop Working?
Your vacuum might've suddenly stopped due to a frayed power cord, a clogged hose, or an overheated motor. Check for blockages, inspect the cord, and let it cool down if needed.
Is It Worth Repairing a Vacuum Cleaner?
"Don't throw good money after bad." When considering whether it's worth repairing your vacuum, weigh repair costs against its age and performance. If repairs exceed half its original price, replacing it might be wiser.
Conclusion
To sum up, tackling your vacuum troubles transforms tedious tasks into triumphs. By diligently diagnosing issues, you can dramatically extend your device's lifespan while saving cash. Regular maintenance not only maintains performance but also nurtures your vacuum's importance. So, don't let those pesky problems pile up. With a little care and commitment, you'll keep your vacuum cleaner humming happily for years to come! Remember, a well-maintained machine makes for a more manageable, mess-free home.