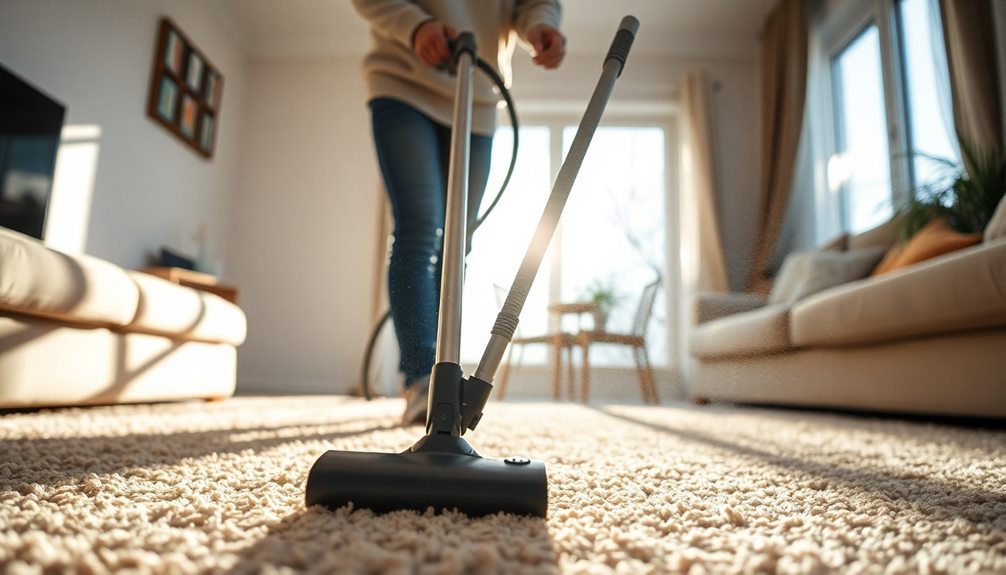
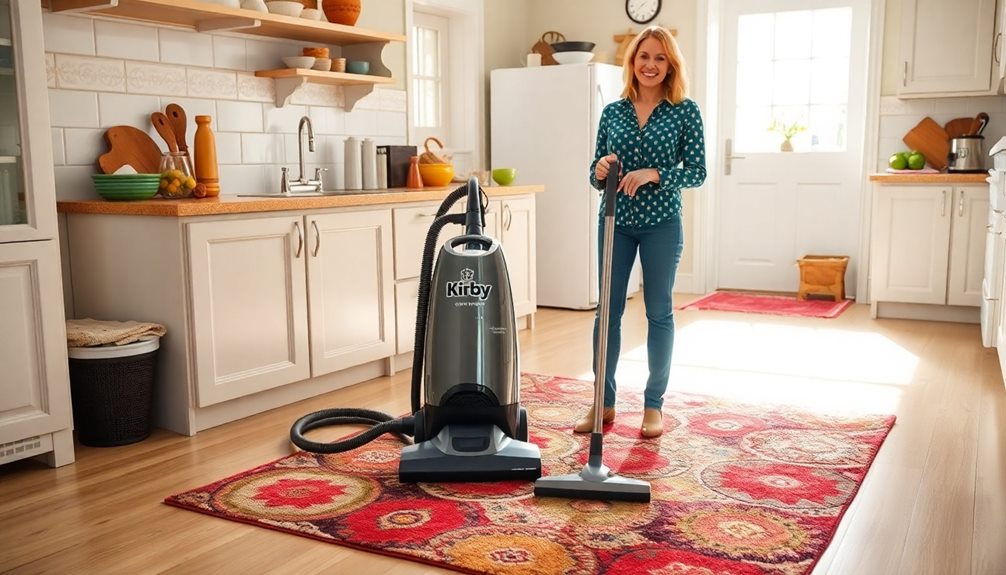
To repair your Kirby vacuum cleaner, start by checking for common issues like belt wear or clogs. Disassemble the machine to clean internal parts and replace any worn belts. Be sure to inspect brush movement and suction power as you reassemble it. After putting it back together, test the vacuum for any unusual sounds or performance issues. Regular maintenance, like replacing filters and cleaning brushes, keeps it running smoothly. If you want tips on further enhancing your vacuum's longevity and performance, you're in the right place.
Key Takeaways
- Inspect the vacuum for signs of issues like burning smells, worn belts, or clogs to identify problems early.
- Disassemble the vacuum for thorough cleaning, using compressed air to remove dirt from internal components.
- Regularly check and replace the vacuum belt to ensure proper brush spinning and vacuum efficiency.
- After reassembly, test functionality by checking suction power, brush movement, and listening for unusual sounds.
- Perform routine maintenance, including filter replacement and brush cleaning, to maintain optimal performance.

Kirby Vacuum Belt 3-Pack | Genuine OEM Replacement Part #301291G | Compatible with All Kirby Upright Vacuum Models
✔ Genuine Kirby OEM Replacement – Official Part #301291G, designed to maintain optimal vacuum performance and suction power.
As an affiliate, we earn on qualifying purchases.
As an affiliate, we earn on qualifying purchases.
Assessing Common Issues
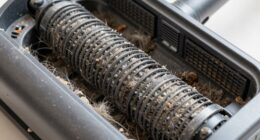
When you notice a strong rubber burning smell coming from your Kirby vacuum, it's a sign that something's off—most likely a jammed brush or a stretched belt. You should inspect the brush roll and remove any debris, like hair or dirt, that could be causing the jam.
If the brush isn't spinning properly, it might be due to a worn or broken belt, which you'll need to assess and possibly replace.
Regularly checking the suction power and brush movement can help you catch these issues early. If you notice a drop in performance, don't wait—address it right away to prevent more extensive repairs down the line.
An accumulation of animal hair or dirt in the nozzle can also hinder your Kirby vacuum's effectiveness, so make certain to keep it clean.
Future maintenance is essential for prolonging the life of your Kirby vacuum. By routinely inspecting and cleaning the machine, you can guarantee peak performance and avoid the frustration of unexpected issues.

13" Vacuum Crevice Tool Attachment Replacement for Kirby Vacuums
13" Vacuum Crevice Tool Attachment Replacement for Kirby Vacuums
As an affiliate, we earn on qualifying purchases.
As an affiliate, we earn on qualifying purchases.
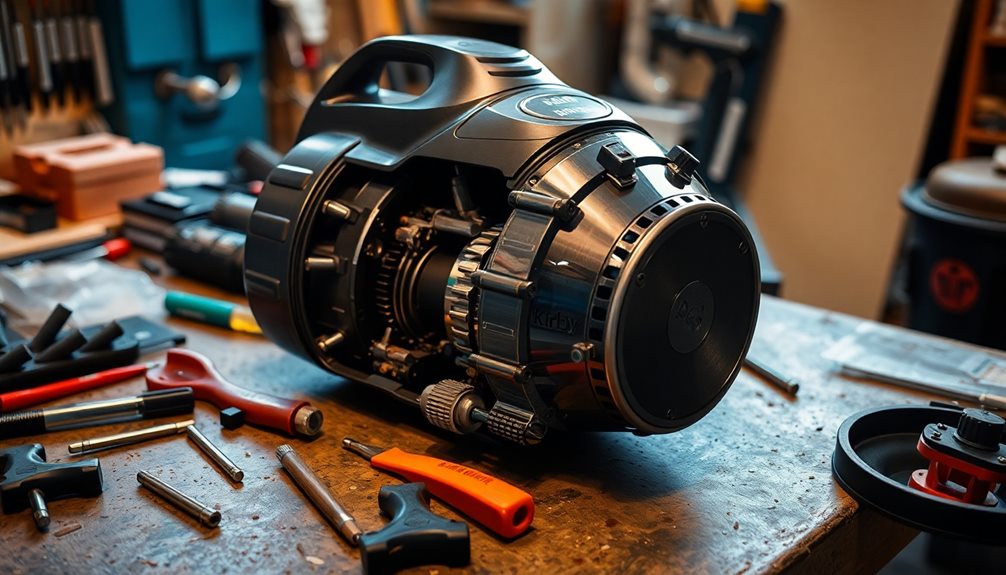
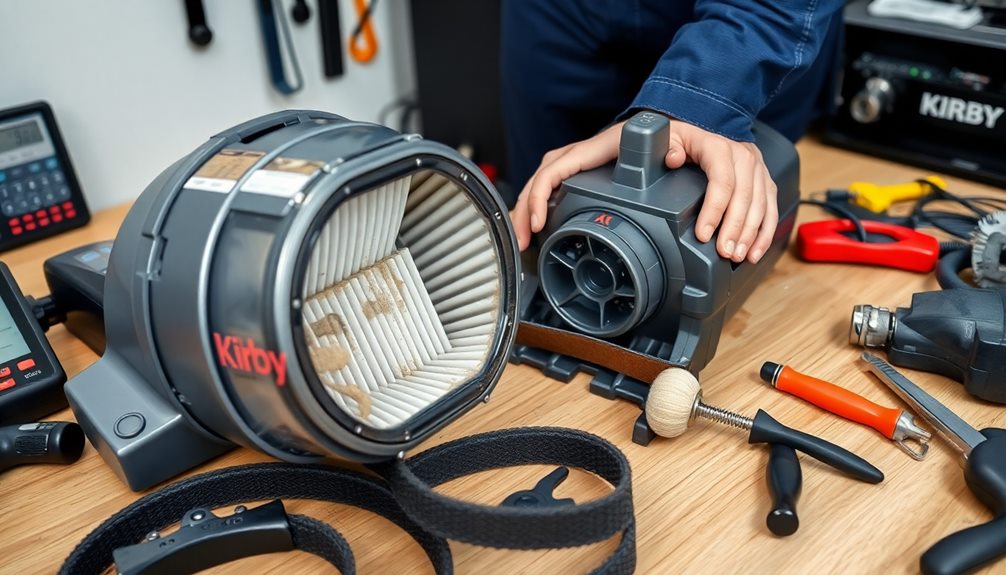
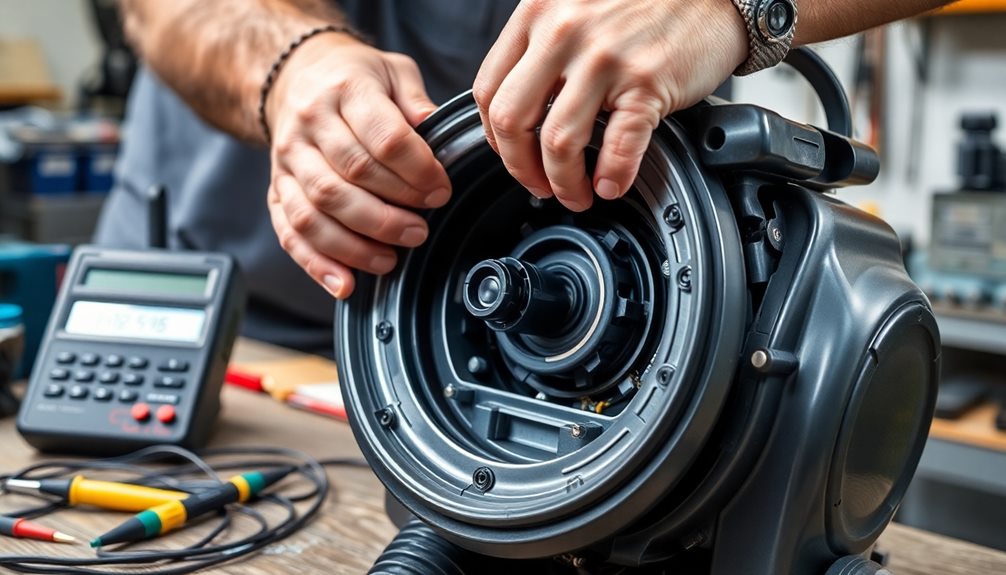
Disassembly and Cleaning

Disassembling and cleaning your Kirby vacuum is essential for maintaining its performance. Start by carefully removing the nozzle to inspect for clogs. Have the right tools handy, like pliers and a utility knife, to tackle any tangled debris.
Next, remove the main machine cover and the bag, allowing full access to the internal parts. Be gentle during disassembly to avoid damaging any tabs.
Once you've got everything apart, use compressed air to blow out dirt and debris from the internal components. Make certain you're in a well-ventilated area to avoid inhaling dust particles.
When cleaning the metal parts, take extra care to avoid scratches or abrasions, as they can impact both functionality and appearance.
As you clean, remember that moisture can cause problems during operation. So, make sure all components are completely dried before you start reassembling.
If you find that your vacuum needs more extensive work, consider enrolling in the Kirby rebuild program for professional assistance. This way, you can keep your vacuum running smoothly and prolong its lifespan.

Kirby Micron Magic Plus HEPA Filter Bags 6-Pack | Part #204814 | Compatible with F-Style & Twist-Style Vacuums
Genuine Kirby HEPA Filtration – Designed with Micron Magic Plus technology, these high-performance vacuum bags help capture dust,…
As an affiliate, we earn on qualifying purchases.
As an affiliate, we earn on qualifying purchases.
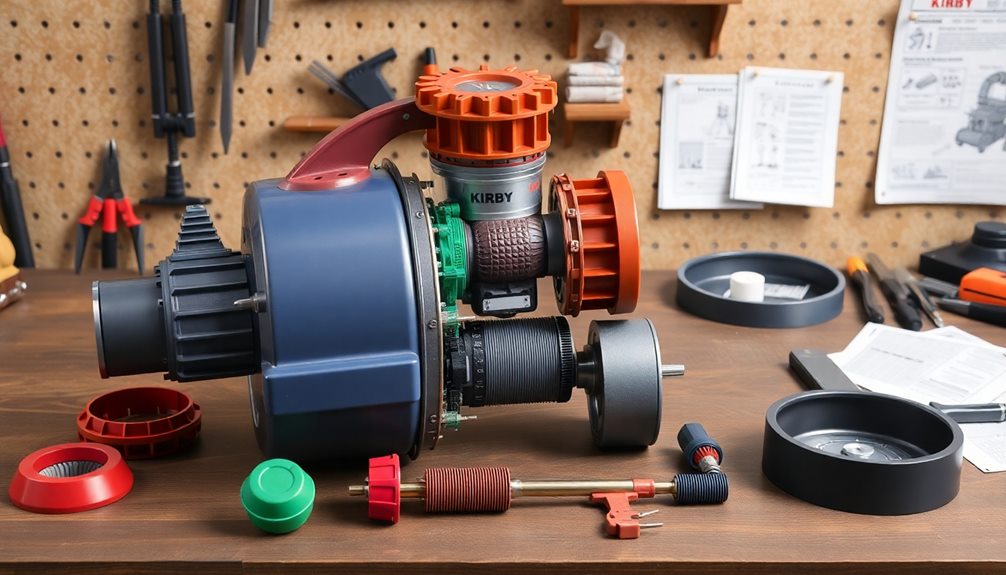
Belt Inspection and Replacement

Maintaining your Kirby vacuum's efficiency hinges on regular belt inspection and replacement. Start by checking the vacuum's belt for signs of stretching or wear. A stretched belt can lead to poor brush performance and reduced suction efficiency, which ultimately affects your vacuum cleaners' overall effectiveness.
If you find that the belt needs replacing, disassemble the nozzle and remove the old belt. It's important to compare its length with the new belt to guarantee you're using the correct size.
When you're ready to install the new belt, make certain to align it properly with the belt lifter. Secure it by twisting the lifter to maintain the correct tension, preventing slippage during operation.
Once the new belt is in place, reassemble the nozzle and double-check that all components are aligned and secure. Before powering on the vacuum for testing, confirm everything is correctly put back together.
Kirby Genuine Vacuum Cleaner Brush Roll #152505 – Fits Sentria, SE2, Ultimate G, ULTG, Diamond Edition, DE, G Six G6, G5 – OEM Replacement for Deep Carpet Cleaning Performance
Genuine Kirby Replacement Part – Designed to fit and work seamlessly with Kirby vacuum models, ensuring peak performance…
As an affiliate, we earn on qualifying purchases.
As an affiliate, we earn on qualifying purchases.
Reassembly Steps
As you start reassembling your Kirby vacuum, make certain all components are clean and dry.
Secure everything in proper alignment to avoid any operational hiccups later on.
Component Cleaning and Inspection
Reassembling your Kirby vacuum cleaner requires careful attention to detail, especially after cleaning its components. Before you begin, make certain all parts are thoroughly cleaned and dried. This component cleaning is vital to prevent debris from affecting the vacuum's performance.
As you reassemble, replace screws in their respective positions. This step maintains the structural integrity of your vacuum and avoids any loose parts that could lead to malfunctions.
Be cautious when reattaching the handle and cord; they need to be secure to avoid operational issues when the vacuum is powered on.
Next, focus on the belt. Properly position and align it to prevent slippage, which is important for peak suction performance.
Once everything is back in place, conduct a thorough inspection. Turn on the machine and listen for any unusual sounds. Observe the brush movement to confirm it operates correctly.
Secure Proper Alignment
Achieving proper alignment is essential when reassembling your Kirby vacuum cleaner. If you don't secure proper alignment, you risk malfunctioning parts that can lead to further issues. Follow these steps to guarantee everything fits together seamlessly:
- Make sure all components are cleaned and dried before starting the reassembly process.
- Position the belt correctly on the machine, aligning it with the belt lifter to maintain proper tension and prevent slippage.
- As you reattach the nozzle, check that it fits snugly against the main body of the vacuum, avoiding any obstructions.
- Replace screws in their respective positions methodically to guarantee structural integrity.
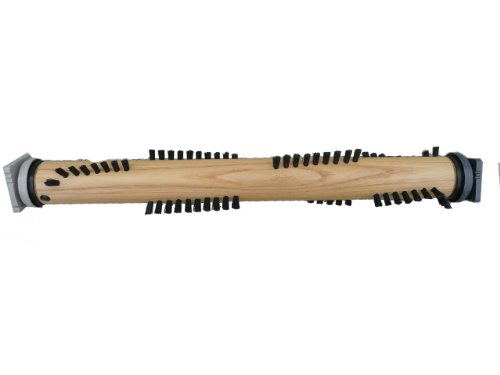
While reassembling, pay special attention to the brush roll alignment. A misaligned brush roll can lead to uneven cleaning and possible damage.
After everything is reattached, confirm that the vacuum remains stable and that all settings are adjusted accurately. Taking the time to secure proper alignment won't only enhance the performance of your vacuum but also prolong its lifespan.
Being methodical and careful at this stage is key to a successful reassembly.
Final Functionality Verification
After ensuring that all components are properly aligned and secured, it's time to verify the vacuum's functionality.
Start by making sure all parts are cleaned and dried; any debris can negatively impact performance. Replace the screws in their respective positions to keep everything intact. Reattach the handle and cord securely, ensuring all rubber pieces are in place for proper functionality.
Next, focus on the belt during reassembly. Position it correctly on the machine and check for any obstructions that could hinder its movement. This step is essential for maintaining ideal cleaning performance.
Once everything is reassembled, power on the vacuum for the final functionality verification.
Listen for any unusual sounds that could indicate a problem. Observe the brush movement and check the suction power; both should operate smoothly and efficiently. If you notice any issues, revisit your assembly steps to troubleshoot.
Functionality Testing
Now that you've reassembled your Kirby vacuum, it's time to test its functionality.
Start by turning it on and listening for any unusual sounds that could signal mechanical issues.
Next, assess the suction power by running it over different surfaces to verify consistent airflow and ideal cleaning performance.
Operational Status Verification
To guarantee your Kirby vacuum cleaner is functioning properly after repairs, it's vital to conduct a thorough operational status verification. This process helps confirm your Kirby system is ready for effective cleaning.
Start by powering on the vacuum and listening for any unusual sounds, like grinding or rattling, which could indicate issues.
Next, observe the brush movement. It should spin freely and engage correctly with the carpet or floor surface. Additionally, check all adjustable settings, such as height adjustments, to verify they respond appropriately.
A visual inspection of components is also essential; look for any obstructions or misalignments that could affect functionality.
Here's a quick checklist for a successful operational status verification:
- Listen for abnormal sounds during operation.
- Verify the brush spins freely and engages properly.
- Test adjustable settings for responsiveness.
- Conduct a visual inspection for obstructions or misalignments.
Suction Power Assessment
Evaluating the suction power of your Kirby vacuum cleaner is vital for guaranteeing ideal cleaning performance.
Start by turning on the machine and listening for any unusual sounds that might indicate motor issues or airflow blockages. Pay close attention to the brush movement while the vacuum is running; if the brushes aren't spinning properly, it could negatively impact the suction power.
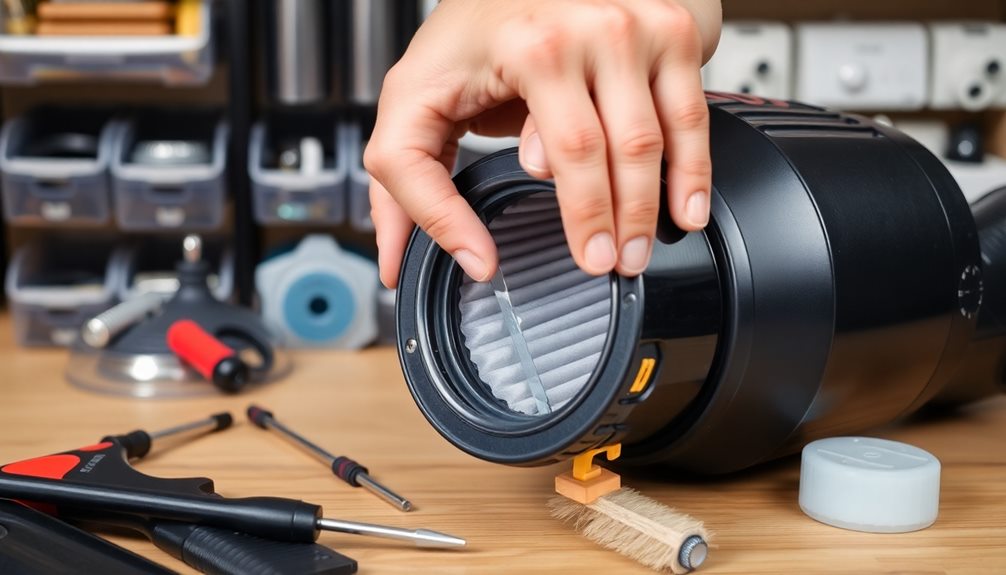
Next, check the vacuum's filters and bags. A clogged or full bag can greatly reduce suction, so replace or clean it as necessary. For a more precise assessment, measure the suction power at the nozzle using a manometer or vacuum gauge. This will help you determine if it meets the manufacturer's specifications for peak performance.
Regular maintenance is essential for maintaining effective suction power in your Kirby vacuum cleaner. Clean the filters regularly and replace any worn parts to keep your vacuum running smoothly.
Regular Maintenance Tips
Keeping your Kirby vacuum cleaner in prime condition is essential for guaranteeing it performs at its best. Regular maintenance not only extends the life of your vacuum but also keeps it running efficiently. Here are some key tips to follow:
- Check and replace the vacuum filter every 3-6 months to maintain peak suction power and air quality.
- Clean the brush rolls and remove hair or debris at least once a month to prevent jamming and maintain effective cleaning performance.
- Inspect the vacuum belt every few months for signs of stretching or wear, replacing it as needed for proper brush movement.
- Empty the dust bag or replace it when it's about two-thirds full to prevent reduced suction.
Additionally, consider scheduling professional servicing at a Kirby Service Center annually to address any wear and tear.
This proactive approach guarantees your vacuum continues to operate at peak performance. By following these maintenance tips, you'll enjoy a cleaner home and a longer-lasting vacuum.
Utilizing the Rebuild Program

If your Kirby vacuum cleaner isn't performing like it used to, the Rebuild Program could be the perfect solution. This thorough refurbishment service is designed for all Kirby models and works to restore your vacuum to like-new condition. Through professional disassembly, repair, and polishing, the program guarantees that your vacuum gets the care it needs.
To take advantage of the rebuild program, verify your vacuum was purchased from an authorized distributor and is intended for personal use—commercial use will void eligibility. During the refurbishment, key components such as brush rolls, outer cloth bags, and motor bearings are replaced, enhancing both performance and longevity.
Once your vacuum is rebuilt, you'll enjoy a one-year warranty that covers defects in materials and workmanship under normal use. This added assurance provides peace of mind as you get back to cleaning.
Plus, participating in the rebuild program promotes sustainability by extending your vacuum's lifespan and reducing landfill waste. Instead of buying new, consider revitalizing your current model through this eco-friendly option. It's an effective way to keep your Kirby running efficiently for years to come.
Frequently Asked Questions
What Is the Lifespan of a Kirby Vacuum?
A Kirby vacuum can last 20 to 25 years with proper maintenance. By regularly servicing it and replacing worn parts, you'll guarantee it operates efficiently and retains its durability for many years to come.
What to Do With a Broken Kirby Vacuum?
If your Kirby vacuum's broken, first assess visible issues. Disassemble it, check for clogs or damaged parts, clean thoroughly, replace worn components, then reassemble and test. Regular maintenance can help prevent future problems.
Does My Kirby Have a Lifetime Warranty?
Yes, your Kirby vacuum does have a lifetime warranty on the motor, but it only applies to the original registered owner. Make sure you keep the serial number intact and follow the warranty terms.
Why Is My Kirby Vacuum Not Spinning?
If your Kirby vacuum isn't spinning, check for clogs in the nozzle or brush roll. Inspect the belt for damage, adjust the height setting, and clear any obstructions to restore its functionality. Regular maintenance helps too!
Conclusion
In the grand journey of keeping your Kirby vacuum running smoothly, you've embraced the art of repair with confidence. By evaluating common issues, tending to disassembly and cleaning, and ensuring belts are in tip-top shape, you've become a true steward of your machine. With a little regular maintenance, your vacuum will continue to serve you well, whisking away dirt and dust like an old friend. Remember, every little effort you make brings your Kirby back to life!