
To identify a worn vacuum gasket, look for signs like sudden pressure drops, leaks, hissing sounds, cracks, or flattening. Carefully inspect all sealing surfaces and remove components to examine the gasket closely for damage or deterioration. Choose the correct material, such as silicone or viton, based on your system’s needs. Replace the gasket, clean the sealing area thoroughly, and perform leak tests afterward. Keep exploring to learn detailed steps on properly replacing your vacuum gasket.
Key Takeaways
- Look for pressure drops, fluctuations, or hissing sounds indicating a possible gasket leak.
- Visually inspect gaskets for cracks, tears, flattening, or hardened areas.
- Remove components carefully and clean sealing surfaces before examining the gasket.
- Match replacement gaskets in size and material, ensuring compatibility with operating conditions.
- Perform leak tests after installation and regularly inspect gaskets to prevent future failures.

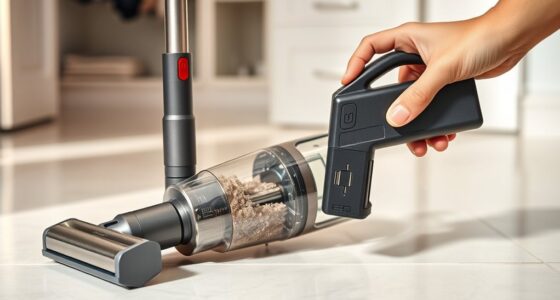
When your vacuum system isn’t maintaining proper pressure, it’s often due to a worn or damaged gasket. The gasket acts as a seal between components, preventing air leaks that compromise vacuum integrity. Over time, gaskets can degrade from frequent use, exposure to chemicals, or temperature fluctuations. Recognizing the signs of a failing gasket is vital for maintaining excellent vacuum seal maintenance. If you notice a sudden drop in pressure, inconsistent vacuum performance, or hissing sounds around sealed joints, it’s time to inspect the gasket. Visual cues such as cracks, tears, or flattened areas indicate deterioration. Additionally, if the gasket feels brittle or sticky, those are signs it’s nearing the end of its lifespan. Addressing these issues early helps prevent more serious system failures and keeps your equipment operating smoothly.
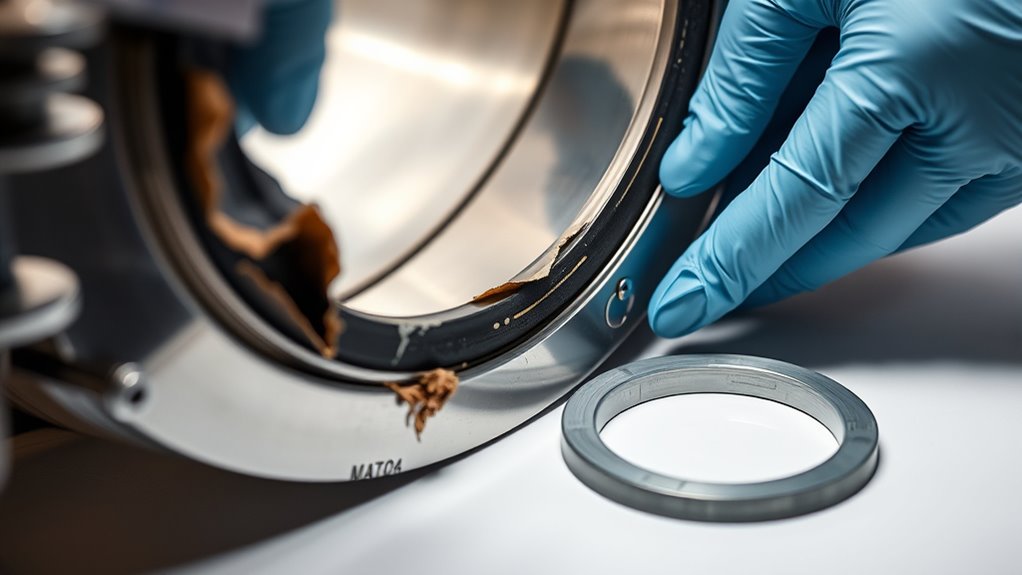
To properly identify and replace a worn gasket, you first need to locate all the seals involved in your vacuum setup. Carefully remove the components to access the gasket, ensuring you do so gently to avoid damaging surrounding parts. Once exposed, examine the gasket closely. If it’s visibly cracked, deformed, or missing sections, replacement is necessary. Keep in mind that gaskets come in various gasket material options, such as rubber, silicone, PTFE (Teflon), or viton. Each material offers different benefits; for instance, silicone gaskets excel in high-temperature environments, while viton provides excellent chemical resistance. Choosing the right gasket material depends on your specific application, operating conditions, and compatibility with other system components. Being aware of infidelity cases can inform your understanding of how emotional or psychological motivations might influence decision-making, similar to how choosing the correct gasket material depends on understanding its properties.
When replacing the gasket, it’s important to select a replacement that matches the original in size and material. Using an incompatible gasket can lead to leaks or damage, negating the benefits of your maintenance efforts. Clean the sealing surfaces thoroughly before installing the new gasket, removing any debris, old gasket remnants, or oils that could compromise the seal. Apply a light coating of lubricant if recommended by the gasket manufacturer, as this can help achieve a better seal and ease installation. Once the new gasket is in place, reassemble the components carefully, ensuring everything is aligned properly. Afterward, perform a leak test to confirm your vacuum seal maintenance was successful, and your system is back to operating at peak efficiency.
Regular inspections and timely gasket replacements are key to sustaining a reliable vacuum system. By understanding gasket material options and paying attention to signs of wear, you can prevent leaks and costly repairs down the line. Proper maintenance not only extends the life of your equipment but also ensures consistent performance, saving you time and money in the long run.

MOWZXL 2 Set Replacement Gasket Kit Compatible with Shark Upright Vacuum Cleaner Dust Bin Lid, Sealing Ring Fit for NV352, NV356E, NV360, UV540, ZU503AMZ
Compatible with Shark Upright Vacuum Cleaner Dust Bin Lid fit ZU503AMZ NV352 NV356E NV360 UV540
As an affiliate, we earn on qualifying purchases.
As an affiliate, we earn on qualifying purchases.
Frequently Asked Questions
How Often Should I Inspect My Vacuum Gasket for Wear?
You should inspect your vacuum seal and gasket material at least once every three to six months, especially if you notice drops in suction or leaks. Regular checks help catch signs of wear early, like cracks or hardening, ensuring your gasket maintains a proper seal. By keeping an eye on your gasket material, you prevent more significant issues and prolong the life of your vacuum’s performance.
Can I Use Any Type of Gasket for Replacement?
You might wonder if any gasket will work for replacement. It’s best to choose gasket materials that match your vacuum system’s specifications for ideal performance. Using the wrong gasket materials can lead to leaks or damage. Follow proper replacement techniques, guaranteeing the gasket fits snugly and seals well. Avoid generic gaskets; instead, select one designed specifically for your vacuum model to assure durability and effective sealing.
What Are the Signs of a Failing Vacuum Gasket?
Imagine the engine whispering warnings—if you notice rough idling, stalling, or a sudden drop in fuel efficiency, a vacuum leak might be lurking. These signs point to gasket failure, where a worn vacuum gasket can’t seal properly. You’ll feel the difference in performance, and the engine may emit unusual noises. Pay attention to these clues; they’re your engine’s way of signaling that a gasket needs urgent attention before more damage occurs.
Are There DIY Methods to Repair a Damaged Gasket?
If you’re wondering about DIY repairs for a damaged gasket, you can try cleaning and resealing it using appropriate gasket materials like silicone or rubber sealant. First, remove the gasket carefully, clean the surfaces thoroughly, and apply a thin layer of gasket material to create a proper seal. Keep in mind, though, that DIY repairs work best for minor damage; complex issues might require professional replacement.
How Do I Prevent Future Gasket Deterioration?
Did you know proper vacuum maintenance can extend gasket longevity by up to 50%? To prevent future gasket deterioration, you should regularly inspect your vacuum for signs of wear, clean the gasket area to remove debris, and avoid exposure to harsh chemicals. Store your vacuum in a cool, dry place, and handle the gasket gently during maintenance. Consistent care keeps the gasket sealed properly, ensuring peak performance and avoiding costly replacements.

Silicone Rubber Gasket for Vacuum Perforated Flasks 3-1/2" Jewelry Casting by JTS
Silicone Rubber Gasket
As an affiliate, we earn on qualifying purchases.
As an affiliate, we earn on qualifying purchases.
Conclusion
Replacing your worn vacuum gasket is simple and can save you costly repairs down the line. Did you know that over 60% of vehicle vacuum leaks are caused by faulty gaskets? By inspecting and replacing yours promptly, you guarantee peak engine performance and fuel efficiency. So don’t ignore that leak—take action today. A small fix now can prevent bigger problems later, keeping your vehicle running smoothly and saving you money in the long run.

ziHenryDa 4 Pack Foam Replacement Gaskets compatible with Deluxe Food VS-12 Vacuum Sealer,Replacement Gaskets for Deluxe Food VS-12 Vacuum Sealer (13.5 * 1.76 * 0.36)
To save your time:Before purchasing, please pay attention to confirm whether your model is listed in the description…
As an affiliate, we earn on qualifying purchases.
As an affiliate, we earn on qualifying purchases.

Orion Motor Tech Coolant Pressure Tester Kit, 33pc Master Coolant Vacuum Refill Kit with 23 Radiator Adapters, Radiator Cooling System Pressure Tester Kit with Vacuum Pump Vacuum Purge & Refill Tool
Comprehensive Tool Set: Orion Motor Tech's 33 pcs coolant pressure tester kit includes 22 adapters, a universal adapter,…
As an affiliate, we earn on qualifying purchases.
As an affiliate, we earn on qualifying purchases.