To replace your vacuum’s brush roll, start by unplugging your cleaner for safety. Remove the bottom plate or cover, then carefully take out the old brush roll, checking for tangled hair or debris. Compare it with the new one to verify proper fit, then install the new roll, making sure it spins freely. Reattach the cover, plug in the vacuum, and run it to confirm everything works smoothly. Continue for detailed guidance to make the process even easier.
Key Takeaways
- Unplug the vacuum and remove the bottom cover or brush housing to access the brush roll.
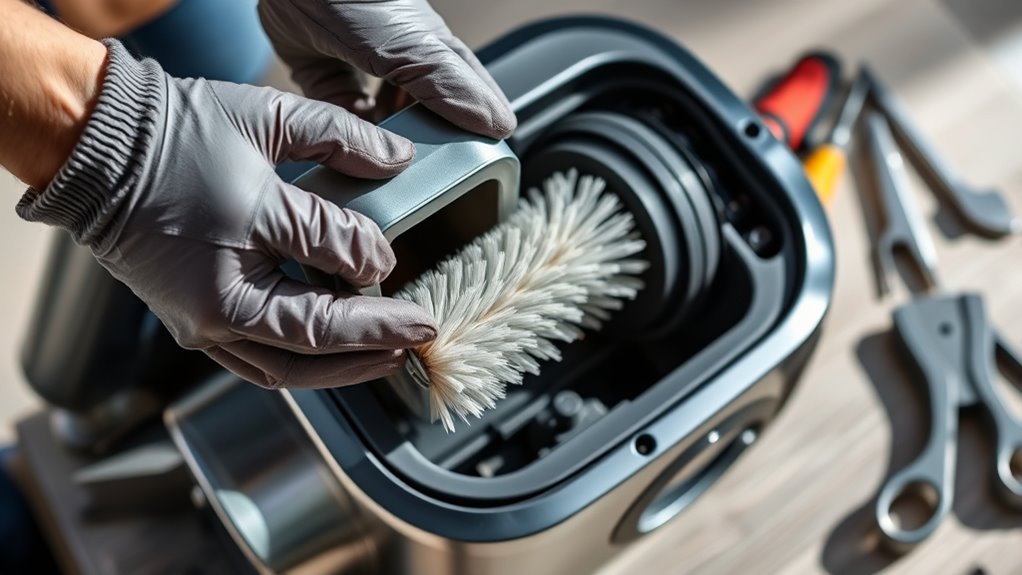
- Carefully extract the old brush roll, checking for tangled hair or debris, and inspect for damage.
- Clean the area thoroughly, removing any debris or hair wrapped around the axle or inside the housing.
- Align the new brush roll properly on the axles, making sure it spins freely without obstructions.
- Reattach the cover securely, plug in the vacuum, and test to ensure the brush roll spins smoothly during operation.
If your vacuum isn’t picking up dirt like it used to, it might be time to replace the brush roll. Over time, debris, hair, and fibers can cause the brush to become clogged or worn out, reducing its effectiveness. Regular vacuum maintenance is essential to keep it running smoothly, and replacing the brush roll is a straightforward way to improve your machine’s performance. Before diving into the replacement, it’s a good idea to troubleshoot common issues—like tangled hair or debris wrapped around the brush—to see if a simple cleaning solves the problem. If cleaning doesn’t help, then replacing the brush roll is your next step.
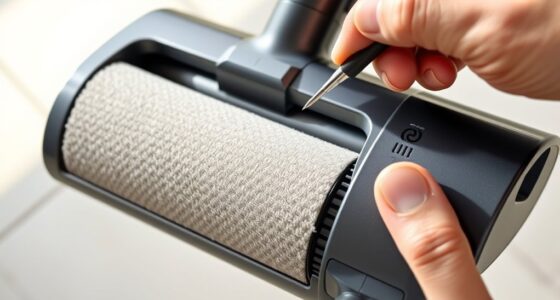
Start by unplugging your vacuum for safety. Remove the vacuum’s bottom plate or brush cover, which is usually held in place with screws or clips. Keep these screws handy so you can reassemble everything easily later. Once you access the brush roll, examine it closely. If it’s covered in hair, string, or other debris, cut away any tangles carefully with scissors, and pull off any hair wrapped around the axle. Sometimes, just cleaning the brush can restore some of its effectiveness, but if it’s visibly worn, cracked, or the bristles are flattened, replacing it is the best move. Additionally, understanding the importance of Volkswagen Tuning can help you appreciate how proper maintenance and upgrades keep machinery running optimally—similar principles apply to maintaining your vacuum.
When selecting a replacement, ensure you get the correct size and type for your vacuum model. Check your user manual or look for the model number on the existing brush roll. Installing the new brush is simple—align it properly with the axles and make sure it spins freely without obstruction. Reattach the cover or bottom plate and secure it with screws or clips. Before plugging the vacuum back in, do a quick test run on a small area to verify that the brush roll spins correctly and that the vacuum is functioning properly.
Frequently Asked Questions
How Often Should I Replace My Vacuum’s Brush Roll?
You might wonder how often you should replace your vacuum’s brush roll for proper vacuum maintenance. Typically, replacement frequency depends on usage and wear. Inspect it regularly—if it’s frayed, cracked, or tangled, it’s time for a replacement. Usually, replacing the brush roll every 6 to 12 months keeps your vacuum functioning at its best. Staying attentive to signs of wear ensures your vacuum maintains strong cleaning performance.
Can I Use Any Replacement Brush Roll for My Vacuum?
Think of your vacuum as a finely tuned orchestra, where each part must harmonize perfectly. You can’t just use any replacement brush roll; it’s like trying to fit a violin where a drum belongs. Always check vacuum compatibility and brush roll types before buying. Using the wrong one can hinder performance or damage your vacuum. Stick to manufacturer recommendations to guarantee smooth operation and long-lasting results.
What Tools Are Needed to Replace the Brush Roll?
To replace the brush roll, you’ll need basic tools like a screwdriver, usually Phillips or flat-head, depending on your vacuum model. Make certain you check tool compatibility with your vacuum to avoid damage. Having a pair of tweezers or pliers can help with small clips or screws. These tools make vacuum maintenance easier, helping you replace the brush roll effectively and keep your vacuum functioning at its best.
Is It Necessary to Unplug the Vacuum Before Replacing the Brush Roll?
You should always unplug the vacuum before replacing the brush roll to avoid electrical hazards. Think of it as a safety precaution to prevent accidental activation or shocks. Even if it seems disconnected, residual power might still pose a risk. Taking this step keeps you safe and ensures you won’t damage the vacuum’s motor or parts. Always prioritize safety precautions when working with electrical appliances to avoid unnecessary accidents.
How Do I Know if My Brush Roll Needs Replacement?
You’ll know your brush roll needs replacement if you notice damage like bent or broken bristles, or if it’s not spinning properly. Poor vacuum performance, such as reduced suction or tangled hair around the roll, also signals it’s time for a change. Damaged brush rolls can hinder cleaning and damage your vacuum, so inspecting it regularly helps maintain peak performance. Replace it promptly to keep your vacuum working efficiently.
Conclusion
Think of replacing your vacuum’s brush roll like tending a garden; with a little care and attention, you restore its vigor. Just as a gardener prunes for healthy growth, swapping out the brush roll keeps your vacuum running smoothly. Don’t hesitate to perform this simple task—it’s the secret to keeping your cleaning tool thriving. With each easy step, you’re nurturing your vacuum’s efficiency, ensuring it’s always ready to keep your home fresh and spotless.