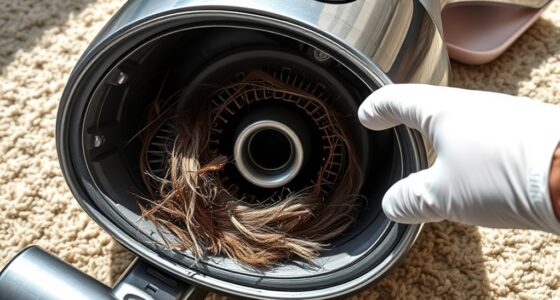

If your vacuum isn’t cleaning well, the belt might be worn or broken. Look for signs like reduced suction, brush roll not spinning, or hair and debris tangled around the brush area. Squeaking or grinding noises also indicate belt issues. You might notice slipping or cracks in the belt itself. Addressing these early prevents motor damage and keeps your vacuum running smoothly. Keep watching to discover how to spot these issues before they cause bigger problems.
Key Takeaways
- Belt shows visible signs of wear, cracks, or fraying upon inspection.
- You notice a decrease in suction power and poor carpet agitation.
- The brush roll isn’t spinning or spins intermittently during operation.
- Unusual noises like squeaking or grinding indicate belt slipping or damage.
- The belt appears loose, slack, or easily slips off the pulley.
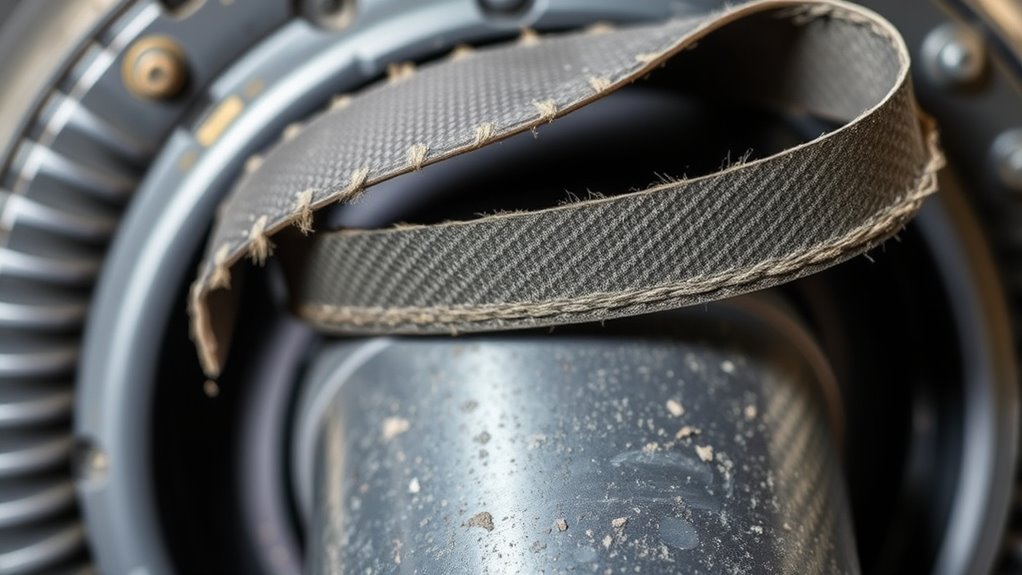
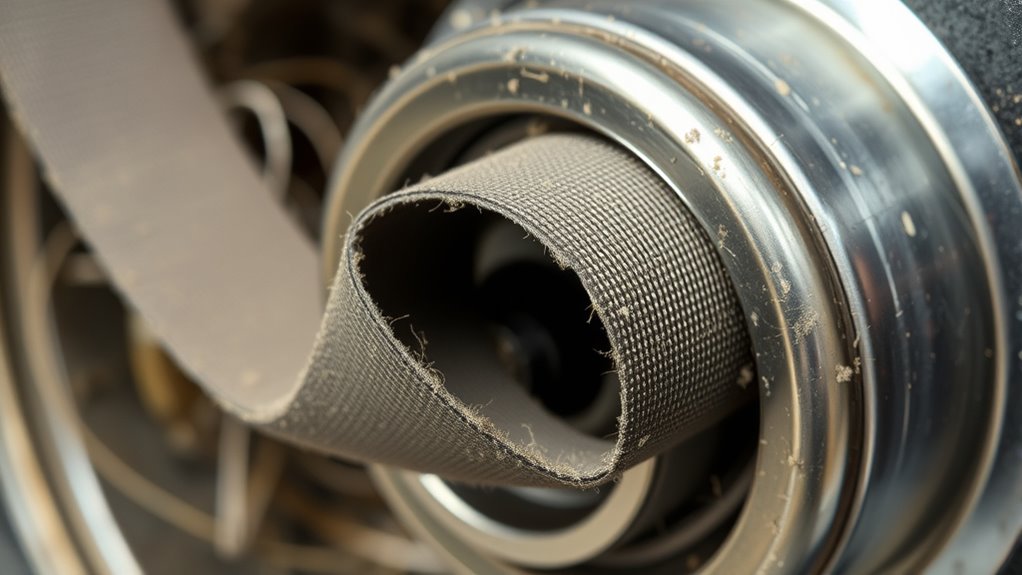
Your vacuum belt plays a essential role in keeping your cleaner running smoothly, but over time, it can wear out or break. When this happens, you’ll notice certain signs that indicate it’s time to replace the belt. One of the first things to watch for is a change in belt tension. If the belt becomes loose or slack, it won’t grip the brush roll properly, leading to inefficient cleaning. Conversely, if it’s overly tight, it can put unnecessary stress on the motor. Maintaining the correct belt tension is fundamental because it ensures the brush roll spins freely without causing motor strain. When the tension is off, your vacuum’s motor has to work harder to turn the brush, which can lead to overheating or premature motor failure. So, if you notice the brush isn’t spinning as it should, it’s likely due to belt tension issues or a worn-out belt. Regular inspection of the belt can help prevent motor burnout and keep your vacuum functioning optimally.
Another telltale sign is decreased suction power or poor agitation of your carpet or floor. When the belt slips or is broken, the brush roll won’t rotate properly, reducing the vacuum’s ability to lift dirt and debris effectively. You might see hair, threads, or other debris wrapped around the brush or tangled in the belt area. These obstructions can be caused by a worn or broken belt that no longer maintains proper contact with the motor and brush roll. If you observe this, it’s a good idea to check the belt for signs of wear, cracks, or fraying. A damaged belt can cause the motor to strain as it tries to turn the brush, which could eventually lead to motor burnout if left unaddressed.
Additionally, unusual noises during operation are often a sign that your vacuum belt needs replacing. Squeaking, slipping, or grinding sounds typically indicate a belt that’s either worn out or slipping off. These noises are not normal and suggest that the belt may be loose or damaged, putting additional stress on the motor. If you hear these sounds, it’s best to turn off your vacuum and inspect the belt and brush roll area. A worn or broken belt not only hampers your vacuum’s performance but also risks damaging other components if not replaced promptly.
Frequently Asked Questions
How Often Should I Check My Vacuum Belt for Wear?
You should check your vacuum belt regularly, ideally once every three to six months, depending on your belt material and usage. If you notice cracks, fraying, or slack, it’s time for a replacement. The replacement frequency varies with belt material—rubber belts may need replacing sooner than polyurethane ones. Regular checks help prevent loss of suction and guarantee your vacuum works efficiently, saving you time and effort in the long run.
Can a Worn Belt Affect Vacuum Suction Power?
Ever wonder if a worn belt could sabotage your vacuum’s suction? Absolutely! A loose or frayed belt can slip, making your vacuum less effective. That’s why belt inspection is essential for proper vacuum maintenance. When your vacuum starts to struggle, it’s a sign you need to check that belt. Keep it in top shape, or prepare for the dreaded “vacuum that sucks even less.”
Are There Different Belt Types for Various Vacuum Brands?
You might wonder if there are different belt types for various vacuum brands. Yes, belt compatibility varies, so you need brand-specific belts to guarantee proper fit and performance. Check your vacuum’s model number and manual to find the right type. Using the correct, brand-specific belts prevents issues like slipping or damage, helping your vacuum work efficiently. Always choose belts designed for your vacuum’s brand to maintain ideal suction and longevity.
What Tools Are Needed to Replace a Vacuum Belt?
For vacuum belt replacement, you’ll need basic tools like a screwdriver, pliers, and possibly a socket wrench. Start by unplugging your vacuum, then remove the vacuum cover using the screwdriver. Use pliers to carefully slide the old belt off the brush roll, and then loop the new belt into place. The tools needed for this process make replacing your vacuum belt straightforward, ensuring your vacuum runs smoothly again.
Is It Safe to Operate My Vacuum Without a Belt Temporarily?
You shouldn’t operate your vacuum without the belt for vacuum safety reasons. Removing the belt can cause damage to the vacuum’s motor or internal parts, and it may not clean effectively. For belt removal, always turn off and unplug your vacuum first. Running it without a belt can lead to further issues, so it’s best to replace the belt promptly to guarantee safe and efficient operation.
Conclusion
When you notice your vacuum isn’t performing like it used to, it’s a clear sign to check the belt. Catching issues early can save you from bigger headaches down the road. Think of your vacuum belt as the heartbeat of your cleaner—if it falters, everything else suffers. Don’t wait for things to fall apart; take action now. After all, a stitch in time saves nine, and a quick fix keeps your home spotless and running smoothly.