
Before disassembling a vacuum, unplug it completely and disconnect from the power source to avoid electrical risks. Gather essential tools like screwdrivers, pliers, and a container for small parts, and handle components with care to prevent damage. Be cautious around wiring and moving parts, and follow step-by-step instructions to avoid mistakes. Knowing these safety tips will help you proceed smoothly and successfully manage your vacuum repair—more detailed guidance awaits.
Key Takeaways
- Unplug the vacuum and disconnect from power before beginning disassembly.
- Gather appropriate tools like screwdrivers, pliers, and a container for small parts.
- Carefully remove covers and motor housing, avoiding damage to plastic clips and wiring.
- Handle belts and internal components gently, releasing tensioners and inspecting for wear.
- Reassemble in reverse order, ensuring all screws are secure and the vacuum functions properly afterward.
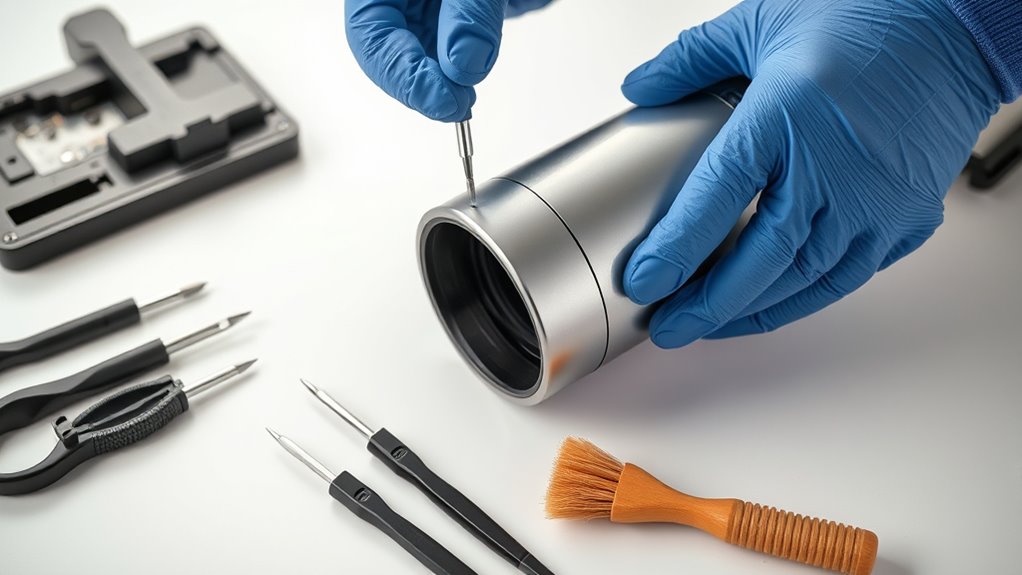
Disassembling a vacuum can be straightforward if you follow proper safety procedures. Before diving in, unplug the vacuum to prevent accidental activation, and if it’s corded, make sure the power source is completely disconnected. You’ll want to gather the right tools—screwdrivers, pliers, and possibly a wrench—so you’re prepared for different screws and fasteners. Having a container nearby to hold small parts prevents losing any essential components during reassembly.
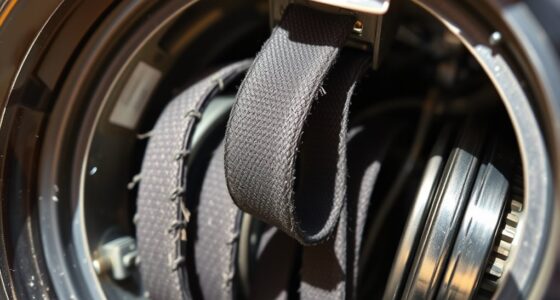
Start by removing the vacuum’s outer cover, which typically involves unscrewing clips or screws around the motor housing. Be gentle to avoid damaging plastic clips or cracking the housing. Once the cover is off, you’ll see the motor housing, which is the core component that powers the vacuum. When working around the motor housing, be cautious not to touch exposed wiring or moving parts. If the vacuum has a vacuum belt, it’s often located inside the motor housing or near the brush roll. Carefully remove the belt, noting how it’s positioned before removing it. This will help you install a new one correctly later.
Handling the vacuum belt requires patience. If it’s worn or broken, replace it with a compatible belt, making sure it’s tight enough to drive the brush roll but not so tight that it strains the motor. To remove the belt, release any tensioners or pulleys that hold it in place, and slide the belt off the motor pulley and brush roll. Inspect the belt for cracks or fraying—if it’s damaged, replace it promptly to restore your vacuum’s performance.
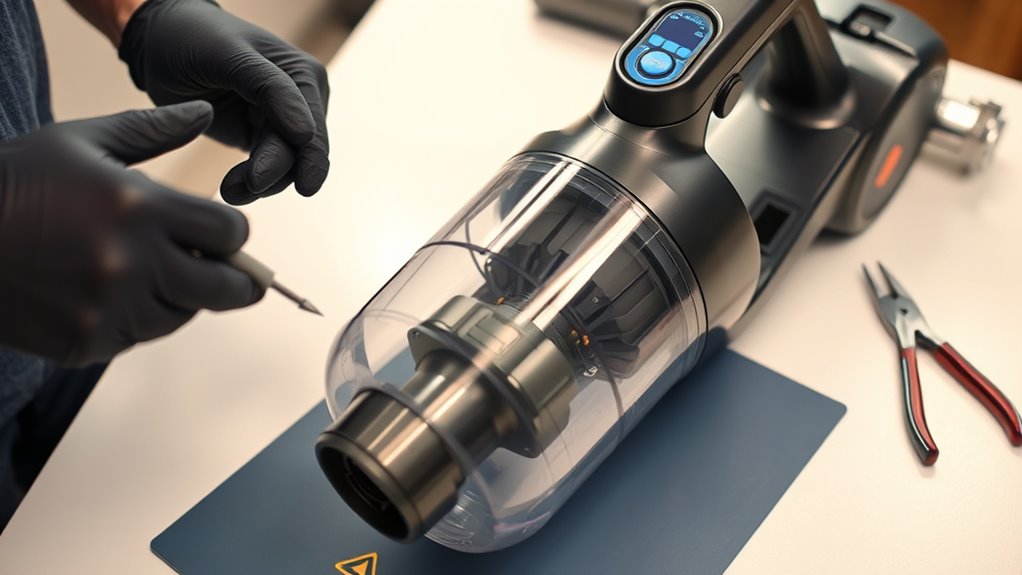
When working inside the motor housing, avoid touching the electrical contacts or wiring unnecessarily. If you need to disconnect wires, do so carefully, noting their positions for reassembly. Keep track of all screws and small parts, as losing any can complicate the process later. If you’re cleaning or replacing parts, remember to handle components with care. Dust and debris can accumulate inside, so use a soft brush or compressed air to clean out the motor housing and surrounding areas, but avoid forcing debris into sensitive parts. Additionally, considering the benefits of cleaning and maintenance, regularly inspecting your vacuum can extend its lifespan and improve performance.
Once you’ve completed your repairs or maintenance, reassemble by reversing your steps. Ensure the vacuum belt is properly positioned and tensioned before reattaching the cover. Double-check all screws and fasteners, then plug in the vacuum and test it to confirm everything works smoothly. Disassembling a vacuum may seem intricate, but with patience, the right tools, and attention to safety, you can do it efficiently and confidently.

Customized Screwdriver Set Compatible with Dyson V6 V7 V8 V10 V11 V12 V15 Vacuum Cleaner Maintenance and Cleaning Disassembly Tool Set
Applicable Models: This is a specially customized disassembly screwdriver set compatible with Dyson V6 V7 V8 V10 V11…
As an affiliate, we earn on qualifying purchases.
As an affiliate, we earn on qualifying purchases.
Frequently Asked Questions
Can I Disassemble My Vacuum Without Prior Experience?
You can attempt DIY repairs on your vacuum, but only if you follow proper safety precautions. If you’re inexperienced, it’s best to research the disassembly process thoroughly and use the right tools. Always unplug the vacuum first and handle parts carefully to avoid damage or injury. If you’re unsure, consider consulting a professional. Prioritize safety to prevent accidents and make certain of your vacuum’s longevity.
Are There Specific Tools Recommended for Different Vacuum Models?
Did you know that using the right tools can reduce disassembly time by up to 30%? For different vacuum models, it’s best to use specialized vacuum toolkits designed for your specific brand. These kits include screws, screwdrivers, and prying tools tailored for various models. Always follow model-specific instructions to avoid damage. Employing the proper tools not only makes the job easier but also ensures your vacuum stays in good condition.
How Do I Prevent Damaging Delicate Vacuum Parts During Disassembly?
To prevent damaging delicate vacuum parts, handle the vacuum brush gently and avoid forcing it out, especially around sealed compartments. Use a plastic pry tool instead of metal to gently lift components, reducing the risk of scratches or cracks. Carefully disconnect parts, ensuring you don’t pull on delicate areas. Taking your time and working slowly helps protect sensitive parts, maintaining your vacuum’s efficiency and extending its lifespan.
What Are Common Mistakes to Avoid When Taking Apart a Vacuum?
Did you know that over 60% of vacuum repairs involve improper disassembly? To avoid common mistakes, prioritize vacuum safety and follow disassembly tips carefully. Don’t force parts apart, as this can cause damage; use the right tools and gentle pressure. Remember to unplug the vacuum first, keep track of screws, and consult the manual if needed. These steps help prevent accidental damage and guarantee a smooth repair process.
Should I Seek Professional Help for Complex Vacuum Repairs?
You should definitely seek professional assistance for complex vacuum repairs. While DIY repairs work for simple fixes, complicated issues like motor or wiring problems can be risky if you’re not experienced. A professional guarantees safety, proper diagnosis, and quality repairs. Don’t push your luck—trust experts when needed, especially if your vacuum’s complexity exceeds basic troubleshooting. This way, you avoid damage and ensure your vacuum functions properly again.

Style 7/9/10 P/N 3031120 Replacement Belt For Bissell Vacuum Belt Fit Bissell Powerforce Helix Powerlifter Cleanview Swivel Rewind Pet Vacuum Cleaner Replace Parts 2031093 32074 3031123 2-Pack
PERFECT UNIVERSAL COMPATIBILITY:These 3031120 belt Compatibility With Perfectly fits Bissell style 7/9/10/12/14/16,Suitable for most Bissell vacuum cleaner models…
As an affiliate, we earn on qualifying purchases.
As an affiliate, we earn on qualifying purchases.
Conclusion
Remember, disassembling your vacuum can be safe and straightforward if you follow the right tools and precautions. Always unplug the appliance first and handle parts carefully. Did you know that over 70% of vacuum repairs are due to improper disassembly or maintenance? Taking your time and being cautious will save you money and extend your vacuum’s lifespan. Stay safe, and don’t rush—your cleaner will thank you for it!

FAITIO 8-in-1 Wire Stripper with Voltage Tester (12V-250V AC/DC), Wire Crimper Cutter for 10-18 AWG – Electrician Tool for Circuit Repair, Outlet Installation, HVAC & Automotive
8-IN-1 ELIMINATES TOOL SWITCHING: Combines wire stripping, cutting, crimping, twisting, pulling, scraping, pressing, and short-circuit testing into one…
As an affiliate, we earn on qualifying purchases.
As an affiliate, we earn on qualifying purchases.
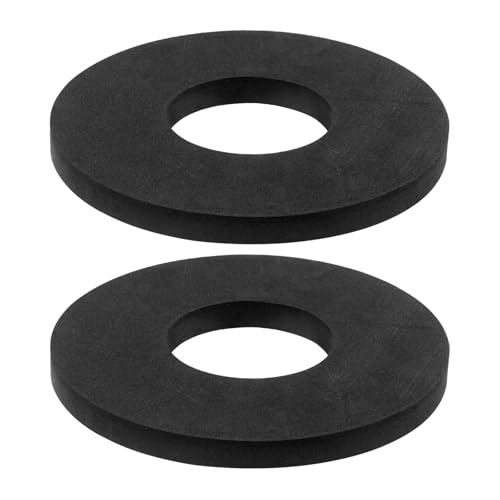
Motor Gasket 5.7" # 566 Compatible With Vacuum Motor,Blower Motor(2 Pack)
【Product Function】This motor gasket 5.7" # 566 is primarily used for tight connection between motors and vacuum housings…
As an affiliate, we earn on qualifying purchases.
As an affiliate, we earn on qualifying purchases.