To effectively use the crevice tool for corners and edges, start by evaluating the area for dust and debris. Attach the tool securely and maneuver slowly for precise cleaning. Angle it slightly for better contact and use short strokes to avoid pushing dirt further in. Don’t forget to check your progress and clean the tool regularly to maintain its performance. If you want to maximize your cleaning results, there’s more to explore on technique and maintenance.
Key Takeaways
- Assess corners and edges for dust and debris before using the crevice tool for targeted cleaning.
- Attach the crevice tool securely to your vacuum for optimal performance and maneuverability.
- Angle the crevice tool slightly for better access and make short, deliberate strokes when cleaning.
- Focus on stubborn spots by revisiting them with multiple passes for thorough dirt removal.
- Regularly clean and maintain the crevice tool to ensure its effectiveness and prolong its lifespan.

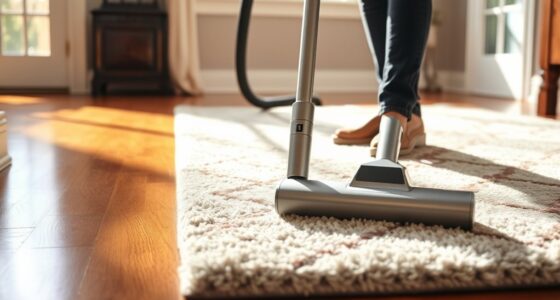
When you tackle cleaning those hard-to-reach corners and edges, the crevice tool becomes your best friend. This handy attachment is designed specifically for tight space cleaning, allowing you to target areas that regular vacuum heads simply can’t reach. Whether it’s the gap between your couch and the wall or the edges of your kitchen cabinets, the crevice tool lets you get in there and remove dust and dirt that’s accumulated over time.
To effectively use the crevice tool, start by evaluating the area you want to clean. Look for dust bunnies, crumbs, or other debris that have settled into those hidden spots. Once you’ve identified the trouble areas, it’s time to put your tool to work. Attach it to your vacuum, and make sure you have a good grip. You’ll want to maneuver the tool slowly and carefully to ensure you’re picking up everything in that tight space.
Evaluate the area, identify hidden debris, and maneuver the crevice tool slowly for effective cleaning in tight spaces.
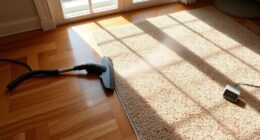
Here’s a solid edge detail tip: angle the crevice tool slightly as you push it into the corners. This technique allows the tool to make better contact with the surfaces, increasing your chances of snagging all the dirt. You might also want to use short, deliberate strokes instead of long sweeping motions. This focused approach will help you effectively remove debris without pushing it further into the corner.
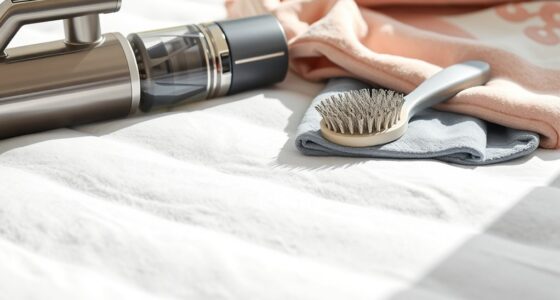
Make sure to take breaks and check your progress, too. Sometimes, dirt can be stubborn, and if it’s not coming up as easily as you’d like, don’t hesitate to go over the area a couple of times. If you’re dealing with particularly tough grime, consider using a cloth or brush to loosen it up before going in with the crevice tool. Additionally, keeping your cleaning tools, including the crevice tool, as optimized as a Volkswagen TDI tuning can enhance their effectiveness in maintaining your home.
Don’t forget to clean the crevice tool itself regularly, as it can accumulate dust and debris from your cleaning sessions. A quick rinse in warm, soapy water will do the trick and keep it functioning at its best.
Frequently Asked Questions
Can the Crevice Tool Be Used on Upholstery?
Yes, you can use the crevice tool on upholstery! It’s great for upholstery cleaning as it helps you reach those tricky spots between cushions and along seams. By using this tool, you can effectively remove dust and debris, which is essential for fabric maintenance. Just make sure to test it on a small area first to verify it won’t damage the fabric. Keep your furniture looking fresh with this handy attachment!
How Do I Clean the Crevice Tool After Use?
After you’ve tackled those hard-to-reach spots in your car, it’s time to clean the crevice tool. Start by tapping it gently against a surface to dislodge debris. Then, rinse it under warm water and use a soft brush to scrub away any stuck dirt. For maintenance routines, consider wiping it down with a damp cloth and drying it thoroughly. These cleaning tips will keep your tool in top shape for your next cleaning session!
Is the Crevice Tool Compatible With All Vacuum Brands?
The crevice tool isn’t universally compatible with all vacuum brands. Vacuum compatibility varies, and accessory interchangeability often depends on the specific model of your vacuum. To guarantee it fits, check the manufacturer’s specifications or consult your user manual. Some brands offer universal tools, while others require brand-specific accessories. If you’re unsure, reaching out to the manufacturer can help you find the right tool for your vacuum.
What Materials Are Best for Crevice Tool Construction?
The best materials for crevice tool construction include high-quality plastics and metal, as they offer excellent material durability. When choosing a crevice tool, consider the design options available; a well-designed tool will enhance your cleaning efficiency. Look for options that are sturdy yet lightweight, making them easy to maneuver in tight spaces. Ultimately, selecting the right material and design guarantees your crevice tool lasts longer and performs better.
How Often Should I Replace My Crevice Tool?
You should replace your crevice tool every six months to a year, depending on usage. Regular tool maintenance is key; if you notice wear or damage, it’s time for a replacement. Keeping an eye on its condition ensures effective cleaning. Remember, a well-maintained tool performs better, lasts longer, and saves you time. So, check it often, clean it regularly, and don’t hesitate to replace it when necessary for peak performance!
Conclusion
In summary, don’t underestimate the power of the crevice tool! With its precise performance, you can easily eliminate dust and debris from those tricky corners and edges. So, grab your trusty tool and get to work—your home will shine brighter than ever! By tackling those tight spaces with tenacity, you’ll transform your cleaning routine into a satisfying success. Remember, a little effort goes a long way in creating a cleaner, cozier environment for you and your loved ones.