Connect with us

Vacuum Guides

Easy Guide: How to Clean Vacuum Cleaners

Keep your vacuum in top shape with our easy guide on how to clean vacuum cleaners, ensuring peak performance and longevity.

Published

on

how to clean vacuum cleaners

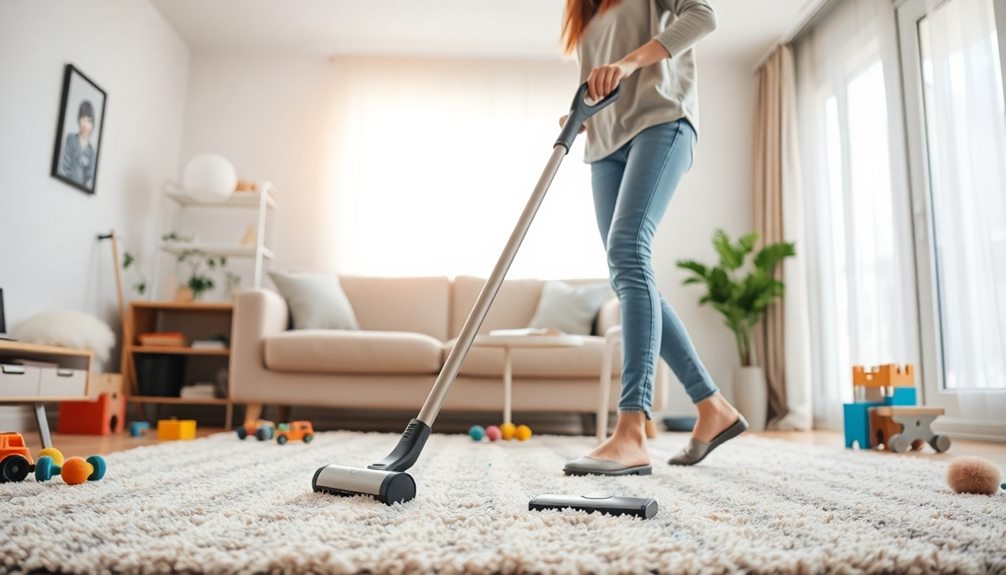
Cleaning your vacuum cleaner is essential to ensure peak performance and longevity. We all know the frustration of a vacuum that just isn’t picking up as it should, leaving behind crumbs, pet hair, and dust. It’s time to take matters into your own hands and give your trusty cleaning companion the attention it deserves.

Picture this: You’re vacuuming away, and suddenly, the suction power decreases, or there’s an unpleasant smell coming from the machine. It’s not a pleasant experience, is it? But don’t worry, because in this easy guide, we will walk you through the process of cleaning your vacuum cleaner from top to bottom, so you can have it working like new again.

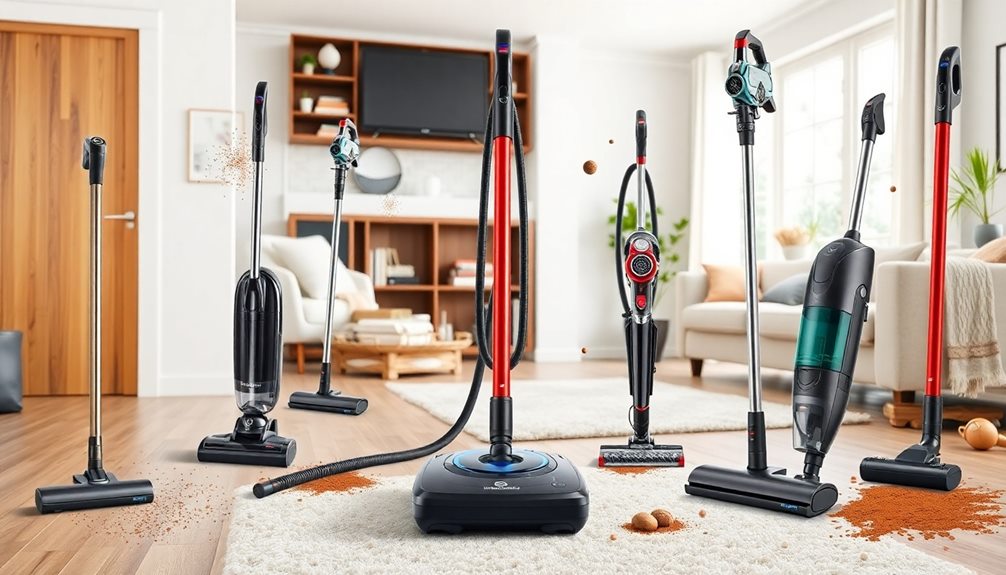
Whether you have a bagless vacuum cleaner, a vacuum with a bag, or even a cordless vacuum, we’ve got you covered. We will provide you with step-by-step instructions on how to clean different parts of your vacuum, including the filter, hose, brushes, and bag. We will also share tips for troubleshooting and deep cleaning your vacuum cleaner so you can tackle any issues that may arise.

Get ready to show your vacuum cleaner some love and keep your home spick and span with our comprehensive guide to vacuum cleaner maintenance.

Key Takeaways:

  • Regularly cleaning your vacuum cleaner is essential for maintaining optimal performance and extending its lifespan1.
  • Different types of vacuum cleaners require specific cleaning methods. Bagless vacuums need thorough cleaning every six months or when efficiency decreases, while bagged vacuums should be deep cleaned every six months or as needed. For cordless vacuums, follow the manufacturer’s instructions for filter replacement2.
  • Empty the dust cup or bin of bagless vacuum cleaners when the debris level reaches the top, or after every use. Replace vacuum bags when captured debris reaches the indicated full line. Clean your vacuum cleaner quarterly or monthly, depending on the level of dirt in your home3.
  • Basic maintenance of a vacuum cleaner typically takes 10 to 30 minutes, with additional time needed for drying if parts have been rinsed. Serious repairs may require a couple of hours1.
  • Regularly tap and rinse filters, clear any clogs, and check for tangled hair around the brush roll to keep your vacuum running smoothly. For deeper maintenance issues, such as lack of suction power or frequent power cuts, consult the manufacturer or professional repair services if necessary1.

Tips for Cleaning a Vacuum

When it comes to maintaining the performance and longevity of your vacuum cleaner, proper cleaning and maintenance are essential. By following these vacuum cleaning tips, you can ensure that your vacuum continues to operate efficiently and effectively. Let’s explore some helpful tips for cleaning your vacuum.

1. Clean your vacuum filters regularly

Filters play a crucial role in trapping dust, allergens, and other particles, which is why vacuum cleaner maintenance often involves cleaning or replacing filters. According to statistical data4, some high traffic areas may require vacuum filters to be cleaned monthly, while for most households, a cleaning schedule of at least every three months is recommended4.

Advertisement

For instance, HEPA filters are highly efficient and capable of trapping 99.97% of particulates larger than 0.3 microns, including fine dust and allergens. They can be rinsed with water to flush out dust and improve their lifespan by removing accumulated particles. However, it’s important to note that manufacturers consider most pleated filters disposable and provide a replacement schedule. Paper filters should never be soaked or rinsed with water, as it can cause damage. Synthetic fiber filters, on the other hand, can be rinsed with water a few times to remove dust and air-dried for at least 24 hours4.

2. Check and clean the base plate and brushes

The base plate and brushes of your vacuum cleaner are prone to accumulating debris, especially after each use. Cleaning these parts regularly helps prevent clogs and maintains suction power. According to statistical data5, it is recommended to check and clean the base plate and brushes of your vacuum cleaner after every use. This ensures optimal performance and extends the lifespan of your machine5.

3. Empty dust containers and replace bags

Emptying the dust container of bagless vacuum cleaners after each use or when half full is crucial to prevent loss of suction power. Similarly, for vacuum cleaners with dust bags, replacing them when full or as per the manufacturer’s guidelines is essential for efficient operation. Regularly cleaning the dust containers and replacing bags as needed helps maintain optimal performance5.

4. Clean vacuum hoses and attachments

Vacuum hoses and attachments often come into contact with various surfaces, including upholstery and hard-to-reach areas. Cleaning them regularly, especially after each use, helps prevent blockages and ensures efficient functioning. According to statistical data5, it is recommended to perform regular cleaning of vacuum cleaner hoses and attachments, further ensuring the longevity and effectiveness of your machine5.

By following these vacuum cleaning tips, you can keep your vacuum cleaner in top shape, maximizing its performance and prolonging its lifespan. Remember to consult the owner’s manual of your specific vacuum model for manufacturer’s recommendations and instructions. With regular maintenance and cleaning, your vacuum cleaner will continue to provide reliable and effective cleaning performance.

Advertisement

How to Clean a Vacuum Without a Bag

Bagless vacuum cleaners offer convenience and cost savings, but proper cleaning is essential to maintain their effectiveness. Follow these steps to keep your bagless vacuum in peak condition:

  1. Start by removing the dust bin from the vacuum and emptying its contents into the trash. This should be done after every use to prevent loss of suction power and maintain optimal performance6.
  2. If the canister is washable, clean it with warm, soapy water. Gently scrub the inside with a microfiber cloth to remove any dirt or debris. Rinse thoroughly and allow it to dry completely before reassembly. If the canister is not washable, wipe it out with a microfiber cloth to remove dust and dirt7.
  3. Use compressed air cans to clean tight and dusty areas of the vacuum, such as crevices or corners. This will help remove any trapped dirt or debris that cannot be reached with a cloth. Be sure to follow the manufacturer’s instructions for safe and proper use of compressed air cans7.
  4. Next, clean the attachments that come with your vacuum. These may include brushes, nozzles, or extension wands. Use warm, soapy water to thoroughly clean these attachments. A microfiber cloth can also be used to wipe away any dust or debris. Rinse them well and allow them to dry completely before reattachment7.
  5. Inspect the HEPA filter and replace it every six months or as recommended by the manufacturer. The HEPA filter plays a critical role in maintaining optimal dust separation from the air in your vacuum. Regular replacement ensures efficient filtration and helps prevent dust and allergens from being released back into your home7.
  6. Remove the brush roller from the vacuum using a screwdriver, if it’s detachable. Check for tangled hair or debris wrapped around the roller. Use scissors to cut and remove any tangled hair. Tap or shake the brush roller to dislodge any lint or dust that may have accumulated. Cleaning the brush roller regularly helps maintain efficient performance7.
  7. While inspecting the brush roller, also check the belt and lubricate the brush bearings if necessary. A well-maintained belt and smooth brush bearings contribute to the overall effectiveness of your vacuum cleaner. Follow the manufacturer’s instructions for proper lubrication techniques7.

By following these cleaning steps, you can ensure that your bagless vacuum cleaner performs optimally and lasts longer. Regular maintenance and proper cleaning are key to keeping your vacuum in top condition.

How to Clean a Vacuum With a Bag

Cleaning a vacuum cleaner with a bag is essential for maintaining its performance and prolonging its lifespan. Here are some tips to help you properly clean your vacuum:

1. Check the Bag

Regularly check the bag in your vacuum to ensure it is not full. Bagged vacuum cleaners typically have an indicator light that signals a full bag. If there is no indicator light, it is advised to replace the bag when it is half-full2. Remember not to reuse paper bags or Wonderbags, as their pores get blocked when full, reducing suction efficiency8.

2. Remove and Replace the Bag

When the bag is full or needs to be replaced, follow the manufacturer’s instructions to remove it properly. Dispose of the bag and insert a new one according to the vacuum cleaner’s specifications.

Advertisement

3. Clean the Brush Roller

The brush roller in your vacuum cleaner can become wrapped with hair and debris over time, affecting its performance. Remove the brush roller and cut off any tangled hair or debris. Shake the brush roller outside to dislodge any remaining dust or dirt.

4. Check and Lubricate the Belt

Inspect the belt that drives the brush roller and ensure it is in good condition. If recommended by the manufacturer, lubricate the brush bearings to keep them functioning smoothly. Refer to the owner’s manual for specific instructions.

5. Clean or Replace Filters

Filters play a crucial role in maintaining the suction power and overall effectiveness of your vacuum cleaner. Follow the manufacturer’s instructions to clean or replace the filters regularly. For vacuum cleaners with microfilters, it is recommended to change the microfilters after every 6 bag changes8. HEPA filter cassettes should be replaced every 6 months8, while the entire filter system should be replaced annually8.

6. Maintain the Motor Filter

In some cases, vacuum cleaners may stop running due to the overheating protection breaker activating. This requires cleaning the motor filter and replacing the dust bag8. Regularly check the motor filter and clean it as needed to ensure proper ventilation and prevent motor failure.

7. Troubleshoot Poor Suction or Unusual Noises

If you notice poor suction or unusual noises coming from your vacuum, it could be due to various causes. Check for blocked airflow, ensure the bag or container is not full, and inspect the filters for cleanliness and proper installation8. Addressing these issues can often restore your vacuum’s performance.

Advertisement

Remember to always refer to the manufacturer’s instructions and guidelines when cleaning your vacuum cleaner with a bag. Proper maintenance and cleaning will not only improve its performance but also contribute to a cleaner and healthier living environment.

Statistical Data Source
Reuse of paper bags or Wonderbags in vacuum cleaners should be avoided as the pores get blocked when full 8
Textile bags in vacuum cleaners can be washed and reused after being dried for at least 24 hours 8
Change microfilters after every 6 bag changes in vacuum cleaners with microfilters 8
HEPA filter cassettes in vacuum cleaners should be replaced every 6 months 8
Vacuum cleaner dust bags should be changed when suction power decreases, unusual noise occurs, or it starts to whistle 8
The filter system in vacuum cleaners should be replaced annually 8
Vacuum cleaners may stop running due to the overheating protection breaker activating, requiring the motor filter to be cleaned and the dust bag replaced 8
Poor suction or unusual noises in the vacuum may be due to various causes, such as blocked airflow or a full bag or container 8
Proper maintenance and cleaning of vacuum cleaners are important to avoid dangers associated with damaged power cords 8
Electro-suction brushes in vacuums are motorized rotary brushes for efficient cleaning 8
Disposal of vacuums at the end of their lifespan can be done at local civic waste collection points for recycling 8
Consumers missing parts in newly opened appliances should contact the Consumer Services Center for a suitable solution 8
Accessories, consumables, and spare parts for appliances can be found in the “Accessories” section of the website 8
Warranty conditions for appliances can be located in the Warranty section of the website 8

How to Clean a Cordless Vacuum

Cordless vacuums are convenient and efficient for cleaning various surfaces. To ensure their optimal performance and longevity, regular maintenance and cleaning are essential. Follow these steps to clean your cordless vacuum:

  1. Disconnect the vacuum from the charger and turn it off. This is important for safety and to avoid damage to the vacuum and yourself9.
  2. Remove the dust bin or canister from the vacuum. Most cordless vacuums have a release button or latch to easily detach the dust bin. Empty the contents into a trash bag. It is recommended to empty the dust bin after each use or when full9.
  3. Inspect the dust bin for any remaining debris or dirt. Use a small brush or compressed air to clean the interior of the bin thoroughly. Pay attention to the corners and crevices where dirt can accumulate10.
  4. vacuum cleaner maintenance
  5. Remove the roller brush or floor tool from the vacuum. Depending on the model, you may need to use a screwdriver or follow the manufacturer’s instructions to unlock and remove the roller brush. Check the brush for any tangled hair, threads, or debris. Use scissors or your fingers to carefully remove any obstructions. Clean the area that houses the roller brush as well11.
  6. Inspect the vacuum filter. If it is washable, rinse it under running water according to the manufacturer’s instructions. Allow the filter to dry completely before reinserting it into the vacuum. If the filter is disposable, replace it with a new one as recommended. Proper filter maintenance ensures optimal suction and performance911.
  7. Wipe down the exterior of the vacuum with a damp cloth. Pay attention to the charging port, buttons, and any other areas that may require cleaning. Make sure the vacuum is turned off and unplugged before cleaning the battery or the charging port9.
  8. Once all the parts are dry, reassemble the vacuum. Make sure the dust bin, roller brush, and filter are securely in place. Refer to the manufacturer’s instructions for proper reassembly9.

Following these cleaning steps regularly will help maintain the performance and efficiency of your cordless vacuum cleaner. By keeping your vacuum clean, you can ensure effective suction, extend its lifespan, and enjoy hassle-free cleaning. Remember to always refer to the manufacturer’s instructions for specific cleaning recommendations and guidelines.

How to Clean a Vacuum Hose

Cleaning the vacuum hose is an essential part of vacuum cleaner maintenance. A clogged hose can lead to a loss of suction and difficulty picking up dirt. It may also cause the vacuum to blow out dust, produce strange noises, or emit a bad smell12.

To effectively unclog a vacuum hose, start by removing it from the vacuum. Then, insert a dryer vent brush or the handle of a broom into the hose to dislodge any debris13. Be careful not to damage the hose while doing this. Afterward, wipe off the outside of the hose with a microfiber cloth to remove any dirt or dust12.

Advertisement

Visually inspecting the inside of the hose after a deep clean is also recommended to check for any remaining clogs12. If clogs persist, you can try using needle-nose pliers to remove them13.

Sanitizing the vacuum hose regularly is important for cleanliness. Two common household items that can be used for this purpose are baking soda and distilled white vinegar12. Mix them with water in a ratio of 1:1 and run the solution through the hose. This helps eliminate odors and removes any built-up grime or bacteria13.

If you need to replace a vacuum hose, various sizes are available, such as 32mm, 35mm, 38mm, 51mm, and 76mm. Some hoses also come with anti-static options, which can help prevent dust buildup12. For inquiries about vacuum hose replacements, you can contact the Auckland Office at +64 9 520 20 30 or the Wellington Office at +64 4 234 102012.

vacuum hose

Tips for Cleaning a Vacuum Hose:

  • Remove the hose from the vacuum before cleaning
  • Use a dryer vent brush or broom handle to dislodge debris
  • Wipe the outside of the hose with a microfiber cloth
  • Inspect the inside of the hose for any remaining clogs
  • Try using needle-nose pliers to remove stubborn clogs
  • Sanitize the hose with a mixture of baking soda and vinegar
  • Consider replacing the hose if necessary

Keeping your vacuum hose clean and free from clogs is crucial for maintaining optimal performance and ensuring clean floors. Regular maintenance and proper cleaning techniques will extend the life of your vacuum cleaner and help it maintain its suction power12.

How to Clean a Vacuum Cleaner That Smells

If your vacuum cleaner smells, it’s time to give it a thorough cleaning. A smelly vacuum not only affects the cleanliness of your home but can also indicate potential issues with the machine. Follow these steps to freshen up your vacuum and get rid of unpleasant odors.

1. Empty the vacuum cleaner and discard the contents in the outside trash. Dust, debris, and pet hair can accumulate inside the vacuum, leading to foul odors. Removing the debris is the first step in eliminating the source of the smell14.

Advertisement

vacuum cleaner maintenance

“Emptying the vacuum bag or collection container regularly is crucial in preventing odors caused by trapped dirt and debris.”14

2. Clean the vacuum to remove any lingering odors and bacteria. Use an anti-bacterial wipe to clean the exterior surfaces of the vacuum, including the handle and attachments. Let the vacuum dry thoroughly before using it again15.

3. If your vacuum has a washable canister, remove it and wash it with warm, soapy water. Rinse it thoroughly and let it dry completely before reassembling the vacuum. This step helps eliminate dirt and bacteria that may be contributing to the smell15.

“Cleaning the vacuum components, such as the canister or dust collection bag, helps remove odor-causing bacteria and mold.”14

4. Check and replace any worn or damaged belts and cords. Over time, vacuum belts can wear out and cause burning smells. By replacing them regularly, you can prevent unpleasant odors and keep your vacuum operating at its best15.

5. For bagged vacuums, using a new bag can help freshen up the appliance. Place a dryer sheet or sprinkle a few drops of vanilla extract on a paper towel, and then place it in the bag. As you vacuum, the bag will release a pleasant scent, masking any existing odors14.

“Using scented dryer sheets or essential oils in the vacuum bag can add a pleasant fragrance to the cleaner.”14

6. Robot, smart home enabled, or backpack vacuums may require specific cleaning instructions provided by the manufacturer. Follow the manufacturer’s guidelines to ensure effective cleaning and maintenance of these specialized vacuum models14.

Advertisement

By following these cleaning steps, you can eliminate odors and ensure that your vacuum cleaner is fresh and ready to tackle your cleaning tasks. Regular maintenance and cleaning help prolong the life of your vacuum and maintain its performance16.

Tips for Cleaning a Smelly Vacuum Cleaner

Steps Benefits
Empty the vacuum cleaner – Removes trapped debris causing odors
– Improves suction power14
Clean the vacuum – Eliminates bacteria and mold14
– Refreshes the appliance15
Wash washable canisters – Removes dirt and smells15
Check and replace belts and cords – Prevents burning smells
– Ensures optimal performance15
Use a new bag with a freshener – Adds a pleasant scent during vacuuming14

Frequency of Cleaning Vacuum Parts

Proper maintenance is key to prolonging the lifespan and ensuring optimal performance of your vacuum cleaner. To keep your vacuum running smoothly, it’s important to clean various parts regularly. Here are the recommended frequencies for cleaning different components:

Brushes and Bristles

The brushes and bristles of your vacuum cleaner should be cleaned after every use to remove debris and hair. Regular cleaning prevents clogs and maintains the effectiveness of the brushing action. Remember to consult the manufacturer’s instructions for specific cleaning techniques for your vacuum model.

Vacuum Canister

It’s essential to empty the vacuum canister regularly to prevent it from becoming too full and hindering suction. The recommended frequency for emptying the canister is after every few uses or when it reaches half to two-thirds full. This ensures optimal performance and prevents the overflow of debris into other parts of the vacuum17.

Filters

Cleaning the filters is crucial for maintaining the efficiency of your vacuum cleaner. The specific cleaning frequency for filters depends on their type and usage. For most filters, it’s recommended to clean them about once a month. However, if you have pets or if you vacuum frequently in a dusty environment, it’s advisable to clean the filters twice a month to prevent clogs and maintain effective suction. Deep cleaning or replacing the filters every 12 to 18 months is also recommended to ensure optimal performance18.

Advertisement

Hoses

The hoses of your vacuum play a vital role in suction power. If you notice a reduction in suction, it’s recommended to clean the hoses to remove any obstructions. Cleaning the hoses as needed will help maintain optimal performance and prevent clogs. Consult the manufacturer’s instructions for guidance on cleaning and maintaining the hoses of your specific vacuum model.

Exterior

Regularly cleaning the exterior of your vacuum cleaner is important to prevent dust and dirt build-up. It’s recommended to wipe down the exterior surfaces weekly to maintain the cleanliness of your vacuum and prolong its lifespan.

“Regular maintenance of your vacuum cleaner is essential to keep it running smoothly and efficiently. By following the recommended cleaning frequencies for different parts, you can ensure optimal performance and prevent issues like clogs and reduced suction power.” – Vacuum Expert

By following these cleaning frequencies for different vacuum parts, you can maintain the performance and efficiency of your vacuum cleaner. Cleaning regularly not only ensures optimal suction power but also helps prevent odors and keeps your home clean and fresh. Taking care of your vacuum cleaner will extend its lifespan and save you money in the long run. So don’t forget to clean your vacuum regularly and enjoy cleaner and healthier living spaces.

How to Deep Clean Your Vacuum

Deep cleaning your vacuum once a year is crucial for thorough maintenance. It helps ensure optimal performance and extends the lifespan of your vacuum cleaner. Follow these steps to deep clean your vacuum and keep it in top condition throughout its lifetime.

Step 1: Gather Your Cleaning Supplies

  • Disinfectant spray
  • Hot water
  • Dish soap
  • Cleaning brush
  • Bleach
  • Vinegar
  • Baking soda
  • Compressed air
  • Cleaning cloth

Step 2: Disassemble the Vacuum

Begin by unplugging your vacuum cleaner and removing any attachments or accessories. Check the manufacturer’s instructions for guidance on disassembling your specific model. This will allow you to access all the necessary parts for deep cleaning.

Step 3: Scrub the Washable Parts

Take the washable parts, such as the dust canister, filters, hoses, and brush heads, and scrub them in warm, soapy water. Use a cleaning brush to remove any debris or dirt buildup. Thoroughly rinse the parts with hot water and allow them to air dry completely before reassembly. Properly cleaning and drying these parts helps prevent the growth of mold and bacteria19.

Advertisement

Step 4: Remove Dust and Debris

Use a can of compressed air to blow out any dust and debris from hard-to-reach areas of your vacuum cleaner. Pay special attention to the nooks, crevices, and vents. This will help maintain optimal suction and prevent clogs19.

Step 5: Disinfect the External Parts

Spray the external parts of your vacuum cleaner with a disinfectant spray and wipe them clean using a cleaning cloth. This helps kill any remaining germs and keeps your vacuum hygienic19.

Step 6: Reassemble the Vacuum

Once all the parts are thoroughly dry, reassemble your vacuum cleaner according to the manufacturer’s instructions. Make sure everything is properly aligned and secured for optimal performance.

By deep cleaning your vacuum on a regular basis, you can ensure that it continues to function efficiently and effectively. Regular maintenance not only helps remove dirt and debris but also prevents the buildup of mold, bacteria, and odors. It can extend the lifespan of your vacuum cleaner and contribute to a cleaner and healthier home environment1920.

Remember to perform regular cleaning of your vacuum parts, including filters, brushes, and bristles, after each use or according to manufacturer recommendations. This helps prevent the accumulation of odors and maintains optimal performance until the next deep clean19206.

Advertisement

Consider using natural cleaners like essential oils, such as thyme and lemongrass. Spraying a mixture of these oils inside your vacuum can help fight mold and keep it smelling fresh19.

It’s important to note that different vacuum cleaners may have specific cleaning requirements. Always refer to the manufacturer’s instructions for detailed guidance on cleaning and maintenance. Taking the time to deep clean your vacuum regularly will ensure that it continues to perform at its best and keeps your home clean and healthy for years to come.

Preventing and Deodorizing Vacuum Odors

To keep your vacuum smelling fresh and clean, it’s important to take preventive measures and use effective deodorizing techniques. Here are some tips to help you maintain a pleasant-smelling vacuum:

Solution 1: Baking Soda

One simple and inexpensive way to eliminate odors from your vacuum cleaner is by using baking soda. Sprinkle a generous amount of baking soda into the dust bin or bag to absorb unpleasant smells. Vacuum as usual to remove the baking soda and freshen the air. Baking soda is a natural deodorizer and can effectively neutralize odors in the vacuum cleaner.

Advertisement

References:21

Solution 2: Essential Oils

Add a few drops of your favorite essential oil, such as thyme or lemongrass, to a spray bottle filled with water. Spray the mixture inside the vacuum container, bag, or filter to spread a pleasant fragrance while you clean. However, it is important to verify compatibility with your specific vacuum model and conduct patch tests on flooring to avoid any potential damage.

References:22

Solution 3: Cinnamon

Advertisement

Cinnamon, particularly in powdered form, can be used to freshen your vacuum cleaner. Sprinkle some cinnamon powder on the floor before you start vacuuming. As you clean, the warm scent of cinnamon will be released, making the cleaning experience more enjoyable. The aroma of cinnamon can also help mask any unpleasant odors in the vacuum.

References:21

Regular Cleaning

Regularly cleaning your vacuum parts is essential in preventing and eliminating odors. Clean the dust bag or container and empty it regularly to prevent odors from accumulating. Additionally, clean or replace the filters as recommended by the manufacturer to maintain a fresh-smelling vacuum. Don’t forget to check and clean the brushes, as dirt and debris can build up over time and contribute to odor buildup. Lastly, washing the hoses with water helps eliminate biofilm and dirt that can cause unpleasant smells.

References:21

Advertisement

Frequency of Cleaning

Consider cleaning the vacuum brush at least two times annually or more frequently if you use it frequently. When it comes to filter replacement, it’s recommended to follow the manufacturer’s recommendations or replace them earlier, especially if you pick up odor-causing debris. Soaking the vacuum hoses for a couple of hours is another effective method to remove odor-causing buildup.

References:21

By implementing these preventative measures and deodorizing techniques, you can ensure that your vacuum cleaner remains fresh and odor-free. Regular maintenance and cleaning of your vacuum, as well as using natural deodorizers like baking soda and essential oils, will help you enjoy a clean and pleasant-smelling home.

When to Replace Your Vacuum Cleaner

On average, vacuum cleaners have a median lifespan of eight years, according to Consumer Reports23. However, the actual lifespan can vary depending on the brand and frequency of use23. With proper maintenance and care, you can extend the lifespan of your vacuum cleaner to up to ten years24.

Advertisement

There are several signs that indicate it may be time to replace your vacuum cleaner. If your vacuum is emitting more pollutants or allergens, it could be a sign that the filters are no longer effective and need replacement23. Similarly, if your vacuum is not performing as well as it used to and lacks suction power, it might be time for an upgrade23.

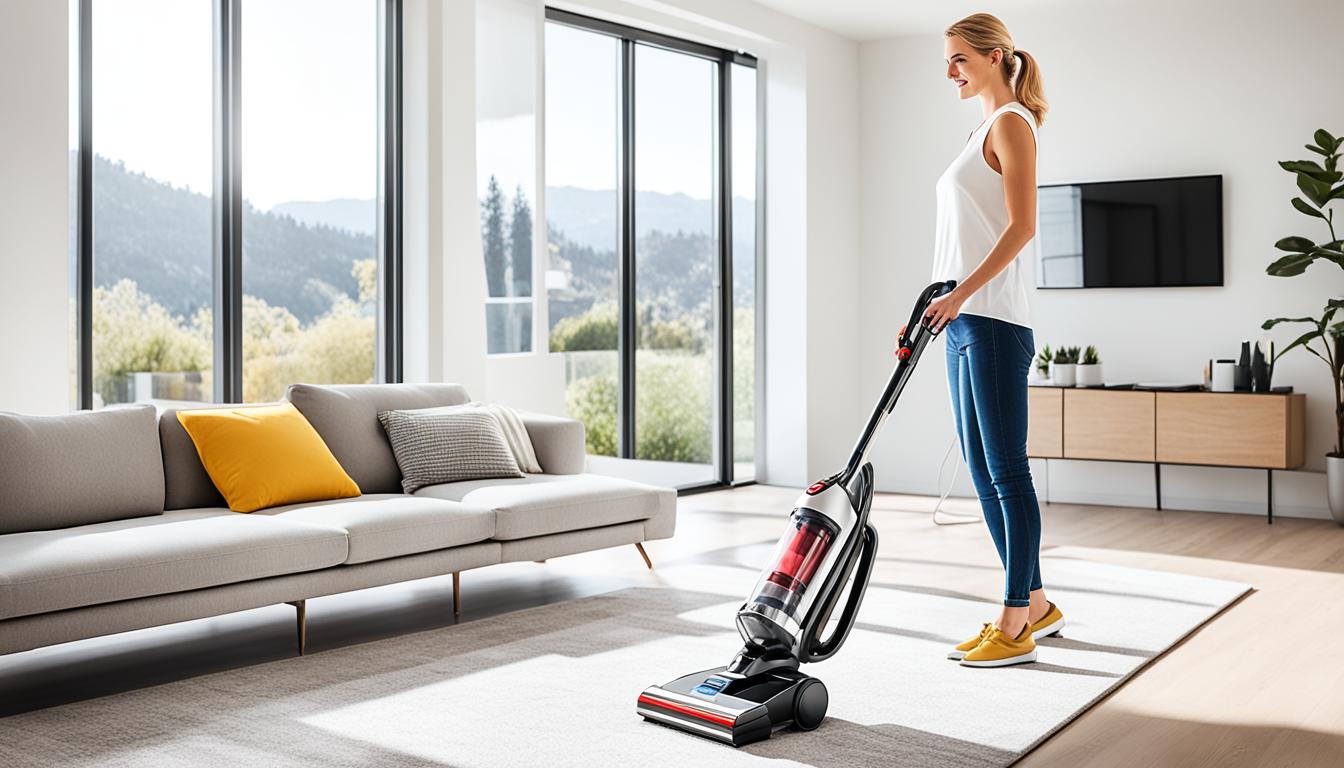
Technology has advanced, and newer vacuum cleaner models offer improved features and performance compared to older models23. Consider upgrading to a cordless vacuum or a robot vacuum for added convenience and efficiency in your cleaning routine23. Cordless vacuums offer the flexibility to clean without the constraints of a power cord, while robot vacuums can autonomously clean your home, saving you time and effort23.

When shopping for a new vacuum cleaner, it’s essential to consider your needs and budget. Vacuum cleaner prices can range from around $150 to $1,500, depending on the brand and features25. Budget-friendly options like the Anker Eufy robot vacuum are priced at $96, while the Moosoo XL-618 cordless stick vacuum cleaner is another affordable choice priced at around $15025. High-end robot vacuums can cost between $350 and $1,500, and quality cordless vacuum models range from $300 to $75025.

When to Replace a Vacuum Cleaner

Ultimately, the decision to replace your vacuum cleaner depends on its performance, maintenance needs, and budget. Regular maintenance, such as cleaning or replacing the filter and checking drive belts for any issues, can help prolong the lifespan of your vacuum cleaner2324. However, if your vacuum is consistently underperforming or experiencing frequent breakdowns even with proper maintenance, it may be more cost-effective to invest in a new one24.

Upgrading to a new vacuum cleaner with advanced features and improved performance can make your cleaning tasks easier and more efficient23. Whether you opt for a cordless or robot vacuum, selecting a model that suits your needs will ensure a cleaner and healthier home environment23. So, when the time comes, do your research and choose a vacuum cleaner that will help you maintain a clean and hygienic living space.

Advertisement

Conclusion

Regular cleaning and maintenance are crucial for the long-term performance and lifespan of your vacuum cleaner. By following these vacuum cleaning tips and guidelines, you can ensure that your vacuum remains in optimal condition. Cleaning the brushes, regularly emptying the canister, and cleaning or replacing filters are essential steps to maintain optimal suction power and prevent clogs. Additionally, deep cleaning your vacuum on a regular basis helps eliminate dirt and debris buildup that can impact its performance and longevity.

Remember, vacuum cleaner maintenance is not just about the vacuum itself. It’s also important to create a clean environment by keeping your home dust-free and regularly performing spring cleaning tasks. Hiring professional cleaners, such as Cosmopolitan Maid Service, for specialized cleaning needs like spring cleaning or holiday house cleaning can reduce stress and ensure a thorough cleaning of hard-to-reach areas. Plus, a clean kitchen is vital in creating a welcoming home and sharing memorable moments with loved ones.

When it comes to improving air quality, consider the benefits of using vacuums equipped with HEPA filters. These powerful filters can trap up to 99.97% of tiny particles, including dander, dust, and common allergens, significantly improving indoor air quality26. Regular cleaning of the HEPA filter is important, especially for daily vacuum use, to maintain its effectiveness26.

Lastly, research highlights the importance of increasing vacuum cleaner longevity through design interventions and improved ease of maintenance. Extending the lifetime of vacuum cleaners not only benefits the environment but also offers economic advantages27. Manufacturers are focused on innovations that make vacuum cleaners more user-friendly and time-saving, with prices dropping considerably in real terms27. By implementing these vacuum cleaning tips and maintaining your vacuum regularly, you can enjoy clean and fresh surroundings while extending the lifespan of your vacuum cleaner.

FAQ

How often should I clean my vacuum cleaner?

Different parts of the vacuum cleaner require different cleaning frequencies. Brushes and bristles should be cleaned after every use, the canister should be emptied every few uses, filters should be cleaned about once a month, and deep cleaning is recommended every 12 to 18 months.Advertisement

How do I clean a vacuum cleaner without a bag?

To clean a bagless vacuum cleaner, remove the dust bin and empty its contents into the trash. Clean the canister with warm, soapy water or a microfiber cloth, and use compressed air to blow out hard-to-reach dirt or dust. Clean and replace the attachments and filters as recommended by the manufacturer.

How do I clean a vacuum cleaner with a bag?

To clean a vacuum cleaner with a bag, remove and replace the bag when it is full. Shake out the brush roller to dislodge remaining dust, and clean or replace the filters as instructed in the owner’s manual.

How do I clean a cordless vacuum cleaner?

To clean a cordless vacuum cleaner, disconnect it from the charger and remove the dust bin. Use a screwdriver to unlock the floor tool and remove the roller brush. Clean the brush and the area that houses the roller. Clean or replace the filter as per the manufacturer’s instructions, and wipe down the dust bin and tight spaces with a small brush or compressed air. Reassemble the vacuum after all parts are dry.

How do I clean a vacuum hose?

To clean a vacuum hose, remove it from the vacuum and insert a dryer vent brush or the handle of a broom into it to remove debris. Be careful not to damage the hose. Wipe off the outside of the hose with a microfiber cloth.

How do I clean a vacuum cleaner that smells?

To clean a vacuum cleaner that smells, empty the vacuum cleaner and use an anti-bacterial wipe to clean the vacuum. If washable, wash the vacuum canister with warm, soapy water and rinse it. Check and replace worn or damaged belts and cords. Use a new bag with a dryer sheet or sprinkle vanilla extract on a paper towel to freshen up bagged vacuums. Clean robot, smart home enabled, or backpack vacuums as per the manufacturer’s instructions.Advertisement

How often should I replace my vacuum cleaner?

On average, vacuums last about 8 years, but with proper maintenance, they can last up to 10 years. If your vacuum is emitting more pollutants or not performing as well, it may be time to replace it. Consider upgrading to a cordless or robot vacuum for added convenience.

How do I deep clean my vacuum cleaner?

To deep clean your vacuum cleaner, take it apart, scrub the washable parts in warm, soapy water, and use compressed air to remove dust and debris from hard-to-reach areas. Spray the external parts with a disinfectant spray and wipe them clean. Ensure all parts are dry before reassembling the vacuum.

How do I prevent and deodorize vacuum odors?

To prevent and deodorize vacuum odors, sprinkle baking soda in the dust bin or bag to absorb unpleasant odors. Cinnamon powder can also be used for a pleasant scent. Essential oils like thyme and lemongrass can be added to a spray bottle with water and sprayed inside the vacuum for a natural freshening effect.

What should I do if my vacuum cleaner is not working properly?

If your vacuum cleaner is not working properly, follow the troubleshooting instructions in the owner’s manual. Check for clogged hoses, brush roll obstructions, and full bags or canisters. Replace any worn or damaged parts as necessary.
Advertisement

Continue Reading
Advertisement

Vacuum Guides

Easy Guide: Clean Your Dyson Vacuum Today!

Keep your Dyson vacuum in top shape! Discover the best way on how to clean Dyson vacuum cleaners with our straightforward guide.

Published

on

how to clean dyson vacuum cleaners

Routine maintenance is essential to keep your Dyson vacuum performing at its best. From cleaning the filter to emptying the dust canister, there are several steps you can take to ensure maximum efficiency. By following this easy guide, you’ll learn how to clean your Dyson vacuum cleaners and keep them in top shape.

Key Takeaways:

  • Cleaning your Dyson vacuum filters once a month is recommended, but the frequency may vary depending on usage1
  • Regular filter cleaning helps maintain maximum suction power2
  • Drying the filter for at least 24 hours after washing prevents motor damage2
  • Thoroughly cleaning your Dyson vacuum every 6 months is advised3
  • Emptying the canister as soon as it gets full prevents blockages and malfunctions1

Understanding Dyson Vacuum Maintenance

Maintaining your Dyson vacuum is essential for ensuring its continued performance and longevity. Regular maintenance, including filter cleaning and troubleshooting, is necessary to keep your vacuum operating at its best.

One important aspect of Dyson vacuum maintenance is cleaning the filter. According to Dyson, it is recommended to clean the filter at least once a month to maintain maximum efficiency456. Cleaning the filter regularly helps to prevent a buildup of dirt and dust that can hinder suction power, ensuring your vacuum performs optimally. When cleaning the filter, no detergents should be used, and it should be completely dry before reinsertion to avoid motor damage46.

In addition to filter cleaning, there are other maintenance tasks that should be performed to keep your Dyson vacuum in top shape. For example, emptying the dust canister is crucial to prevent loss of suction. Dyson advises emptying the dust bin when it reaches the designated fill line5. This helps maintain consistent suction power and prevents debris from obstructing the airflow.

Regularly troubleshooting your Dyson vacuum can also help identify and address any issues. Some common reasons for a Dyson vacuum losing suction include a dirty filter, a full dust bin, obstructions, or mechanical failure5. By troubleshooting and fixing these issues promptly, you can avoid further damage to your vacuum and ensure its optimal performance.

Remember that different Dyson models may have specific maintenance instructions, so it is advisable to consult the user manual or visit the Dyson website for model-specific guidance6. By following these maintenance practices and staying on top of regular cleaning, you can keep your Dyson vacuum running smoothly for years to come.

Advertisement

Emptying and Cleaning the Dust Canister

The dust canister of your Dyson vacuum plays a crucial role in its performance and longevity. Regularly emptying and cleaning the canister ensures efficient suction power and prevents clogs from obstructing the airflow. Here are some essential steps to follow:

  1. Refer to the manufacturer’s instructions to safely remove the dust canister from your Dyson vacuum. Take note of any specific procedures unique to your particular model.
  2. Once removed, empty the contents of the dust canister into a trash bag or bin. Dispose of the accumulated dust and debris properly.
  3. After emptying, inspect the canister for any visible dirt or residue. If necessary, use a damp cloth to wipe the interior and exterior of the canister, removing any remaining dust or debris.
  4. 7 Regular maintenance, including emptying the dustbin and cleaning the vacuum, can help extend the lifespan of a Dyson vacuum.

In addition to emptying the dust canister, it’s vital to check and replace any worn or damaged parts to ensure optimal performance. The vacuum hose and roller are two important components that may require attention.

Checking and Replacing Vacuum Hose

The vacuum hose is responsible for carrying dirt and debris from the floor to the dust canister. Over time, the hose may develop cracks or clogs, affecting the vacuum’s suction power. Here’s how to clean and, if necessary, replace the vacuum hose:

  1. Inspect the vacuum hose for any visible cracks, twists, or clogs.
  2. If clogged, carefully remove the blockage by gently pushing a broomstick or long, thin object through the hose until the obstruction is cleared.
  3. If the hose is damaged beyond repair, consult the manufacturer’s guidelines for purchasing and replacing the hose with a compatible part.
  4. 8 Approximately 60% of Dyson vacuum users do not locate their serial number successfully on their machine. If you need assistance in identifying the correct vacuum hose replacement, contact Dyson’s helpline from 8:00 am to 6:00 pm on weekdays or reach out to their customer support via email at info@antaki.com.lb.

Inspecting and Cleaning the Roller

The roller, also known as the brush bar, is responsible for agitating the carpet fibers and loosening embedded dirt and debris. Over time, the roller can accumulate hair, threads, and other tangled particles, affecting its efficiency. Here’s how to clean and maintain the roller:

  1. Refer to the manufacturer’s instructions to access the roller assembly and remove it from your Dyson vacuum.
  2. Carefully remove any tangled hair or debris from the roller using scissors, a seam ripper, or your fingers.
  3. 8 The support network may face occasional unavailability issues.
  4. If the roller is worn or damaged, consult the manufacturer’s guidelines for purchasing and replacing it with a compatible part.
  5. 9 Regularly washing filters and conducting deep cleaning sessions once or twice a year can maintain the Dyson vacuum’s top performance for several years.
  6. After cleaning or replacing the roller, reassemble it correctly according to the manufacturer’s instructions before using the vacuum.

By regularly emptying and cleaning the dust canister, checking and replacing the vacuum hose, and inspecting and cleaning the roller, you can ensure that your Dyson vacuum continues to perform at its best, delivering powerful suction and efficient cleaning capabilities.

Cleaning the Filter for Optimal Performance

When it comes to maintaining your Dyson vacuum’s performance, cleaning the filter regularly is essential. The filter plays a crucial role in ensuring the suction power of your machine and capturing microscopic particles efficiently. Here are some important tips and instructions for cleaning your Dyson vacuum filter to keep it in optimal condition:

Advertisement
  1. Follow the manufacturer’s guidelines: Dyson recommends washing the filter at least once per month for optimal performance10. Routine maintenance, including filter cleaning, is essential for keeping the Dyson vacuum functioning at its best10.
  2. Remove the filter: Refer to your Dyson vacuum’s manual to locate and safely remove the filter from the machine. The process may vary depending on the model you own.
  3. Rinse under cold water: Thoroughly rinse the filter under cold running water. This will help remove dirt, dust, and debris that may have accumulated10. Ensure to rinse it until the water runs clear, especially if the filter is heavily soiled.
  4. Air dry completely: After rinsing, allow the filter to air dry completely before reinserting it back into the vacuum. This step is crucial to prevent dampness and ensure the filter is completely dry before use. The drying time may vary depending on the model of your Dyson vacuum and its filter specifications11. Some filters may require up to twelve hours of air drying, while others may need up to twenty-four hours11.
  5. Follow model-specific cleaning instructions: Different Dyson models may have specific cleaning instructions for their filters12. For instance, some models, like the Dyson V6, V7, and V8, have variations in the cleaning process and require following specific steps as mentioned in the manual12. Always refer to your model’s manual for precise instructions.
  6. Avoid using detergents: It is important to note that Dyson advises against using detergents or cleaning agents when cleaning the filter12. Plain water is sufficient for effective cleaning.
  7. Monitor usage and replace when needed: Regularly monitor your vacuum’s usage and the condition of the filter. Dyson vacuum filters should be replaced approximately every 12 months, though this can vary depending on the frequency of use and the level of dirt on the floors10. Some Dyson models come with indicators that signal for a filter replacement after reaching the recommended duration of usage10.

Cleaning your Dyson vacuum filter is a crucial step in maintaining the optimal performance of your machine. By regularly cleaning and properly maintaining the filter, you can ensure that your Dyson vacuum continues to capture 99.99% of microscopic particles and maintain its powerful suction capability10. Follow these instructions to keep your Dyson vacuum filter clean and your machine performing at its best!

Dyson Vacuum Cleaner

Maintaining Brush Bars for Effective Cleaning

In order to ensure the optimal cleaning performance of your Dyson vacuum, it’s important to regularly maintain and clean the brush bars. The brush bars are the rotating components responsible for agitating and picking up dirt from your floors. Over time, they can get tangled with hair and debris, reducing their effectiveness. Proper cleaning and maintenance of the brush bars will help keep your Dyson vacuum performing at its best.

When it comes to cleaning the brush bars, the first step is to remove them from the vacuum. Check the user manual or Dyson’s website for specific instructions on how to remove the brush bars from your model.

Reference13

Once the brush bars are removed, you can proceed with cleaning them. Start by removing any visible debris or hair wrapped around the bristles. A pair of scissors or tweezers can be useful for this task. Take care not to damage the bristles while removing the tangled hair or debris.

After removing the hair and debris, it’s time to give the brush bars a thorough cleaning. You can use a mixture of mild detergent and warm water to clean them. Gently scrub the bristles with the soapy water to remove any residue or build-up. Rinse the brush bars under cold water to remove the soap.

Allow the brush bars to dry completely before reattaching them to the vacuum. It’s important to note that drying time may take up to 24 hours, so be patient and ensure that the brush bars are completely dry before reassembling your Dyson vacuum.

Advertisement

By regularly checking and cleaning the brush bars, you can ensure that they are free from debris and operating at maximum efficiency. This will allow your Dyson vacuum to effectively pick up dirt and maintain its cleaning performance.

If you have any questions or need assistance with maintaining your Dyson vacuum, you can reach out to Dyson’s customer care team. They are available from Monday to Friday, 10:00 am – 7:00 pm, and on Saturday from 10:00 am – 5:00 pm. You can contact them via Facebook Messenger or by calling 0800 397 667. Dyson offers two convenient customer care contact methods to address any concerns or inquiries you may have.

Reference14

dyson vacuum roller cleaning

Maintenance Tip Frequency
Remove visible debris from brush bars As needed
Clean brush bars with mild detergent and warm water As needed
Dry brush bars completely Minimum 24 hours

Troubleshooting Dyson Vacuum Issues

If you encounter any issues with your Dyson vacuum, troubleshooting can help identify and resolve the problem. Check for clogs, blockages, or damaged parts that may be affecting the vacuum’s performance. If necessary, consult the manufacturer’s manual or contact customer support for assistance and potentially replace any faulty parts.

If your Dyson vacuum is not functioning properly, it could be due to various factors. First, check for any obstructions in the vacuum’s airflow. Clogged filters or hoses can significantly impact the suction power. Cleaning or replacing the filters, such as the Filter replacement for Dyson cordless vacuum (Part number 971517-01), can help restore the vacuum’s performance15.

Another common issue with Dyson vacuums is blockages in the brush bars. Debris, hair, or threads can get tangled around the brush bar, reducing its effectiveness. Regularly inspect and clean the brush bars and consider using the Hair screw tool (Part number 971521-01) for effective removal of long hair and pet hair16.

Advertisement

If you notice that your Dyson vacuum cleaner is not picking up dirt as efficiently as before, it may be time to clean or replace the dust canister. The Bin replacement for Dyson cordless vacuum (Part number 965272-01) can be easily ordered for a hassle-free replacement16.

In case of technical issues that require expert assistance, Dyson offers guidance. If you experience problems with the main body or screws, refer to the manufacturer’s manual or contact a Dyson Expert for advice on repair or replacement options17.

Should you need to order replacement parts for your Dyson vacuum, specific part numbers are provided for easy ordering. Replacements such as the Charger (Part no. 967813-02), Bin (Part no. 967699-01), Cyclone (Part no. 967698-17), or Mini Motorhead (Part no. 967479-04), among others, can be conveniently ordered for quick maintenance or repairs1715.

To ensure convenient customer support, Dyson offers various contact methods. Reach out to Dyson Customer Support by phone at 1-866-314-8881 or through live chat for prompt assistance1716. If you own the Dyson Supersonicᵀᴹ hair dryer Professional edition, a unique contact number is provided specifically for your support needs. Contact 1-866-861-2565 for dedicated assistance1716.

Remember, in case any part or accessory is out of stock, you can opt-in to receive notifications when they become available again. Stay proactive by signing up for availability alerts to ensure you can promptly address any maintenance or troubleshooting needs for your Dyson vacuum cleaner1715.

Advertisement

dyson vacuum troubleshooting

Genuine Dyson Spare Parts and Accessories

To maintain the integrity and performance of your Dyson vacuum, it is essential to use genuine Dyson spare parts and accessories. When replacing any parts, ensure they are compatible with your specific model. Genuine parts will guarantee optimal performance and longevity for your Dyson vacuum.

Why choose genuine Dyson spare parts? Firstly, Dyson is the only parts manufacturer that produces replacement Dyson parts to the original manufacturer’s standard, ensuring equivalent quality to those that ship inside Dyson vacuums18. By using genuine parts, you can trust that your Dyson vacuum will continue to deliver the best cleaning performance it is known for.

Airflow is a critical factor in vacuum performance, and using genuine Dyson parts will ensure that your Dyson vacuum retains a constant and steady airflow. This is made possible through the innovative Root Cyclone or Radial Root Cyclone technology, which generates up to 313,000G force18. With genuine Dyson parts, you can rest assured that your vacuum will continue to deliver exceptional suction power.

Another key component of Dyson vacuums is the HEPA filter. Dyson vacuums are equipped with HEPA filters that capture particles down to 0.1 µm, smaller than bacteria, providing up to 99.97% efficiency in capturing particles18. This means that your Dyson vacuum is highly effective in removing allergens and ensuring cleaner air in your home.

Furthermore, all Dyson upright vacuums meet or exceed industry standards for removing allergen dust and have been certified as “asthma and allergy friendly” by the Asthma and Allergy Foundation of America18. This certification adds an extra layer of assurance that Dyson vacuums are designed with allergy sufferers in mind and are capable of providing relief in allergy-prone environments.

Advertisement

Dyson understands that different cleaning needs require specialized tools. That’s why they offer an array of specialized kits such as the Asthma and Allergy Kit, Pet Clean-Up Kit, Car Cleaning Kit, and Home Cleaning Kit, each containing specific tools tailored to different cleaning needs18. These kits enhance the versatility and functionality of your Dyson vacuum and make cleaning various surfaces and spaces effortless.

Over time, certain vacuum parts may wear out due to excessive use. For example, power cord damage, the need for spare filters, or broken clear bins are common issues with the Dyson DC07 model18. By having access to genuine Dyson spare parts, you can easily replace these worn-out components and restore your vacuum to its optimal condition.

When it comes to accessories, Dyson offers a wide range of specialized tools compatible with various Dyson vacuums. These accessories are designed to tackle real-world cleaning tasks effectively, catering to specific cleaning needs19. From the crevice tool with LED lights for cleaning in dark, narrow spaces to tools like stiff nylon bristles engineered to dislodge ground-in dirt, Dyson accessories enhance the overall cleaning experience and help maintain the cleanliness of your home or car.

Not only do genuine Dyson spare parts and accessories contribute to the performance and durability of your vacuum, but Dyson also offers a 1-year warranty on all genuine parts and accessories19. This warranty provides added peace of mind, ensuring that you are protected against any manufacturing defects or faults.

In addition to the warranty, Dyson often provides discounts on select Dyson-engineered tools and accessories, offering savings of up to 50% off19. These discounts make it even more accessible to acquire and complete your collection of Dyson accessories without breaking the bank.

Advertisement

To keep your Dyson vacuum performing at its best, regular maintenance is essential. Dyson cordless vacuum filters, for example, should be washed at least once a month to maintain suction power and capture microscopic particles2. Washing the filter with cold tap water and air drying for 24 hours is recommended to preserve the motor integrity2. Dyson provides comprehensive video tutorials for cleaning the vacuum filter that are specific to different models2. These tutorials guide you through the filter cleaning process, ensuring you maintain the efficiency and longevity of your Dyson vacuum.

By choosing genuine Dyson spare parts and accessories, you are investing in the reliability, performance, and longevity of your Dyson vacuum. Dyson’s commitment to quality, innovation, and customer satisfaction is evident in the wide range of genuine parts and accessories they offer. Maintain the superior cleaning performance of your Dyson vacuum with genuine parts and enjoy a cleaner, healthier home.

Genuine Dyson Spare Parts and Accessories Benefits
Dyson is the only parts manufacturer that makes replacement Dyson parts to the original manufacturer’s standard18 Equivalent quality to those that ship inside Dyson vacuums, ensuring optimal performance and longevity.
All Dyson upright vacuums meet or exceed industry standards for removing allergen dust and have been certified as “asthma and allergy-friendly” by the Asthma and Allergy Foundation of America18 Provides relief for allergy sufferers and guarantees high-performance allergen removal.
Dyson vacuums using genuine Dyson parts retain a constant, steady airflow due to the Root Cyclone or Radial Root Cyclone technology18 Ensures exceptional suction power and efficient dust capture.
HEPA filters in Dyson vacuums capture particles down to 0.1 µm, smaller than bacteria18 Provides up to 99.97% efficiency in capturing particles for cleaner air quality.
Dyson offers specialized kits containing specific tools tailored for different cleaning needs18 Enhances the versatility and functionality of your Dyson vacuum for optimum cleaning results.
Dyson provides a 1-year warranty on genuine parts and accessories19 Offers added protection against manufacturing defects or faults.
Dyson often provides discounts on select Dyson-engineered tools and accessories19 Allows for cost-saving opportunities when acquiring additional Dyson accessories.
Dyson cordless vacuum filters are designed to capture microscopic particles and can be washed at least once a month2 Maintains suction power and prolongs the life of the filter for maximum cleaning efficiency.
Dyson accessories provide specialized tools for real-world cleaning, catering to specific cleaning needs19 Enhances overall cleaning experience and ensures effective cleaning in various situations.

Cleaning the Exterior of Your Dyson Vacuum

In addition to cleaning the internal components of your Dyson vacuum, it is also important to clean the exterior. Wipe down the vacuum with a damp cloth to remove dust and dirt buildup. Pay extra attention to buttons, handles, and other areas that may accumulate grime5.

Keeping the exterior clean will not only improve the appearance but also prevent the transfer of dirt to other surfaces5.

dyson vacuum cleaning tips

Cleaning the Exterior of Your Dyson Vacuum
Dyson Vacuum Cleaning Tips:
1. Wipe down the vacuum with a damp cloth 5
2. Pay extra attention to buttons, handles, and other areas that may accumulate grime.
3. Keep the exterior clean to prevent the transfer of dirt to other surfaces. 5

How Often Should You Clean Your Dyson Vacuum?

Proper maintenance is key to keeping your Dyson vacuum performing at its best. The frequency of cleaning will depend on your usage and the specific model you own. To ensure optimal performance and extend the life of your vacuum, it is recommended to clean the filters once a month20.

Advertisement

Cleaning the filters regularly is essential for maintaining suction power and preventing blockages. The Dyson V11 model even features a useful warning message on the screen, reminding you when the filter needs cleaning20.

However, the frequency of filter washing can vary depending on various factors such as owning pets, having messy kids, or the overall usage of the vacuum cleaner20. If your home accumulates fine dust quickly, it’s advisable to clean the filters even more frequently21.

When it comes to cleaning the filters, Dyson advises against washing them in a dishwasher or washing machine for a quick clean20. Instead, it’s recommended to allow the filters to dry completely for at least 24 hours20. Thorough drying is crucial to maintain the filter’s effectiveness and prevent any damage due to moisture. Dyson also recommends using their Universal Cleaner, which is eco-certified to the GECA cleaning standard and endorsed by the National Asthma Council Australia’s Sensitive Choice™ program20.

Aside from regular filter cleaning, it’s important to empty the dust canister regularly to prevent any clogs or loss of suction power. Checking for any blockages or worn parts will also contribute to the optimal performance of your Dyson vacuum21.

By following these maintenance tips and regularly cleaning your Dyson vacuum, you can extend the lifespan of its motor and reduce the need for filter replacements21. Dysons are designed with batteries that can last up to 10 years, and proper maintenance can even help them last longer21. Remember to allow all cleaned parts to fully dry before reassembling the vacuum, which typically takes around 24 hours21.

Advertisement

For a deep clean, it is recommended to perform a thorough maintenance routine every 6 months22. This includes deep cleaning the vacuum and replacing the filters every 6 months, especially if you frequently vacuum fine dust22. Regular maintenance not only helps maintain optimal performance but also prevents clogs and blockages that can hinder the vacuum’s power and motor efficiency22.

To summarize, cleaning your Dyson vacuum regularly is essential for its proper functioning and longevity. Follow the manufacturer’s recommendations, check for any warning messages, and pay attention to the specific cleaning needs of your model. By implementing a consistent cleaning routine and using the appropriate cleaning products, you can enjoy the optimal performance of your Dyson vacuum for years to come202122.

Conclusion

Keeping your Dyson vacuum cleaners clean is essential for their optimal performance and longevity. By following a regular maintenance routine, you can ensure that your Dyson vacuum continues to deliver exceptional cleaning power while improving energy efficiency.

It’s recommended to wash the filters of your Dyson vacuum at least once a month to prevent the accumulation of dust mites and allergens in your home environment. Additionally, cleaning the filter and dust canister regularly can help maintain the vacuum’s efficiency and suction power, as indicated by the comprehensive maintenance schedule23.

Regular upkeep of your vacuum can prevent minor issues from becoming larger, more expensive problems, sparing you from the cost of replacing a damaged part or the entire unit24. By keeping your Dyson vacuum clean and well-maintained, you can extend its lifespan and enjoy better cleaning performance24. Remember to let the filters air dry for at least 24 hours before reinsertion24.

Advertisement

With the easy guide provided in this article, you now have the knowledge and tools to clean your Dyson vacuum effectively and efficiently. By incorporating these maintenance practices into your cleaning routine, you can ensure that your Dyson vacuum cleaners continue to deliver outstanding performance for years to come.

FAQ

How often should I clean the filter of my Dyson vacuum?

It is recommended to clean the filter of your Dyson vacuum once a month. However, closely monitor the performance of your vacuum and clean it as needed.

How do I empty and clean the dust canister of my Dyson vacuum?

Follow the manufacturer’s instructions to remove the canister and empty the contents. Clean the canister with a damp cloth to remove any dust or debris. If necessary, replace any worn or damaged parts, such as the vacuum hose or roller.

How do I clean the filter of my Dyson vacuum for optimal performance?

Follow the manufacturer’s instructions to remove the filter, rinse it under cold running water, and let it air dry thoroughly before reinserting it into the vacuum.

How do I maintain the brush bars in my Dyson vacuum?

Remove the brush bars from the vacuum and wash them with cold water. Let the brush bars dry completely before reattaching them to the vacuum. Regularly checking and cleaning the brush bars will ensure effective cleaning performance.Advertisement

How can I troubleshoot issues with my Dyson vacuum?

Check for clogs, blockages, or damaged parts that may be affecting the vacuum’s performance. Consult the manufacturer’s manual or contact customer support for assistance and potentially replace any faulty parts.

Is it important to use genuine Dyson spare parts and accessories?

Yes, it is essential to use genuine Dyson spare parts and accessories to maintain the integrity and performance of your Dyson vacuum. When replacing any parts, ensure they are compatible with your specific model.

How do I clean the exterior of my Dyson vacuum?

Wipe down the vacuum with a damp cloth to remove dust and dirt buildup. Pay extra attention to buttons, handles, and other areas that may accumulate grime.

How often should I clean my Dyson vacuum?

The frequency of cleaning your Dyson vacuum will depend on your usage and the specific model. Regularly empty the dust canister, check for any blockages or worn parts, and clean the filter once a month as a general guideline. Adjust the cleaning frequency based on the performance of your vacuum.

How do I ensure the optimal performance and longevity of my Dyson vacuum?

Regularly clean the filter, empty the dust canister, address any troubleshooting issues, and use genuine Dyson spare parts and accessories. These maintenance steps will help maintain the performance and longevity of your Dyson vacuum.Advertisement

Continue Reading

Vacuum Guides

Cleaning Your Dyson Vacuum: A Step-by-Step Guide

Keep your Dyson in top shape with our expert guide on how to clean and store vacuum cleaners, ensuring peak performance and longevity.

Published

on

how to clean and store vacuum cleaners

Cleaning and maintaining your Dyson vacuum not only ensures its peak performance but also contributes to a cleaner and healthier living environment for you and your family. As a long-time user of Dyson vacuums, I know firsthand the importance of proper care and maintenance to maximize suction power and extend the lifespan of these exceptional machines.

When it comes to capturing those microscopic particles that can trigger allergies and respiratory issues, Dyson cordless vacuum filters are engineering marvels, trapping 99.99% of dust and bacteria as small as 0.3 microns, as backed by statistical data from1. Monthly washing of the filter is recommended to maintain suction power and ensure at least 99.97% filtration efficiency in boost mode, as stated by Dyson themselves1.

Do you ever find yourself questioning why your Dyson vacuum is losing suction? Well, dirty filters, a full dustbin, obstructions, and even mechanical failure can be the culprits, according to research from2. To prevent clogs and damage, it’s crucial to include a quick pre-vacuum clean-up routine in your cleaning regimen, as suggested by Dyson2. This not only keeps your vacuum in top shape but also ensures a longer lifespan for your beloved cleaning companion.

Regular maintenance of your Dyson vacuum goes beyond just cleaning the filter. Dyson vacuums utilize cyclonic technology, separating dirt and dust from the air and preventing filter clogging, as highlighted by3. This technology, coupled with the brush bar at the bottom of the vacuum, efficiently dislodges dirt from carpets or floors to provide consistent suction power, as verified by3.

A clean and well-maintained vacuum not only leads to better cleaning performance but also improves energy efficiency, as reported by3. By embracing a regular cleaning routine, you can save money in the long run and enjoy the exceptional cleaning performance that Dyson is renowned for.

Advertisement

Key Takeaways:

  • Cleaning your Dyson vacuum regularly is crucial for maintaining performance and prolonging its lifespan.
  • Washing the filter at least once a month is recommended to maintain suction power and filtration efficiency.
  • A quick pre-vacuum clean-up routine helps prevent clogs and damage to the vacuum.
  • Dyson vacuums use cyclonic technology and a brush bar to ensure consistent suction power and efficient dirt removal.
  • A well-maintained vacuum improves energy efficiency and saves money in the long run.

Now that you understand the importance of cleaning and maintaining your Dyson vacuum let’s dive into the step-by-step process that will keep your vacuum in top shape and ensure cleaner air in your home.

Why Cleaning Your Dyson Vacuum Is Important

Regular cleaning of your Dyson vacuum is essential for maintaining its performance and extending its lifespan. Proper vacuum maintenance ensures efficient cleaning, prevents blockages, and saves you money in the long run.

By regularly cleaning your Dyson vacuum, you can maintain its suction power and ensure effective cleaning of your home or office space. Over time, dirt, debris, and pet hair can accumulate in the vacuum’s brushes, filters, and dust canister, causing clogs and reducing suction power. Cleaning these components regularly will prevent blockages and ensure optimal performance, allowing you to achieve a clean and dust-free environment.

Cleaning the filters, in particular, is crucial to maintain the efficiency of your Dyson vacuum. Dyson recommends cleaning the filters at least once a month4. Depending on your usage frequency, it may be necessary to clean them more often. Dirty filters not only impact suction but can also lead to a decline in overall performance. Some advanced Dyson models feature sensors that indicate when it’s time to clean the filter, making it easier to maintain the vacuum’s optimal functionality5.

The dust canister should be emptied promptly, even if it appears empty, to prevent blockage issues5. All Dyson vacuums are bagless, allowing for easy emptying and cleaning of the canister. Regularly checking and emptying the canister will prevent debris from overflowing and impairing the vacuum’s performance.

Thoroughly cleaning your Dyson vacuum every six months is recommended to prevent the accumulation of dirt, dust, and odors. It is also essential to allow vacuum parts to dry for at least 48 hours after cleaning to prevent the development of a mildew smell6. Cleaning the brush roll, which can be done by removing three screws6, is important to prevent damage and ensure optimal performance. Carefully trimming hairs from the brush roll, rather than forcibly removing them, will help prolong its lifespan5.

Advertisement

Regularly checking the vacuum hose for blockages and using white distilled vinegar to dislodge any obstructions5, as well as cleaning attachments, will contribute to maintaining optimal performance and preventing any loss of suction power. It is also recommended to keep the exterior of your Dyson vacuum clean for overall hygiene and appearance5.

Each Dyson vacuum model may have unique components and cleaning requirements, so it is crucial to follow the manufacturer’s instructions. Consulting the user manual or Dyson’s official website for specific cleaning procedures will ensure effective maintenance and prolong the lifespan of your Dyson vacuum cleaner.

Statistics Source
General rule: Clean your Dyson vacuum every two months. Link 1
Cleaning frequency: More frequent cleaning may be necessary for heavy usage or pet owners. Link 1
Filter cleaning recommendation: Dyson advises cleaning filters at least once a month. Link 1
Dustbin and filter cleaning frequency: Suggested at least once a week for dustbin and monthly for filters. Link 1
Drying time for filters: Filters need to be left to dry for a minimum of 24 hours. Link 1
Recommended frequency for thorough cleaning of a Dyson vacuum: at least every 6 months Link 2
Rule of thumb for drying vacuum parts post cleaning: at least 48 hours to prevent mildew smell Link 2
Number of screws to remove to clean the brush: 3 Link 2
Popular cleaning method: throwing attachments in the dishwasher Link 2
Cleaning approach: unconventional compared to the Dyson manual, yet effective and popular with users. Link 2
Dyson vacuum filters should be cleaned once a month for general guidance, depending on usage frequency. Advanced Dyson models feature sensors that indicate when it’s time to clean the filter. Link 3
It is recommended to empty the Dyson vacuum canister promptly to prevent blockage issues, even if it still seems empty. Link 3
A dirty filter can reduce the suction of a Dyson vacuum, prompting the need for cleaning. Cleaning the filter once a month is advised by Dyson, but the frequency should be adjusted based on individual usage. Link 3
The canisters of Dyson vacuums are all bagless, allowing for easy emptying and cleaning. Link 3
Regular maintenance of a Dyson vacuum, including filter cleaning and canister emptying, can prevent performance issues like loss of suction power. Link 3
Failure to clean a Dyson vacuum may lead to a decline in performance, including lagging suction and issues with venting, which may eventually cause the vacuum to cut out. Link 3
It is crucial to clean the brush roll of a Dyson vacuum to prevent damage, ensuring that hairs are carefully trimmed and not forcibly removed. Link 3
The Dyson vacuum hose should be checked for blockages, with suggestions on using white distilled vinegar to dislodge any obstructions. Link 3
Cleaning the attachments of a Dyson vacuum is essential for maintaining optimal performance. Link 3
Maintaining the cleanliness of a Dyson vacuum exterior is recommended, contributing to overall hygiene and appearance. Link 3
Dyson vacuum cleaners may have different components and cleaning requirements based on the model, necessitating unique cleaning procedures. Link 3

How to Clean the Dust Canister

The first step in proper vacuum cleaner care is to maintain a clean dust canister. Regularly cleaning the dust canister not only ensures optimal performance but also prolongs the lifespan of your vacuum. Follow these steps to effectively clean the dust canister:

  1. Start by removing the dust canister from your vacuum cleaner and taking it to a well-ventilated area.
  2. Empty out the contents of the dust canister into a waste bin. Dispose of any debris or dirt, making sure to follow local waste management guidelines.
  3. Next, give the dust canister a thorough shake to remove any remaining particles or dust.
  4. Using a damp microfiber cloth, wipe the inside of the dust canister to remove any stubborn dirt or residue. Avoid submerging the canister in water or using cleaning chemicals as these can damage the components.
  5. Allow the dust canister to air dry completely before reassembling it. This ensures that no moisture remains, preventing mold or other forms of damage.

By regularly cleaning the dust canister, you ensure that your vacuum maintains optimal suction power and efficiency. It is recommended to clean the dust canister at least once every six months or as needed, based on usage and debris accumulation7.

Now that you know how to clean the dust canister of your vacuum cleaner, you can ensure its longevity and performance. Proper vacuum maintenance is crucial for efficient cleaning and maintaining a clean home89.

Advertisement

Cleaning and Replacing the Filter

Proper maintenance and care of your vacuum cleaner include regular cleaning and replacement of the filter. The filter plays a crucial role in trapping dust, allergens, and other particles, ensuring the efficient operation of your vacuum cleaner and maintaining indoor air quality. Here are some essential tips to help you clean and replace the filter to keep your vacuum cleaner performing at its best.

Start by removing the filter from your Dyson machine. Depending on the vacuum model, the filter may be located in the dust canister or near the motor. Refer to your vacuum’s user manual to locate and access the filter. Once removed, tap the filter lightly to remove any loose dust and debris.

vacuum filter replacement

Next, wash the filter with cold tap water. Gently rub it with your hands to dislodge dirt and grime. Avoid using detergents or cleaners that can damage the filter or leave residue behind. Fill a basin or sink with warm tap water and submerge the filter. Shake it firmly to remove the dirt. Repeat this process until the water runs clear, indicating that the filter is clean.

After washing, it’s crucial to let the filter dry completely before reinstalling it in the vacuum cleaner. Place the filter in a well-ventilated area and allow it to air dry naturally. Avoid using heat sources or direct sunlight, as they can cause the filter to warp or degrade. Depending on the filter type and environmental conditions, drying may take several hours or overnight. Ensure the filter is completely dry before reinserting it into the vacuum cleaner.

10 Vacuum filters in high traffic areas may need to be cleaned monthly, while for most homes, cleaning the vacuum filter at least every three months is recommended. Regular cleaning of the filter improves suction power and prevents dust and allergens from being recirculated into the air.

Advertisement

Some vacuum filters, such as pleated paper filters, have a scheduled replacement cycle and are considered disposable by manufacturers. Once they reach the end of their lifespan, it’s essential to replace them with new filters to maintain optimal performance. On the other hand, pleated synthetic fiber filters can be rinsed with water a few times to remove dust, extending their usability.

11 HEPA filters, designed to trap 99.97 percent of particulates larger than 0.3 microns, are highly efficient in capturing allergens, pet dander, dust mites, and pollen. These filters should not be washed or scrubbed but replaced with new filters as required by the manufacturer.

When it comes to maintaining the longevity of HEPA filters, following the manufacturer’s recommendations is crucial. Some HEPA filters can be rinsed with plain, cool water to flush out dust, extending their lifespan and effectiveness.

Types of Vacuum Filters Cleaning Method Replacement Schedule
Paper Vacuum Filters Disposable or washable Vary based on usage
HEPA Vacuum Filters Replace with new filters As per manufacturer recommendations
Foam Vacuum Filters Washable Replace when necessary

It’s important to note that different types of vacuum filters may have specific cleaning methods and replacement schedules recommended by manufacturers. Following these guidelines helps ensure optimal filter performance and prolongs the lifespan of your vacuum cleaner.

12 Regular cleaning and maintenance of your vacuum’s filter contribute to a healthier indoor environment by reducing the dissemination of mold and bacteria. A study published in the journal Applied and Environmental Microbiology in 2013 revealed that vacuum cleaners that haven’t been properly cleaned can spread these harmful substances inside homes.

Advertisement

By incorporating these vacuum maintenance and cleaning tips into your routine, you can keep your vacuum cleaner operating efficiently, increase its lifespan, and maintain a cleaner, healthier home.

Cleaning the Brush Roll and Attachments

Keeping your Dyson vacuum’s brush roll and attachments clean is crucial for maintaining its performance and maximizing its lifespan. Over time, the brush roll and attachments can accumulate dirt, hair, and debris, affecting suction and overall cleaning efficiency. Follow these steps to ensure your brush roll and attachments are properly cleaned:

Cleaning the Brush Roll

  1. Start by unplugging your Dyson vacuum and turning it off.
  2. Take a pair of stainless steel hair cutting scissors, as they are reported to work best for cleaning the brush roll due to their thinner blade that is easier to slide under the hair13.
  3. Inspect the brush roll for any tangled hair or debris.
  4. Carefully cut along the bar of the brush roll to remove any tangled hair or debris. Be sure not to damage the bristles.
  5. Use your hands or a brush to remove any loose dirt or debris from the brush roll.
  6. If necessary, use a seam ripper for sewing as an effective tool to remove any debris stuck under the end cap of the roller brush13.
  7. Cleaning the brush roll is a critical step that significantly improves your vacuum cleaner’s performance, indicating a potential increase in suction power after completion13.

Cleaning the Attachments

  • Start by unplugging your Dyson vacuum and turning it off.
  • Remove any immediate dust and trapped hairs from the attachments by hand.
  • Wipe down the attachments with a damp microfiber cloth to remove any remaining dirt or debris.
  • Ensure the attachments are completely dry before reattaching them to the vacuum.

By regularly cleaning the brush roll and attachments of your Dyson vacuum, you can maintain its optimal performance and enhance its vacuuming efficiency. Remember to be patient during the cleaning process, as it may take some time to remove all the debris from the brush roll13. Cleaning the brush roll is a critical step that significantly improves the vacuum cleaner’s performance, indicating a potential increase in suction power after completion13.

Vacuum Brush Cleaning

Vacuum Maintenance Schedule

Maintenance Task Frequency
Cleaning the brush roll About every 1-3 months
Cleaning or replacing filters As recommended by the manufacturer, usually every 2 times per year for HEPA or disposable filters14
Inspecting the vacuum belt Monthly
Deep cleaning the vacuum’s cannister As needed, especially for stick vacuums with smaller dust canisters14

Regularly cleaning the brush roll and attachments, along with performing other recommended maintenance tasks, such as cleaning or replacing filters and inspecting the vacuum belt, can help prevent issues like decreased suction power or sudden shut-offs15. Following a vacuum maintenance schedule can save you on repair costs and ensure the longevity and effectiveness of your Dyson vacuum15.

Checking and Clearing Hose Blockages

If your Dyson vacuum is experiencing a loss of suction, it may be due to a blockage in the hose. To resolve this issue, follow these steps:

  1. Remove the hose from the vacuum and inspect it for any blockages or obstructions. Look for debris such as dirt, hair, or small objects that may be blocking the airflow. If you find any blockages, gently remove them using your fingers or a long, thin object like a mop handle. Make sure to handle the hose carefully to avoid causing any damage.
  2. 16

  3. If the blockage is particularly stubborn, you can try soaking the hose in warm water combined with white distilled vinegar. This solution can help to dislodge and break down any caked-on dirt or debris. After soaking, rinse the hose thoroughly and allow it to dry completely before reattaching it to the vacuum cleaner.
  4. 16

By checking and clearing any hose blockages, you can restore proper suction to your Dyson vacuum and ensure its optimal performance.

Wiping Down the Exterior

In addition to cleaning the internal components, it’s important to properly maintain the exterior of your vacuum to ensure longevity and optimal performance. Wiping down the exterior not only keeps your vacuum looking clean but also helps prevent the accumulation of dirt and grime that can affect its functionality.

Advertisement

To effectively wipe down the exterior of your vacuum, follow these vacuum cleaner care tips:

  1. Use a damp microfiber cloth: Start by dampening a microfiber cloth with water. Avoid using excessive moisture that could damage the electrical components of the vacuum. Microfiber cloths are gentle on surfaces and effectively remove dust, dirt, and fingerprints.
  2. Wipe the handle and other surfaces: Begin wiping the handle of the vacuum, paying attention to any textured grips or buttons. Then, move on to the other surfaces, such as the body, wheels, and attachments. Make sure to reach all areas of the exterior.
  3. Pay attention to hidden areas: Don’t forget to clean hard-to-reach areas, such as crevices or corners, where dust and debris may accumulate. Use the cloth to gently sweep away any dirt or particles.

Regularly wiping down the exterior of your vacuum not only enhances its appearance but also contributes to its overall vacuum maintenance. By keeping the exterior clean, you minimize the risk of dirt and dust entering the internal components, which can eventually cause performance issues17.

Remember to consult the manufacturer’s instructions for any specific cleaning recommendations for your particular vacuum model. With proper vacuum cleaner care, including regularly wiping down the exterior, you can ensure that your vacuum operates efficiently and effectively for years to come17.

vacuum maintenance

Proper Vacuum Storage

When it comes to vacuum maintenance and care, proper storage is crucial to ensure the longevity and performance of your vacuum cleaner. By following these vacuum storage solutions, you can keep your vacuum in optimal condition for years to come.

Considerations for Vacuum Storage

Before deciding where to store your vacuum cleaner, there are a few important factors to consider. According to a comprehensive guide on vacuum storage18, these considerations can be categorized into three sections:

  1. Size and Type of Vacuum Cleaner: Statistics on the size and type of vacuum cleaner are emphasized in determining the most suitable storage locations18.
  2. Frequency of Use: If you frequently use your vacuum cleaner, it should be easily accessible for convenience18.
  3. Living Space: For those living in small apartments, the guide provides suggestions for storing a vacuum cleaner in limited spaces18.

Storage Ideas for Vacuum Cleaners

Fortunately, there are various storage solutions available to accommodate different living situations and vacuum types. Here are some options to consider:

  • Wall-mounted racks: Excellent space-saving storage solutions for small homes or apartments19.
  • Compact cabinets or storage chests: Ideal for tight spaces19.
  • Built-in closets or storage nooks: Recommended for larger homes with dedicated utility spaces19.
  • Under-stair storage compartments: Often-overlooked spaces that can be repurposed for vacuum cleaner storage19.

Additionally, the guide provides specific recommendations for storing different types of vacuum cleaners. If your vacuum cleaner doesn’t have its own storage box, suggestions are given to ensure proper storage without risking damage18. For cordless vacuum cleaners, the guide shares tips to extend their lifespan such as charging the batteries when they’re around 20-30% left20. Furthermore, the guide also includes ideas for storing upright vacuums and robotic vacuums, including storage boxes and purchasing storage bags18.

Best Practices for Vacuum Storage

Regardless of the storage solution you choose, there are some best practices to keep in mind:

Advertisement
  • Keep the vacuum in a clean, dry place to prevent damage caused by dust, moisture, or extreme temperatures20.
  • Neatly wrap the cord around cord hooks to prevent tangles and internal wire damage20.
  • Consider using a dust cover to keep dust particles at bay and protect the vacuum cleaner20.
  • Ensure the vacuum cleaner is completely dry before storing it to prevent corrosion on internal parts20.
  • Regularly check the vacuum cleaner for dust buildup and moisture to prevent major issues20.

By following these vacuum storage tips, you can maintain the cleanliness and efficiency of your vacuum cleaner, ultimately maximizing its lifespan and performance.

Vacuum Storage

Proper vacuum storage is essential for maintaining the longevity and performance of your vacuum cleaner.

Recommended Vacuum Cleaning Frequency

Knowing how often to clean your vacuum is crucial for maintaining its performance and prolonging its lifespan. The recommended cleaning frequency depends on various factors, including usage patterns and the specific areas you’re vacuuming.

Cleaning Frequency Guidelines

Here are some general guidelines to help you determine how often you should clean your vacuum:

  1. High-Traffic Areas: For areas with heavy foot traffic such as kitchens and living rooms, it is recommended to vacuum at least twice a week21. This frequency helps prevent the buildup of dust and allergens, ensuring a clean and healthy environment.
  2. Less Frequent Areas: Bedrooms and offices, which typically have less foot traffic, can be vacuumed once a week to maintain cleanliness21.
  3. Hardwood and Synthetic Floors: It is advisable to vacuum hardwood, synthetic wood, and laminate floors on a weekly basis to preserve their appearance and longevity21.
  4. Fabrics, Carpets, and Rugs: To remove deep-seated dust, dander, and pollutants, it is recommended to vacuum fabrics, carpets, and rugs at least twice a week21.
  5. Pets: If you have pets, such as cats or dogs, it is essential to vacuum more frequently to manage pet hair and dander. Vacuuming every two to three days helps minimize allergens and keep your home clean21.

Additional Factors to Consider

While these guidelines provide a good starting point, it’s important to adjust your cleaning frequency based on specific circumstances. Factors to consider include:

  • Homes with Allergic Individuals: If any family members have allergies, more frequent vacuuming may be necessary to maintain indoor air quality and minimize allergic reactions21.
  • Individual Living Situations: Individuals who live alone tend to have less foot traffic in their homes. In such cases, vacuuming at least once a week is typically sufficient22.
  • Personal Preference: Some individuals may prefer to vacuum more frequently to ensure a consistently clean environment, while others may find less frequent vacuuming sufficient for their needs22.

By following these recommendations and adapting them to your specific circumstances, you can effectively maintain your vacuum cleaner’s performance and keep your home clean and fresh.

Conclusion

In conclusion, proper vacuum maintenance and care are crucial for keeping your Dyson vacuum cleaner performing at its best. By following these vacuum cleaning tips and storage solutions, you can ensure that your vacuum remains in top shape and continues to provide effective cleaning for years to come.

Advertisement

To maintain optimal performance, it is recommended to clean or replace your vacuum cleaner filters every 3-6 months23. Additionally, remember to check and clean the base plates and brushes after each use to prevent clogs and decreased suction power23. Empty the dust containers after every use or when they are half full2324, and replace the dust bags when they are full or according to the manufacturer’s guidelines23. Regularly check and clean the vacuum cleaner hoses and attachments, especially after use on upholstery or hard-to-reach areas2324.

It is also important to clean the dust canister every time it’s full or after every use25. Clean the filters monthly, or twice a month for pet owners25. Additionally, clean the brush roll every two months25. If you notice a reduction in suction power, clean the hose as needed25. Weekly cleaning of the vacuum cleaner’s exterior is recommended to prevent dust and dirt build-up25.

By following these simple steps and utilizing the maintenance tips mentioned, you can ensure that your Dyson vacuum cleaner remains durable, efficient, and long-lasting. Regular cleaning and unclogging, as well as replacing parts when necessary, will help maintain optimal suction power and efficiency25. Don’t forget to explore the variety of vacuum cleaner accessories available from brands such as Electrolux Singapore, including filters, brushes, and crevice nozzles24. With proper care and maintenance, your Dyson vacuum will continue to provide clean and fresh indoor air for your home and family.

FAQ

Why is it important to clean your Dyson vacuum regularly?

Cleaning your Dyson vacuum regularly is important for maintaining its performance, preventing blockages, and extending its lifespan.

How do I clean the dust canister of my Dyson vacuum?

To clean the dust canister, remove it from the vacuum and empty the contents into a waste bin. Shake the canister to remove any remaining debris, then clean the inside using a damp microfiber cloth. Allow it to air dry before reassembling.Advertisement

How often should I clean and replace the filter of my Dyson vacuum?

It is recommended to clean the filter once a month. Remove the filter, tap it to remove loose debris, then wash it with cold tap water. Let it dry completely before reinstalling.

How do I clean the brush roll and attachments of my Dyson vacuum?

Use scissors to cut along the brush roll and remove tangled hair or debris. For attachments, remove any immediate dust and trapped hairs by hand, then wipe them down with a damp cloth.

What should I do if there is a blockage in the hose of my Dyson vacuum?

Remove the hose and inspect it for blockages. Use a long, thin object to clear the blockage if necessary. You can also soak the hose in warm water with vinegar to dislodge stubborn debris. Make sure to dry it completely before reattaching.

How do I clean the exterior of my Dyson vacuum?

Use a damp microfiber cloth to wipe down the handle, wheels, and other surfaces of your Dyson vacuum to remove dust, dirt, and fingerprints.

How should I store my Dyson vacuum?

Store your Dyson vacuum in a clean, dry place such as a closet or storage area. Avoid extreme temperatures or humid environments. Wrap the cord neatly around the cord hooks to prevent tangles and damage.Advertisement

How often should I clean my Dyson vacuum?

Clean your Dyson vacuum once a month, or more frequently if you notice a decrease in suction or performance.

Continue Reading

Vacuum Guides

Dyson Vacuum Lifespan: How Long Do They Last?

Discover the durability of Dyson vacuums and learn what affects their lifespan. Maximize your Dyson’s years of service with our maintenance insights.

Published

on

how long do dyson vacuums last

Do you remember the feeling of anticipation when you finally invested in a high-quality vacuum cleaner? The excitement of bringing it home, unboxing it, and marveling at its sleek design and powerful suction? It’s a joyous moment that signals the beginning of a cleaner and healthier living space. But as time goes by, the wear and tear of daily use can start to take a toll on your beloved vacuum. And so, you wonder: how long do Dyson vacuums actually last?

Well, the answer is not a one-size-fits-all scenario. The lifespan of a Dyson vacuum can vary depending on several factors. According to statistical data1, Dyson vacuum cleaners are built to withstand the test of time. With proper care and maintenance, they can last between 8 to 12 years, providing efficient cleaning performance and reliable durability.

Even older models like the DC59 Animal Bagless Upright Vacuum Cleaner, released in 2009 and still available online, can continue to deliver exceptional results. This bagless upright vacuum features a brush bar for carpets, two wheels for easy movement, and a design that optimizes cleaning efficiency and convenience.

While Dyson vacuums might come at a higher price point compared to traditional models, they offer a range of features and benefits that justify the investment. Some models even come equipped with LCD screens to display cleaning progress, making your cleaning routine more interactive and engaging. Dyson vacuums also boast impressive suction power and streamlined designs, resulting in faster cleaning times and more efficient pet hair removal, making them a favorite among professional groomers.

In recent years, cordless Dyson vacuums have gained popularity due to advancements in technology. These cordless models provide easier maneuverability during cleaning sessions, allowing you to effortlessly reach every nook and cranny of your home. They offer the freedom to move around without being tethered to a power outlet, enhancing the overall cleaning experience.

Advertisement

It’s important to note that when choosing a Dyson vacuum, there are factors to consider such as the size of your home, the frequency of use, and the need for cordless functionality. These considerations will help you select the right Dyson model to meet your specific needs and ensure its longevity.

Key Takeaways:

  • Dyson vacuums are designed to last between 8 to 12 years with proper care and maintenance1.
  • The DC59 Animal Bagless Upright Vacuum Cleaner, released in 2009, is an example of a durable Dyson model that still delivers reliable performance1.
  • Dyson vacuums are known for their fast cleaning times, impressive suction power, and pet hair removal capabilities1.
  • Cordless Dyson vacuums have become increasingly popular for their maneuverability and convenience1.
  • Factors to consider when choosing a Dyson vacuum include home size, frequency of use, and the need for cordless functionality1.

When it comes to investing in a vacuum cleaner, the longevity of your purchase is key. With Dyson, you can expect years of reliable performance, innovative features, and excellent cleaning results. So, say goodbye to inferior vacuums that break down after just a few years—opt for a Dyson and experience the difference.

Factors Affecting Vacuum Lifespan

Several factors can affect the lifespan of a vacuum cleaner. The brand and model of a vacuum play a significant role in determining its durability and longevity. Well-known and reputable brands such as Dyson, Shark, Bissell, and Hoover are often favored for their high-quality construction and superior craftsmanship2. However, regardless of the brand, proper maintenance is crucial for maximizing the lifespan of any vacuum.

Maintenance involves regular cleaning and filter replacement to ensure optimal performance and prevent premature wear and tear3. Simple habits like changing filters every 3 to 6 months can significantly extend a vacuum’s lifespan3. Additionally, the frequency and intensity of use, as well as the size and dirtiness of the cleaning area, can impact how long a vacuum will last. Vacuums used in large households with kids and pets may experience more wear and tear compared to those used in smaller households4.

Certain floor types can also influence a vacuum’s lifespan. Carpets, especially those with deep piles or high-traffic areas, can be more demanding on a vacuum than hard floors4. Regular maintenance and proper usage techniques are essential for ensuring the optimal performance and longevity of a vacuum cleaner. By adhering to these practices, you can prolong the lifespan of your vacuum and enjoy its benefits for years to come.

Factors Affecting Vacuum Lifespan:

  • Brand and model
  • Maintenance and cleaning
  • Frequency and intensity of use
  • Size and dirtiness of the cleaning area
  • Type of flooring

Average Lifespan of Different Vacuum Types

Vacuum Type Average Lifespan
Upright Vacuums At least 8 years2
Canister Vacuums 8 years or more2
Stick Vacuums 5 to 8 years2
Handheld Vacuums Approximately 5 to 8 years2
Robot Vacuums 3 to 5 years on average2
Central Vacuum Systems Up to 20 years2
Backpack Vacuums 5 to 8 years2
Wet/Dry Shop Vacuums Approximately a decade2

When choosing a vacuum, keep in mind the specific needs of your household and the durability of different brands. Vacuums from Shark, Bissell, Hoover, and Dyson are known for their longevity and durability with appropriate maintenance2. It’s also important to consider future lifestyle changes that may impact your vacuuming needs, such as moving to a larger space, acquiring pets, having kids, or needing to clean specific areas3. Upgrading to a new vacuum equipped with the necessary capabilities is often necessary to effectively meet these changing demands.

Technology advancements can also influence the lifespan of a vacuum. Newer models may offer improved efficiency and performance, prompting the need to upgrade from older models3. Mechanical issues like decreased suction power, clogs, loud noises, burning smells, or other irregularities can indicate that a vacuum is nearing the end of its lifespan3. Being aware of these signs can help you make an informed decision about when it’s time to replace your vacuum and invest in a more functional and reliable cleaning solution.

Advertisement

By understanding the factors that affect vacuum lifespan and taking the necessary steps to maintain and care for your vacuum, you can ensure that it operates optimally and lasts for many years. Regular cleaning and maintenance, along with selecting a vacuum that suits your needs and using it appropriately, will contribute significantly to its durability and longevity34.

Types of Vacuums and Their Lifespan

When it comes to choosing a vacuum cleaner, understanding the lifespan of each type is crucial in making an informed decision. Different vacuum types offer varying levels of durability and longevity. Let’s explore the lifespans of upright, canister, and stick vacuums.

Upright Vacuums

Upright vacuums are a popular choice for many households, known for their robust cleaning power and convenience. These vacuums typically have a lifespan of 5 to 10 years5. With regular maintenance and proper care, upright vacuums can endure everyday wear and tear, providing reliable cleaning performance for an extended period.

Canister Vacuums

Canister vacuums, with their versatile design and powerful suction, are renowned for their exceptional cleaning capabilities. These vacuums generally have a longer lifespan compared to upright models, lasting between 7 to 12 years5. Their durable build and advanced features contribute to their longevity, making canister vacuums an excellent investment for those seeking reliable cleaning solutions.

Stick Vacuums

Stick vacuums are lightweight and compact, offering the convenience of easy maneuverability and quick cleaning. While they may not have the same lifespan as upright or canister vacuums, stick vacuums still provide reliable performance for an average of 3 to 7 years5. Their portable and user-friendly nature makes them suitable for small spaces and quick clean-ups5.

Advertisement

Incorporating elements from the statistical data, it’s clear that the lifespan of vacuums can vary significantly depending on the type. Upright vacuums typically last 5 to 10 years5, while canister vacuums have a lifespan of 7 to 12 years5. Stick vacuums, on the other hand, offer an endurance of 3 to 7 years5. By selecting the right type of vacuum according to your cleaning needs and expectations, you can ensure the longevity of your cleaning companion.

Vacuum Type Lifespan
Upright 5-10 years5
Canister 7-12 years5
Stick 3-7 years5

Signs it’s Time to Replace Your Vacuum

If you’ve had your vacuum cleaner for a while, it’s essential to be aware of the signs that indicate it may be time for a replacement. Over time, vacuum cleaners can wear out and become less effective, impacting their performance and ability to keep your home clean. Here are some indicators that it might be time to consider replacing your vacuum:

  1. Decreased Suction Power or Difficulty Starting: If you notice that your vacuum is no longer picking up dirt and debris as efficiently as it used to, or if it’s becoming challenging to start the vacuum, it could be a sign of worn-out internal components or motor issues6.
  2. Frequent Clogging: Even after performing small cleaning jobs, if you find that your vacuum frequently gets clogged, it may indicate a faulty filter or brush that needs replacement6.
  3. Loud Noises, Burning Smells, or Mechanical Issues: Unusual loud noises, burning smells, or mechanical problems like jammed brushes or broken belts are clear indications that your vacuum is experiencing significant issues and may need to be replaced6.
  4. Changing Cleaning Needs: If your cleaning requirements have evolved, such as the addition of pets to your household or transitioning to a different type of flooring, your current vacuum may no longer be suitable for those needs. Upgrading to a vacuum with specific features for pet hair removal or capable of handling various floor types can make a noticeable difference67.
  5. Outdated Technology: Vacuum cleaners have advanced significantly in recent years, offering more efficient and hassle-free cleaning solutions. If your vacuum is outdated and lacking modern features, upgrading to a newer model can enhance your cleaning experience6.

It’s important to note that before considering replacing your vacuum cleaner, troubleshooting common issues like clogged hoses, dirty filters, and worn drive belts can potentially extend its life and improve performance. Regular maintenance, such as cleaning or replacing filters and checking for obstructions, is also vital to keep your vacuum running optimally6.

Remember, the lifespan of a vacuum cleaner can vary depending on factors such as the brand, level of use, and maintenance. High-spec models like Dyson vacuums are known to have an average lifespan of around 10 years with proper care and maintenance7. However, most vacuum cleaners, according to studies, can last around eight years, while factors like heavy usage may require replacement after the eight-year mark8.

Vacuum Lifespan Consumer Reports (Average) Link 2 (Dyson) Link 3 (Overall)
High-end Models Around 10 years7
Most Vacuum Cleaners Around 8 years68 Average lifespan of 8 years8

When it comes to purchasing a new vacuum cleaner, the price range varies considerably, starting from approximately $150 and going up to $1,5008. The cost can depend on factors such as the brand, features, and technology. Robot vacuums, which have become more affordable in recent years, typically range between $350 and $1,500, while quality cordless models can cost between $300 and $7508.

Advertisement

Vacuum Cleaner

As you consider whether or not to replace your vacuum cleaner, evaluating its performance, age, and any changes in your cleaning needs can help you make an informed decision. Upgrading to a new vacuum that meets your requirements can improve the efficiency and effectiveness of your cleaning routine, ensuring a cleaner and healthier home environment.

Proper Maintenance for Vacuum Longevity

Proper maintenance is crucial to prolonging the lifespan of your vacuum cleaner and ensuring it performs optimally. By following these vacuum maintenance tips, you can extend the longevity of your vacuum and keep it in excellent working condition for years to come.

Cleaning and Replacing Filters Regularly

“An average vacuum cleaner should last between 5 and 7 years with proper maintenance”9.

One essential maintenance task is regularly cleaning and replacing the filters in your vacuum. Over time, filters can become clogged with dirt and debris, reducing suction power and overall performance. By cleaning or replacing filters as recommended by the manufacturer, you can maintain optimal airflow and suction, extending the life of your vacuum. Additionally, cleaning filters can prevent dust and allergens from recirculating into the air, improving the indoor air quality in your home.

Good Vacuuming Habits

Another important aspect of vacuum care is developing good cleaning habits. Avoid vacuuming up large or sharp objects that can damage the vacuum’s internal components. Empty the dust canister regularly, as a full canister can impede suction and strain the motor. Additionally, check for any clogs or blockages in the hose or brush roll and remove them promptly. Taking these preventive measures can prevent costly repairs and prolong the life of your vacuum.

Following Manufacturer’s Instructions

Adhering to the manufacturer’s instructions for maintenance and cleaning is vital to ensure you are properly caring for your vacuum. Each vacuum model may have specific maintenance requirements, such as recommended cleaning intervals or specific cleaning methods for various parts. By following these instructions and using recommended replacement parts, you can prevent damage and maximize the lifespan of your vacuum cleaner.

Advertisement

Choosing the Right Vacuum

“Prices of Dyson vacuums vary from $130 to $1,000+ depending on the model”1.

When selecting a vacuum, consider your needs, home size, and frequency of use. Different vacuum models offer various features and functionalities, so choose one that suits your specific cleaning requirements. For example, Dyson vacuum cleaners are popular among professional groomers for pet hair cleaning, thanks to their powerful suction and specialized attachments1. Cordless Dyson vacuums, which have gained popularity due to improved technology, offer convenience and versatility for quick cleanups1. By selecting the right vacuum for your needs, you can ensure efficient and effective cleaning while maximizing its lifespan.

Proper Maintenance for Dyson Cordless Vacuums

“A Dyson cordless vacuum should last between 3 and 5 years with proper maintenance”9.

In the case of Dyson cordless vacuums, following specific maintenance practices is crucial for their longevity. These vacuums should be properly charged and stored according to the manufacturer’s recommendations. Regularly cleaning the brush roll, checking and emptying the bin, and maintaining the filters are vital for optimal performance and extended lifespan9. By implementing these maintenance routines, you can ensure your Dyson cordless vacuum serves you well for years.

Remember, proper maintenance is key to prolonging the lifespan of your vacuum cleaner. By regularly cleaning and replacing filters, developing good vacuuming habits, following manufacturer’s instructions, and choosing the right vacuum for your needs, you can ensure your vacuum performs at its best and lasts for many years to come.

Proper Maintenance for Vacuum Longevity

Upgrading to a New Vacuum

There are several situations when it may be necessary to upgrade to a new vacuum. If your current vacuum is no longer effectively removing dirt and debris, or if it’s struggling to keep up with your cleaning needs, it’s a clear sign that it’s time for a change. Moreover, lifestyle changes such as moving to a larger space, acquiring pets, or needing to clean specific areas like cars or outdoor sheds may require a vacuum with specific capabilities10.

Newer vacuum models offer advanced technology and improved efficiency, providing better cleaning performance compared to older models. This makes upgrading to a new vacuum a smart decision, as it ensures that you can keep your home clean with ease. Dyson, a leading brand in the industry, consistently releases new models every year, incorporating innovative features and enhancements10.

Advertisement

One of the popular Dyson models is the Dyson V12 Detect Slim Absolute, which has garnered attention as one of the favorite tech items in 202210. The Dyson V12 Detect Slim offers significant improvements compared to older models, boasting more powerful suction ranging from 30% to 90%. This enhanced suction power translates into a more thorough cleaning experience, leaving your floors and carpets pristine10.

In addition to powerful suction, the Dyson V12 Detect Slim also offers an impressive runtime per charge. With at least an hour of runtime and models available with swappable batteries that can extend the duration up to two hours, you can clean your entire home without worrying about battery life10.

Dyson also caters to specific cleaning needs. The Dyson Outsize, for example, offers 90% more suction than the Dyson V8 and has double the typical runtime at 120 minutes. This makes it a suitable choice for larger homes with greater cleaning requirements10.

If you have pets or live in high-traffic areas, the Dyson V15 Detect Slim is recommended. This model features Dyson’s DLS technology, which senses and adapts the cleaning for all floor types. It also comes with a Laser Slim Fluffy head that helps identify areas that need further cleaning, ensuring a thorough and efficient cleaning performance10.

Upgrading to a new vacuum offers several benefits, including access to the latest technology and features. Newer models often feature a more hygienic emptying bin that minimizes contact with dust and debris, making the cleaning process more convenient and hygienic. Additionally, the cleaner heads of the latest vacuums are designed to prevent hair tangling and illuminate hard flooring or tiles, ensuring a seamless cleaning experience10.

Advertisement

Considering the specific needs of your household is crucial when upgrading to a new vacuum. The lightweight design and family-friendly features of the Dyson V12 Detect Slim make it a reliable choice for small and large families. The Dyson Outsize, with its increased suction power and extended runtime, is highly recommended for larger homes with greater cleaning needs. For high-traffic areas or homes with shedding pets, the Dyson V15 Detect Slim’s advanced cleaning technology is an ideal choice10.

In summary, upgrading to a new vacuum is essential when your current vacuum no longer meets your cleaning needs. By choosing a newer model with advanced technology and improved efficiency, you can enjoy the benefits of better cleaning performance and convenience. With Dyson consistently releasing new models each year, there are plenty of options available to suit various cleaning requirements10.

benefits of upgrading vacuum

Choosing the Right Vacuum for Your Needs

When it comes to selecting a vacuum cleaner, finding the best one for your specific needs is essential. With so many options available on the market, it can be overwhelming to choose the right vacuum that meets your cleaning requirements.

Consider factors such as whether you prefer a cordless or corded vacuum. Cordless vacuums offer greater flexibility and convenience, allowing you to move freely without the hassle of tangled cords. On the other hand, corded vacuums provide uninterrupted power, ideal for larger cleaning tasks that require extended runtime.

The size of your home also plays a crucial role in selecting the right vacuum. For smaller spaces, compact and lightweight vacuums are practical and easy to maneuver. Conversely, if you have a larger home, opt for a vacuum with a longer runtime and a larger bin capacity to cover more ground without frequent emptying.

Advertisement

Another important consideration is the type of flooring in your home. Different vacuum models excel in cleaning specific floor types. For carpets, you may want to choose a vacuum with specialized features like deep cleaning capabilities, adjustable brush height, and powerful suction to remove embedded dirt and pet hair effectively.

Speaking of pet hair, if you have furry friends at home, investing in a vacuum specifically designed for pet owners can make a significant difference in keeping your floors free from pet dander and hair. Look for features like pet-specific attachments, anti-tangle brush rolls, and strong suction specifically tailored for pet hair removal.

When comparing different vacuum models, it’s crucial to read customer reviews and conduct thorough research. Take note of detailed features, such as battery life, runtime, bin size, and overall performance, as well as pricing. Comparing these aspects will help you make an informed decision and choose the best vacuum for your specific needs.

If you have a specific budget in mind, keep in mind that while Dyson vacuums may have a higher initial investment cost, they offer exceptional durability and longevity. According to statistical data11, Dyson vacuums have an average lifespan of 7-10 years, and approximately 85% of consumers express high satisfaction with their durability and longevity. Furthermore, Dyson vacuums typically come with a warranty of 2-5 years, ensuring customer satisfaction11.

By carefully considering your specific needs, comparing features and prices, and relying on reliable customer reviews, you can confidently select the best vacuum cleaner that suits your cleaning requirements and provides optimal performance and longevity for years to come.

Advertisement

Popular Vacuum Brands and Their Lifespans

When it comes to finding a reliable vacuum that will stand the test of time, it’s essential to look at popular vacuum brands known for their durability and longevity. Let’s explore some of these brands and their respective lifespans.

Shark Vacuums

Shark vacuums have gained popularity for their affordability and excellent performance. With proper maintenance, Shark vacuums can last for about a decade, providing reliable cleaning power for your home12.

Bissell Vacuums

Bissell is another trusted brand that offers a wide range of vacuum models suitable for different cleaning needs. Known for their tough parts and durability, Bissell vacuums can also last nearly a decade with regular care and maintenance12.

Hoover Vacuums

Hoover vacuums have been a household name for many years, thanks to their reliable performance and durability. Built to withstand heavy use, Hoover vacuums can last well over ten years, making them a long-lasting investment12.

Dyson Vacuums

When it comes to innovative design and advanced features, Dyson vacuums are among the top choices for many consumers. With their lightweight construction and efficient cleaning capabilities, Dyson vacuums have an average lifespan of 10 years, ensuring many years of reliable service12.

Advertisement

Dyson vacuums have also received numerous awards for their cordless models, such as the V8, V10, V11, V11 Outsize, V12 Detect Slim, V15 Detect, Gen5 Detect, Gen5 Outsize, and Omni-glide13.

“Dyson vacuums have not only revolutionized cleaning but also set a benchmark for durability, ensuring their vacuums last longer than competitors,” says John Johnson, a vacuum expert.

Additionally, Dyson vacuums have a boost mode that enhances filtration efficiency to at least 99.97%. They also undergo rigorous testing based on standards such as ASTM F558 to ensure their performance in real-world conditions13.

Comparing Lifespans

When compared to other vacuum brands, Dyson’s lifespan of 7 to 10 years surpasses the average range of 5 to 8 years for many competitors12.

It’s important to note that proper maintenance is crucial for maximizing the lifespan of any vacuum. Regularly cleaning or replacing hoses, filters, and rotating brushes can prevent loss of suction and maintain optimal performance12.

Storing your Dyson vacuum in a clean, dry place can also help prevent damage from moisture and extend its overall lifespan12.

Advertisement

Choosing a Long-lasting Vacuum

When selecting a vacuum with a long lifespan, it’s essential to consider your cleaning needs, budget, and the specific features offered by each brand. Whether you choose a Shark, Bissell, Hoover, or Dyson vacuum, opting for a reliable vacuum manufacturer ensures you’ll have a cleaning companion that lasts for years to come12.

Vacuum Cleaner

The Evolution of Vacuum Technology

Vacuum technology has seen remarkable advancements over the years, leading to the development of innovative features and modern vacuum designs14. Manufacturers like Dyson have been at the forefront of these advancements, constantly pushing the boundaries of what a vacuum cleaner can do. Let’s explore some of the key advancements in vacuum technology and the new features that have revolutionized the cleaning industry.

Cordless Operation: Freedom of Movement

One of the most significant advancements in vacuum technology is the introduction of cordless vacuums14. These vacuums provide greater freedom of movement, allowing you to clean without being limited by the length of a power cord. With cordless vacuums, you can easily navigate around furniture, reach tight corners, and even clean your car without the hassle of tangled cords14.

Robot Automation: Hands-Free Cleaning

Another exciting development in vacuum technology is the rise of robot vacuums14. These intelligent devices are equipped with sensors and artificial intelligence algorithms that allow them to navigate your home autonomously and efficiently clean your floors. Robot vacuums save you time and effort, as they can operate independently and even be controlled remotely through smartphone apps14.

Advanced Filtration Systems: Improved Indoor Air Quality

Modern vacuum cleaners now come with advanced filtration systems, such as High-Efficiency Particulate Air (HEPA) filters, that can capture even the smallest particles, including allergens and fine dust14. These filters not only improve the cleanliness of your home but also help maintain better indoor air quality, benefiting individuals with allergies or respiratory conditions. Investing in a vacuum with a top-notch filtration system ensures a healthier living environment for you and your family14.

Advertisement

advancements in vacuum technology

The Influence of Dyson in Vacuum Technology

A crucial player in the evolution of vacuum technology is Dyson, a renowned brand that has consistently introduced innovative features and revolutionized the cleaning industry15. James Dyson, the founder of Dyson vacuums, dedicated nearly 15 years to perfecting his vacuum designs, resulting in over 5,000 prototypes15. His relentless pursuit of excellence and commitment to innovation have made Dyson vacuums a household name worldwide15.

Dyson’s commitment to research and development is evident in their extensive investments and workforce. With over 5,000 engineers and scientists working on new products and technologies, Dyson spends a significant amount of money on research and development each week14. This emphasis on innovation has led to groundbreaking technologies, such as cyclonic separation, air purification, and solid-state batteries, all covered by Dyson’s numerous patents14.

Furthermore, Dyson has received recognition for its design excellence, winning over 200 design awards and 14 Red Dot Awards in 2020 alone14. Dyson’s commitment to sustainability is evident in their goal to become carbon-neutral by 2025, investing in technologies like solid-state batteries and electric motors14. These initiatives demonstrate Dyson’s continuous efforts to push the boundaries of vacuum technology while also prioritizing environmental responsibility14.

The James Dyson Foundation and Giving Back

James Dyson, through the James Dyson Foundation, has made significant contributions to charitable causes worldwide. The foundation has donated over 60 million pounds or 69 million euros to projects in 27 different countries16. By supporting education and scientific research, the James Dyson Foundation is actively nurturing the next generation of innovators16.

A Revolution in Lean Manufacturing

Dyson’s approach to lean manufacturing has revolutionized the industry of household and commercial appliances16. By streamlining production processes and reducing waste, Dyson has set new standards for efficiency and sustainability in the manufacturing sector16. This commitment to lean manufacturing allows Dyson to deliver high-quality products that are built to last16.

Advertisement

The Importance of Effective Vacuuming

Vacuuming is an essential part of maintaining cleanliness and hygiene in your home. Regular vacuuming helps remove dust, dirt, allergens, and pet hair from your floors and surfaces. This not only improves the appearance of your home but also contributes to a healthier living environment, especially for individuals with allergies or respiratory conditions.

When it comes to vacuuming, the importance of using an efficient and reliable vacuum cannot be overstated. Investing in a high-quality vacuum, such as a Dyson, offers several benefits for effective cleaning.

Powerful Suction for Thorough Cleaning

Dyson vacuums are known for their powerful suction, suitable for removing dirt, dust mites, and pet hair from various surfaces. Their innovative features, like “Root Cyclone” technology, ensure consistent suction power over time, allowing you to achieve a deep clean throughout your home17.

Designed for Long-Lasting Performance

Dyson vacuums are designed and built with durability in mind. On average, a well-maintained Dyson vacuum can last between 7 to 10 years, surpassing the average lifespan of other brands18. This longevity can be attributed to their high-quality construction and reliable motor, backed by a 20-year warranty on the motor17.

Versatility and Innovative Features

Dyson vacuums offer a wide range of attachments and features that set them apart from other brands. From specialized tools for pet hair removal to versatile designs that make cleaning convenient, Dyson vacuums provide the flexibility needed to tackle any cleaning task17. Their stick vacuums, in particular, offer a cordless design for added maneuverability and ease of use19.

Advertisement

Improved Indoor Air Quality

One of the key benefits of regular vacuuming is the removal of allergens and dust particles from the air. Dyson vacuums are equipped with HEPA filters that can trap up to 99.97% of particles as small as 0.3 microns, including pollen, dander, and dust mites19. This helps improve indoor air quality and creates a healthier living environment for you and your family.

To maintain the effectiveness and longevity of your Dyson vacuum, regular maintenance is crucial. Emptying the dust bin after each use, cleaning filters, and addressing any blockages or issues promptly can greatly enhance the machine’s performance and lifespan18. Additionally, using authorized service centers for repairs and following proper storage and usage practices contribute to maximizing the lifespan of your Dyson vacuum18.

By recognizing the importance of effective vacuuming and investing in a reliable and long-lasting vacuum like Dyson, you can achieve a cleaner, healthier, and more comfortable living space for you and your family.

Vacuuming

Considering Your Vacuum’s Impact on Health and Environment

The choice of a vacuum can have a significant impact on both your health and the environment. By selecting the right vacuum, you can prioritize clean indoor air and contribute to sustainability efforts.

Vacuum Impact on Health

An essential factor to consider when choosing a vacuum is its impact on indoor air quality. Some vacuums are equipped with advanced filtration systems that can effectively capture allergens, dust, and pollutants, improving the air quality in your home. These vacuums can be particularly beneficial for individuals with allergies or respiratory conditions20.

Advertisement

By using a vacuum with a high-quality filtration system, you can reduce the presence of airborne particles, such as pet dander, pollen, and dust mites, creating a healthier environment for you and your family20.

Eco-Friendly Vacuum Options

In addition to considering their impact on health, it’s crucial to choose eco-friendly vacuum options that minimize harm to the environment. Some manufacturers produce vacuums made from recycled materials, reducing the demand for new resources20.

Moreover, energy-efficient vacuums can help lower your carbon footprint. Look for vacuums that are labeled as energy-efficient or those with features such as low wattage motors, which consume less electricity20.

Sustainable Vacuum Choices

To contribute to sustainable practices, it’s essential to choose vacuum options that promote longevity and reduce waste. Instead of discarding an entire vacuum, opt for repairing or replacing specific parts. This approach not only saves money but also extends the lifespan of the vacuum and prevents unnecessary waste20.

Furthermore, some vacuum manufacturers emphasize sustainability across their operations. For example, Dyson, a renowned brand in the industry, has initiatives in place to reduce their environmental impact. Dyson Farming, a subsidiary of Dyson, utilizes circular farming systems to generate renewable energy from crops20.

Advertisement

By making conscious choices and opting for sustainable vacuum options, you can prioritize both your health and the environment. Consider factors such as advanced filtration systems, the use of recycled materials, and the ability to repair or replace parts when selecting a vacuum. By doing so, you contribute to both a cleaner living environment and a more sustainable future20.

Sustainable Vacuum

Next, let’s explore the lifespan of different types of vacuums and how long they typically last.

Conclusion

In conclusion, the lifespan of a Dyson vacuum can range from 8 to 12 years with proper maintenance. Dyson vacuums have a reputation for durability due to their use of high-quality materials in construction18. Regular maintenance can significantly enhance the performance and longevity of a Dyson vacuum18. Loss of suction is a common problem with Dyson vacuums, often attributed to blockages in hoses or filters18. Motor failure may require professional repair or replacement18. Issues with the rotating brush are usually caused by tangled hair or debris18. It is advisable to use authorized service centers for Dyson vacuum repairs18.

When considering the lifespan of a Dyson vacuum in relation to other brands, Dyson vacuums typically outlast competitors by a few years. While the average lifespan of a well-maintained Dyson vacuum is between 7 to 10 years, other vacuum cleaner brands in the market typically have an average lifespan of 5 to 8 years18. This showcases the durability of Dyson vacuums and their ability to withstand years of use.

Moreover, Dyson vacuum cleaners consistently receive high ratings for owner satisfaction and reliability compared to other vacuums on the market21. Dyson’s significant market presence is evident as they accounted for more than 20% of the global market share in the cordless vacuum cleaner sector in 2020, despite their high-end pricing21. Additionally, Dyson offers a comprehensive warranty program that covers all vacuum cleaner models for up to five years from the date of purchase, providing customers with peace of mind regarding their investment21.

Advertisement

When it comes time to replace your vacuum, it’s important to consider your specific needs and choose a reliable and efficient vacuum that aligns with those requirements. By selecting an appropriate vacuum for your home size and cleaning tasks, following manufacturer guidelines, and conducting regular maintenance, you can maximize the lifespan of your vacuum and enjoy a cleaner home for years to come2218.

FAQ

How long do Dyson vacuums last?

The lifespan of a Dyson vacuum can vary, but with proper care and maintenance, they can generally last between 8 to 12 years.

What factors can affect the lifespan of a vacuum?

The lifespan of a vacuum can be influenced by factors such as the brand and model, maintenance, frequency of use, and the size and dirtiness of the area being cleaned.

What is the lifespan of different types of vacuums?

Upright vacuums and canister vacuums can last for at least eight years, while stick vacuums typically last between five to eight years.

What are the signs that it’s time to replace your vacuum?

Signs that indicate it’s time to replace your vacuum include decreased performance, frequent clogging, unusual noises or smells, and outdated features.Advertisement

How can I prolong the lifespan of my vacuum?

Proper maintenance, such as regularly cleaning and replacing filters, avoiding vacuuming up large or sharp objects, and following the manufacturer’s instructions, can help prolong the lifespan of your vacuum.

When should I consider upgrading to a new vacuum?

If your current vacuum no longer efficiently removes dirt and debris or if it struggles to keep up with your cleaning needs, it may be time for an upgrade. Lifestyle changes or outdated features can also be indicators for an upgrade.

How do I choose the right vacuum for my needs?

Consider factors such as whether you need a cordless or corded vacuum, the size of your home, the type of flooring you have, and your cleaning frequency when choosing a vacuum. Reading customer reviews and comparing features and prices can also be helpful.

Which vacuum brands offer reliable performance and long lifespans?

Well-known vacuum brands such as Dyson, Shark, Bissell, and Hoover are known for their quality and often offer reliable performance and long lifespans.

What are the advancements in vacuum technology?

Vacuum technology has advanced to include features such as cordless operation, robot automation, and advanced filtration systems that help improve cleaning efficiency and indoor air quality.Advertisement

Why is effective vacuuming important?

Regular vacuuming helps remove dust, dirt, allergens, and pet hair from your floors and surfaces, contributing to a cleaner and healthier living environment for you and your family.

How can I consider my vacuum’s impact on health and the environment?

Some vacuums come with advanced filtration systems that effectively capture allergens and pollutants, contributing to improved indoor air quality. Choosing eco-friendly options and opting for repair or part replacement can also help reduce your carbon footprint.

Do you have any final thoughts on vacuum longevity?

By choosing a reliable and long-lasting vacuum, properly maintaining it, and considering your specific needs, you can maximize the lifespan of your vacuum and enjoy a cleaner living space.

Continue Reading
Advertisement

Affiliate disclaimer

As an affiliate, we may earn a commission from qualifying purchases. We get commissions for purchases made through links on this website from Amazon and other third parties.

Advertisement

Vetted

affordable vacuum cleaners for spotless homes affordable vacuum cleaners for spotless homes
Vetted3 months ago

15 Best Value Vacuum Cleaners That Will Keep Your Home Spotless Without Breaking the Bank

Budget-friendly vacuum cleaners like the BISSELL CleanView Swivel Upright ensure a spotless home – discover more affordable options for effective...

vacuuming luxury vinyl planks vacuuming luxury vinyl planks
Vetted3 months ago

15 Best Vacuums for LVP Floors – Keep Your Luxury Vinyl Plank Floors Spotless

For spotless LVP floors, find the perfect vacuum from our top 15 picks, starting with the letter 'F' for fabulous...

spotless home with cordless spotless home with cordless
Vetted3 months ago

15 Best Cordless Vacuum Cleaners to Keep Your Home Spotless

Pondering the perfect cordless vacuum? Discover top models like Shark IX141 and Dyson V8 for effortless cleaning - find the...

versatile vacuums for all versatile vacuums for all
Vetted3 months ago

15 Best Multi Surface Vacuums for a Spotless Home – Reviews & Buying Guide

Kickstart your cleaning routine with the top 15 multi-surface vacuums for a spotless home - find the perfect match for...

effortless cleaning with vacuums effortless cleaning with vacuums
Vetted3 months ago

15 Best Battery-Powered Vacuums for Effortless Cleaning

Top 15 battery-powered vacuums for effortless cleaning offer power, portability, and versatility - discover the best choice for your home!

top rated tineco vacuum cleaners top rated tineco vacuum cleaners
Vetted3 months ago

15 Best Tineco Wet Dry Vacuum Cleaners for a Spotless Home

Optimize your cleaning routine with 15 top Tineco Wet Dry Vacuum Cleaners for a spotless home – find your perfect...

top dyson vacuum deals top dyson vacuum deals
Vetted3 months ago

15 Best Deals on Dyson Vacuum Cleaners You Can't Miss

Intrigued by unbeatable deals on Dyson vacuum cleaners? Discover top picks with powerful features and exceptional savings in this list...

top vacuum cleaner picks top vacuum cleaner picks
Vetted3 months ago

15 Best Rated Vacuum Cleaners That Will Make Cleaning a Breeze

Journey through the top-rated vacuum cleaners starting with the letter 'J' and find the perfect cleaning companion to simplify your...

car vacuum buying guide car vacuum buying guide
Vetted3 months ago

15 Best Vacuums for Cars to Keep Your Vehicle Clean and Fresh

Journey into a world of powerful car vacuums with features like high suction and versatile attachments to keep your vehicle...

top vacuums for pet hair top vacuums for pet hair
Vetted3 months ago

15 Best Vacuums for Pet Hair on Carpet – Say Goodbye to Pesky Fur

Tackle pet hair on carpets effortlessly with the top vacuums starting with the letter 'T' - discover powerful suction, anti-allergen...

efficient cordless vacuums for easy cleaning efficient cordless vacuums for easy cleaning
Vetted3 months ago

15 Best Handheld Vacuum Cordless Cleaners for Easy and Efficient Cleaning

Journey into effortless cleaning with the 15 best handheld vacuum cordless cleaners, offering powerful suction and versatile features for a...

cat friendly vacuums for cleanliness cat friendly vacuums for cleanliness
Vetted3 months ago

15 Best Vacuums for Cat Litter – Keep Your Home Clean and Fresh

Tackle cat litter cleanup effortlessly with the top 15 vacuums that keep your home fresh and clean - discover the...

Advertisement

Trending

Copyright © 2024 Witbeck Vacuums Affiliate disclaimer As an affiliate, we may earn a commission from qualifying purchases. We get commissions for purchases made through links on this website from Amazon and other third parties.